# How can I create a waitlist for an event?
> Source: https://support.associationsphere.com/how-can-i-create-a-waitlist-for-an-event | Updated: 2026-09-02T13:27:58Z
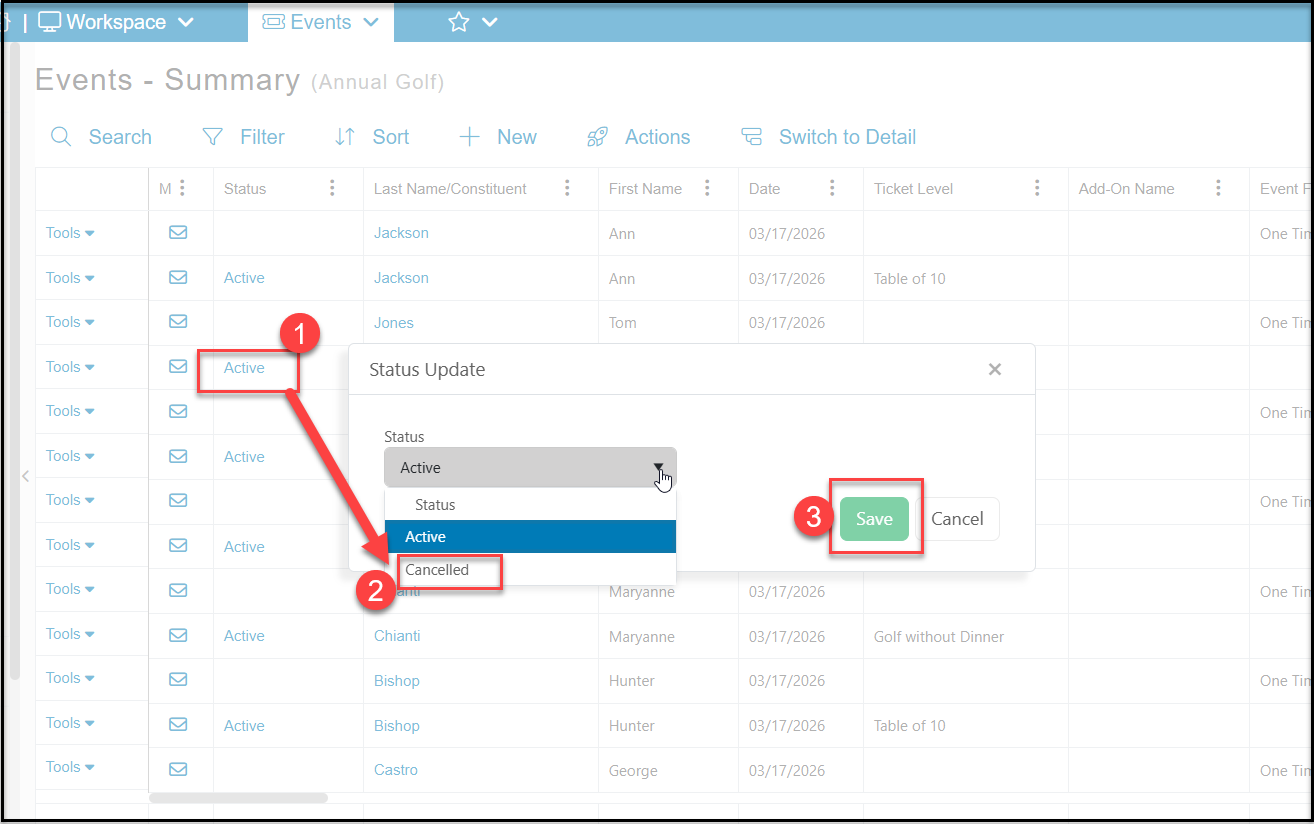
If you have sold tickets and registrants have notified you that they will not be attending, you can mark their event registration Status as Cancelled on the Events - Summary grid to free up those tickets for another a purchase. The transaction will still be visible, however the cancelled registrant will not appear on the Event Attendance grid and the number of ticket available will increase by the number that were cancelled.
 If your event is sold out, you can create a waitlist using the following steps:
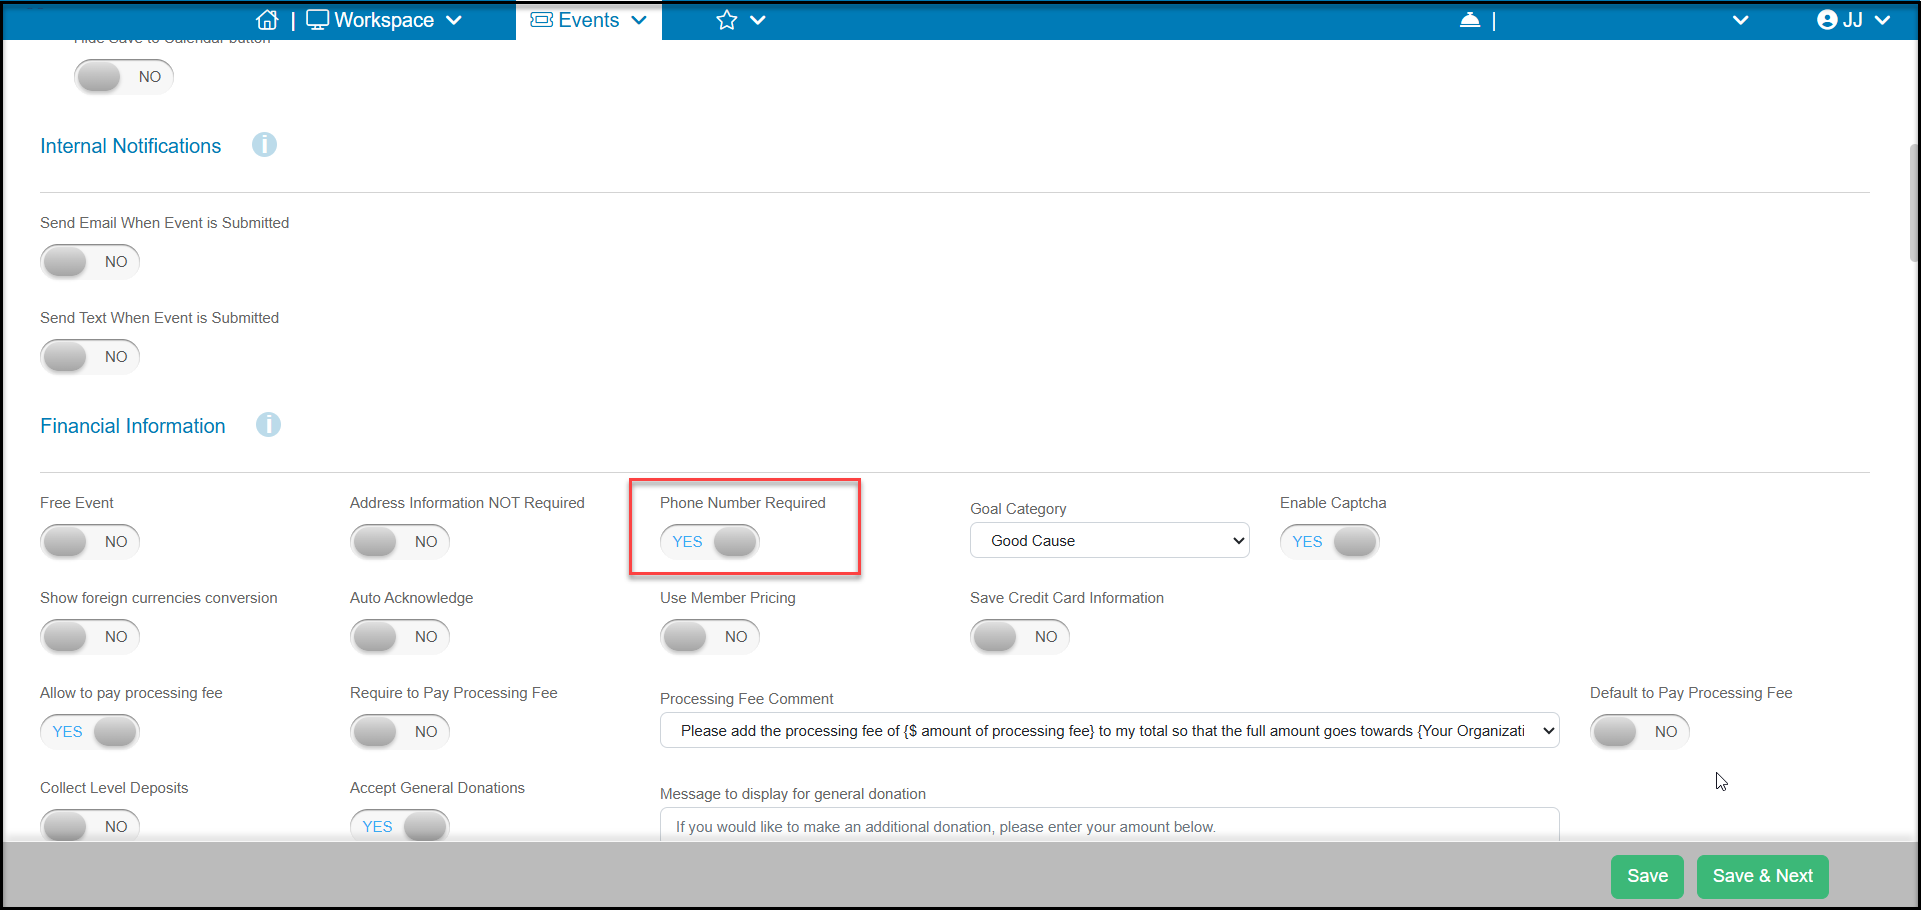
1. Activate Phone Number Required on the Event Settings tab so that you have a way to contact your waitlist registrants.
If your event is sold out, you can create a waitlist using the following steps:
1. Activate Phone Number Required on the Event Settings tab so that you have a way to contact your waitlist registrants.
 2. Add a new $0 level called Waitlist.
- You can add information about how they will be contacted if they are invited to sign up.
- Set the **# of Attendees Per Purchase** to "0" so waitlist registrants will not receive a ticket, show on your event attendance grid, or be restricted by any Total Event Capacity you set on the Event Settings tab.
- This level can be marked as Offline or Inactive until you are ready to use it.
2. Add a new $0 level called Waitlist.
- You can add information about how they will be contacted if they are invited to sign up.
- Set the **# of Attendees Per Purchase** to "0" so waitlist registrants will not receive a ticket, show on your event attendance grid, or be restricted by any Total Event Capacity you set on the Event Settings tab.
- This level can be marked as Offline or Inactive until you are ready to use it.
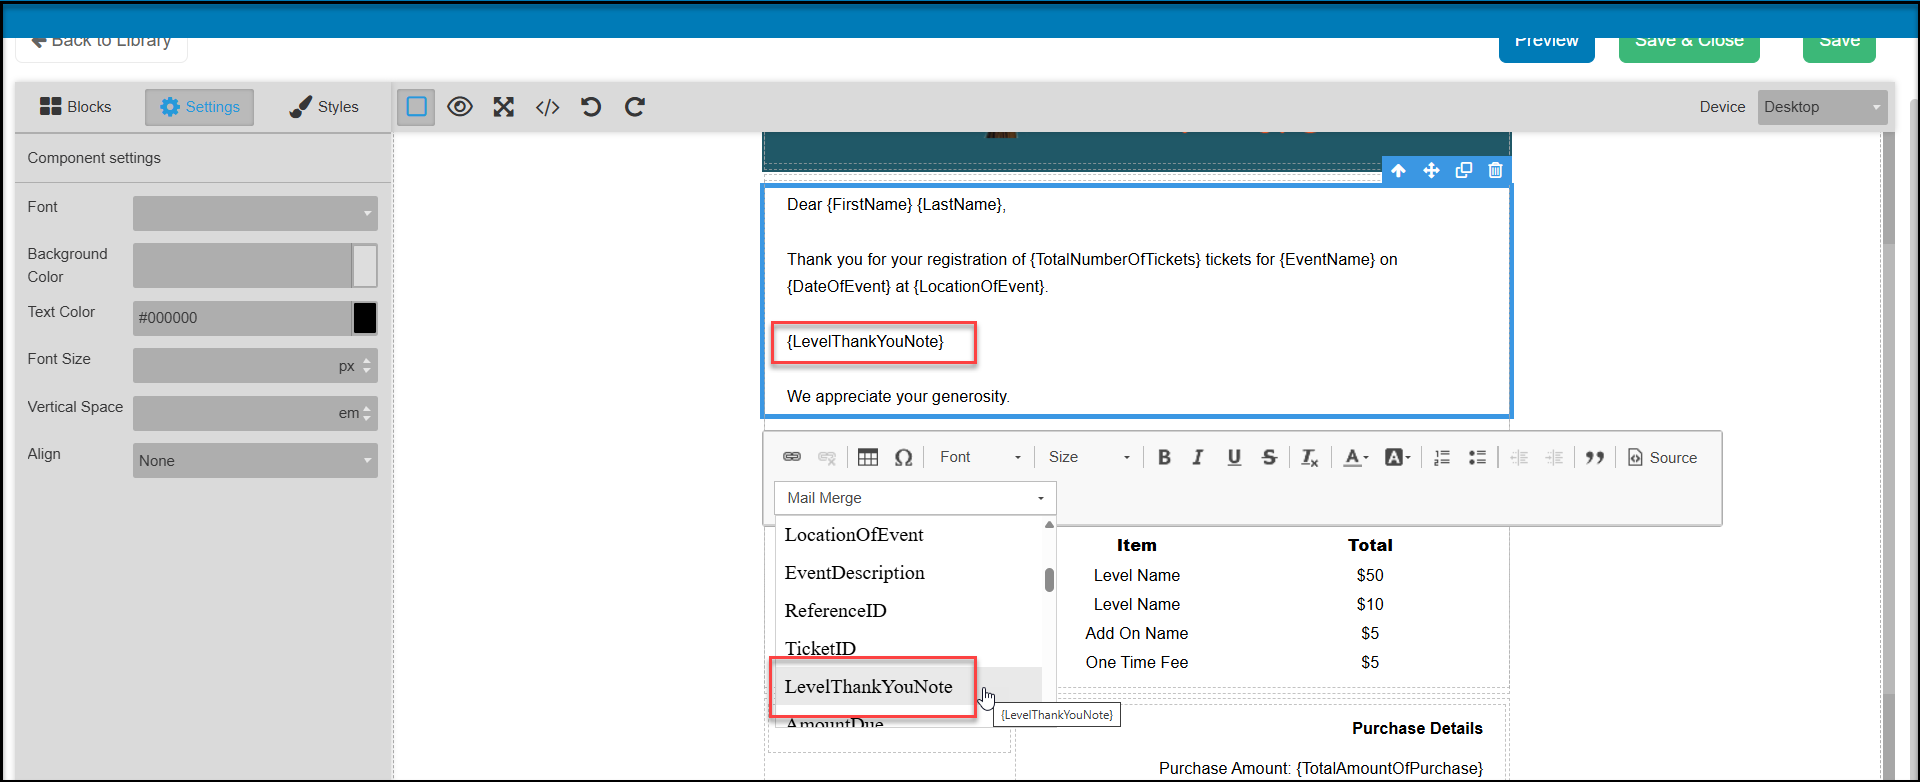
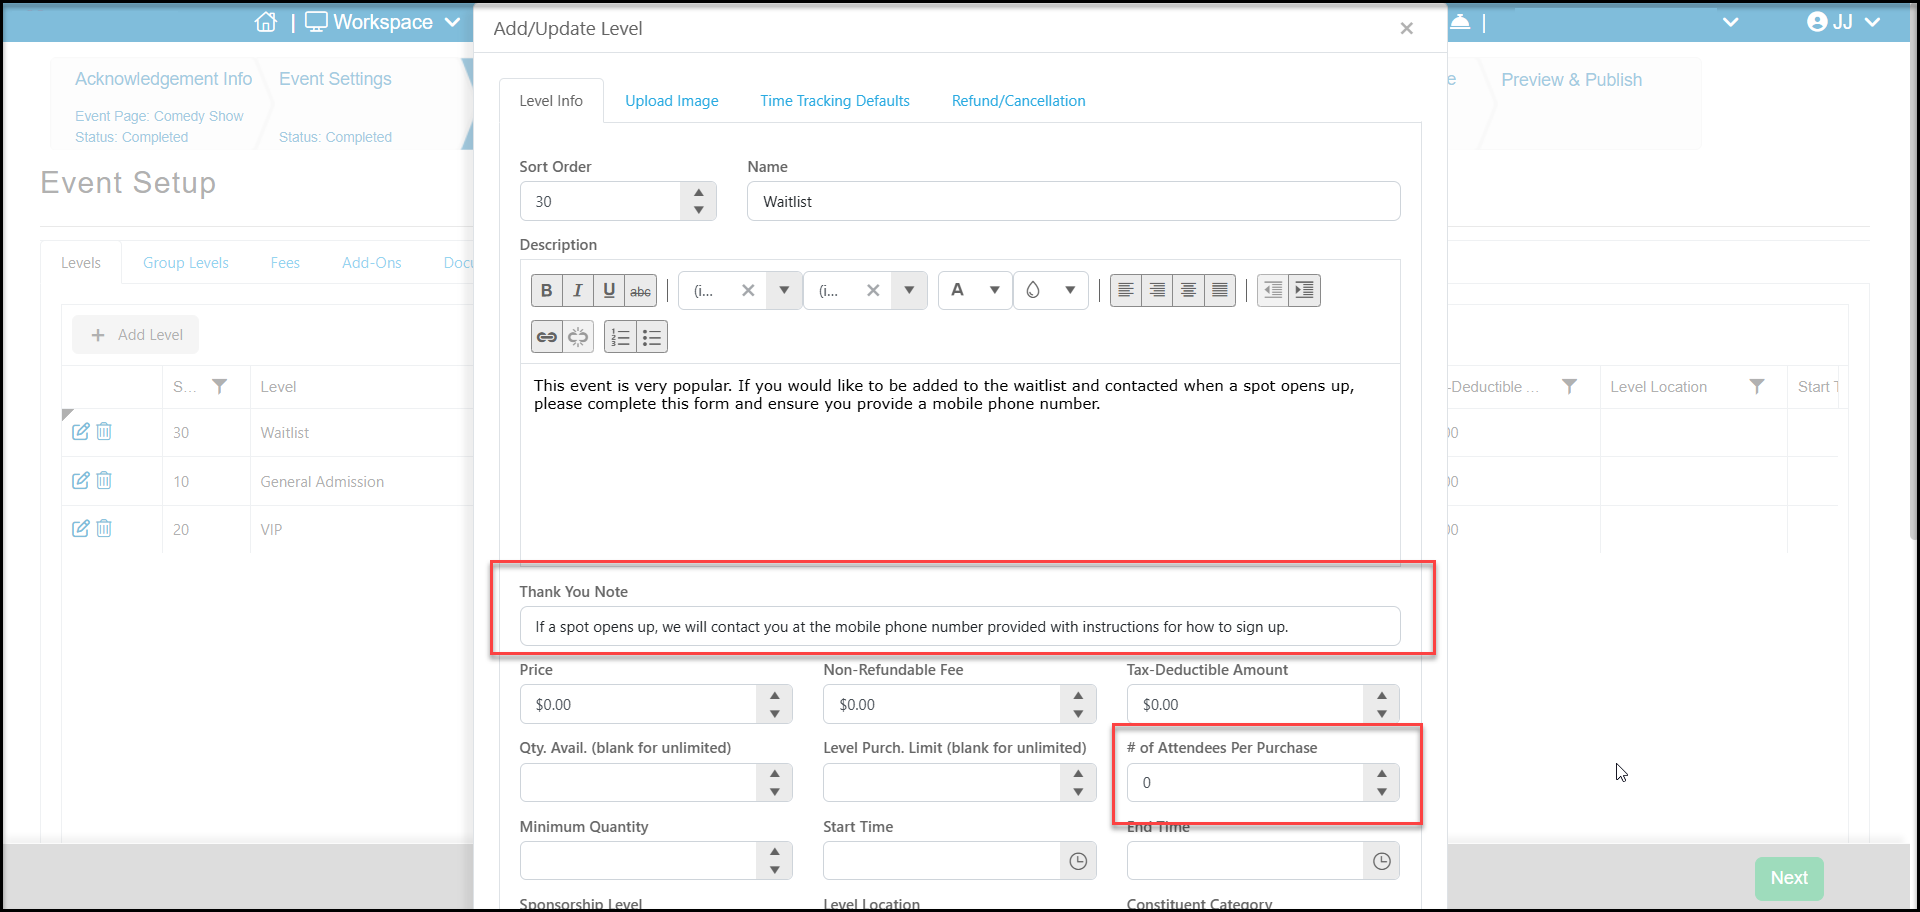 - If you would like to add a special note in the thank you email, you can enter a **Thank You Note** on the ticket level under the description. This can be added as a mail merge field "{LevelThankYouNote}" to your Thank You email.
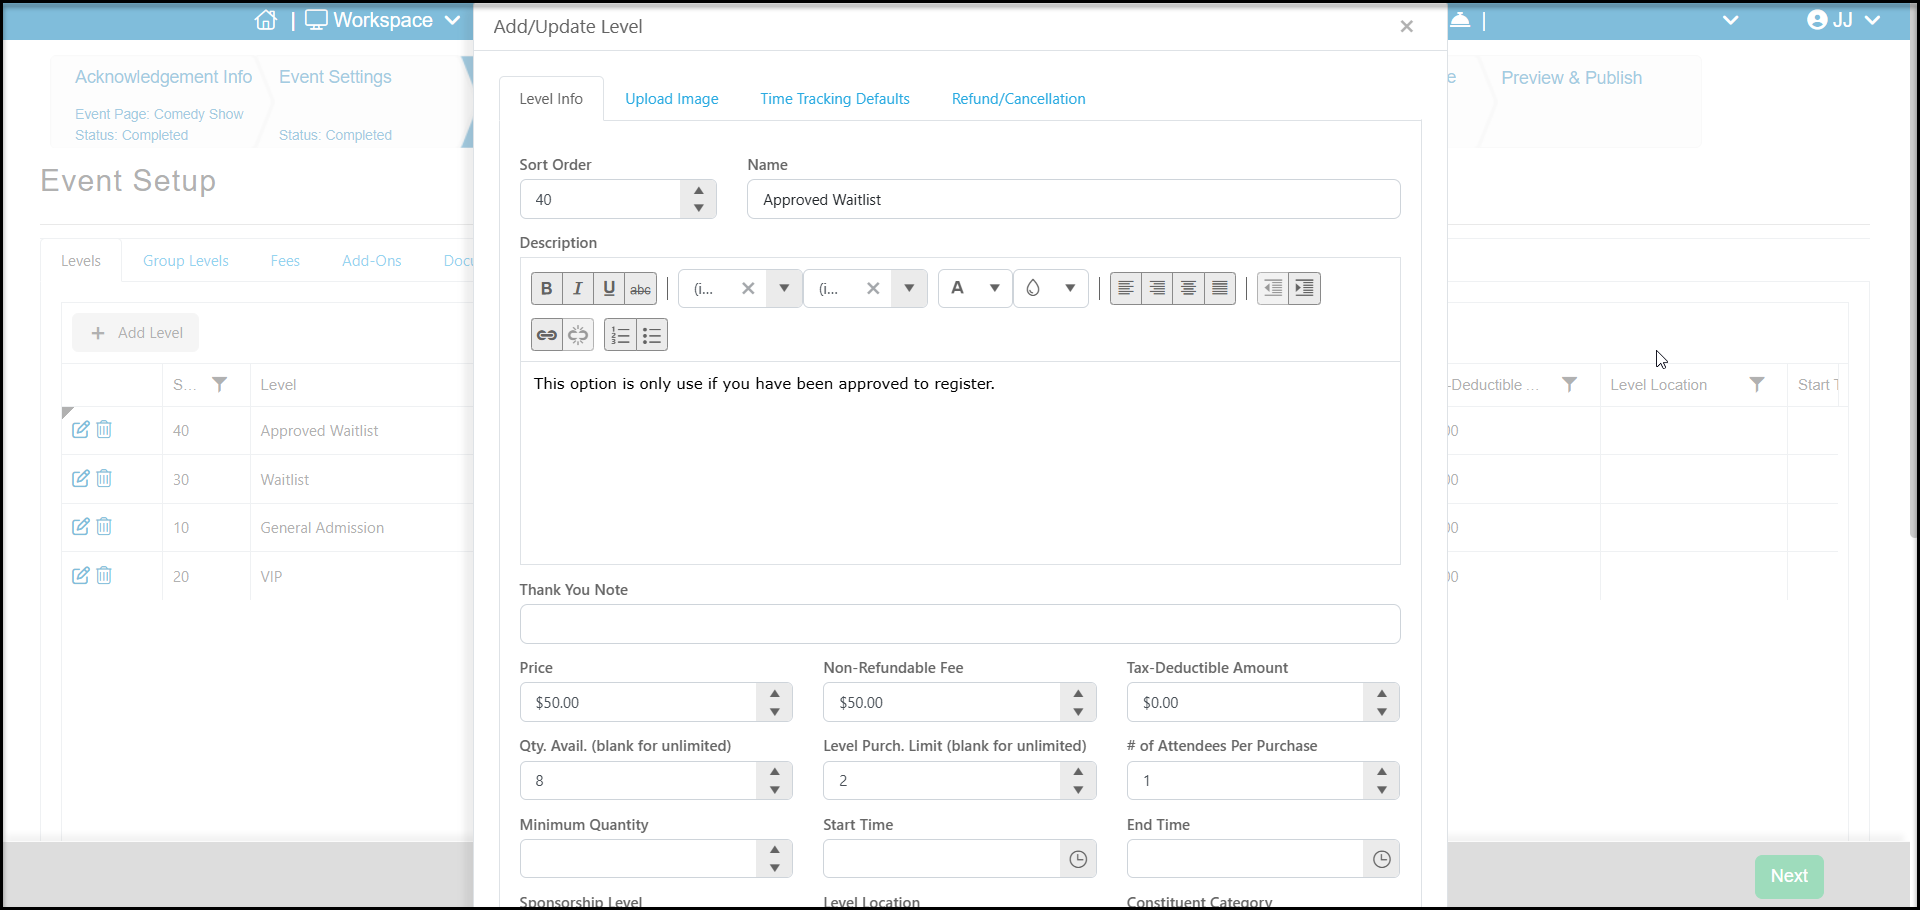
 3. If spots open up for your event, you can add another level for your Approved Waitlist attendees.
- Enter the **Price**
- Enter the limit to the number of waitlist approved spots available in the **Qty. Avail**. field.
- If the waitlist approved attendees can only register for limited tickets, such as two per transaction, enter this in the **Level Purchase Limit** field.
- This level should have at least "1" **# of Attendees Per Purchase**.
3. If spots open up for your event, you can add another level for your Approved Waitlist attendees.
- Enter the **Price**
- Enter the limit to the number of waitlist approved spots available in the **Qty. Avail**. field.
- If the waitlist approved attendees can only register for limited tickets, such as two per transaction, enter this in the **Level Purchase Limit** field.
- This level should have at least "1" **# of Attendees Per Purchase**.
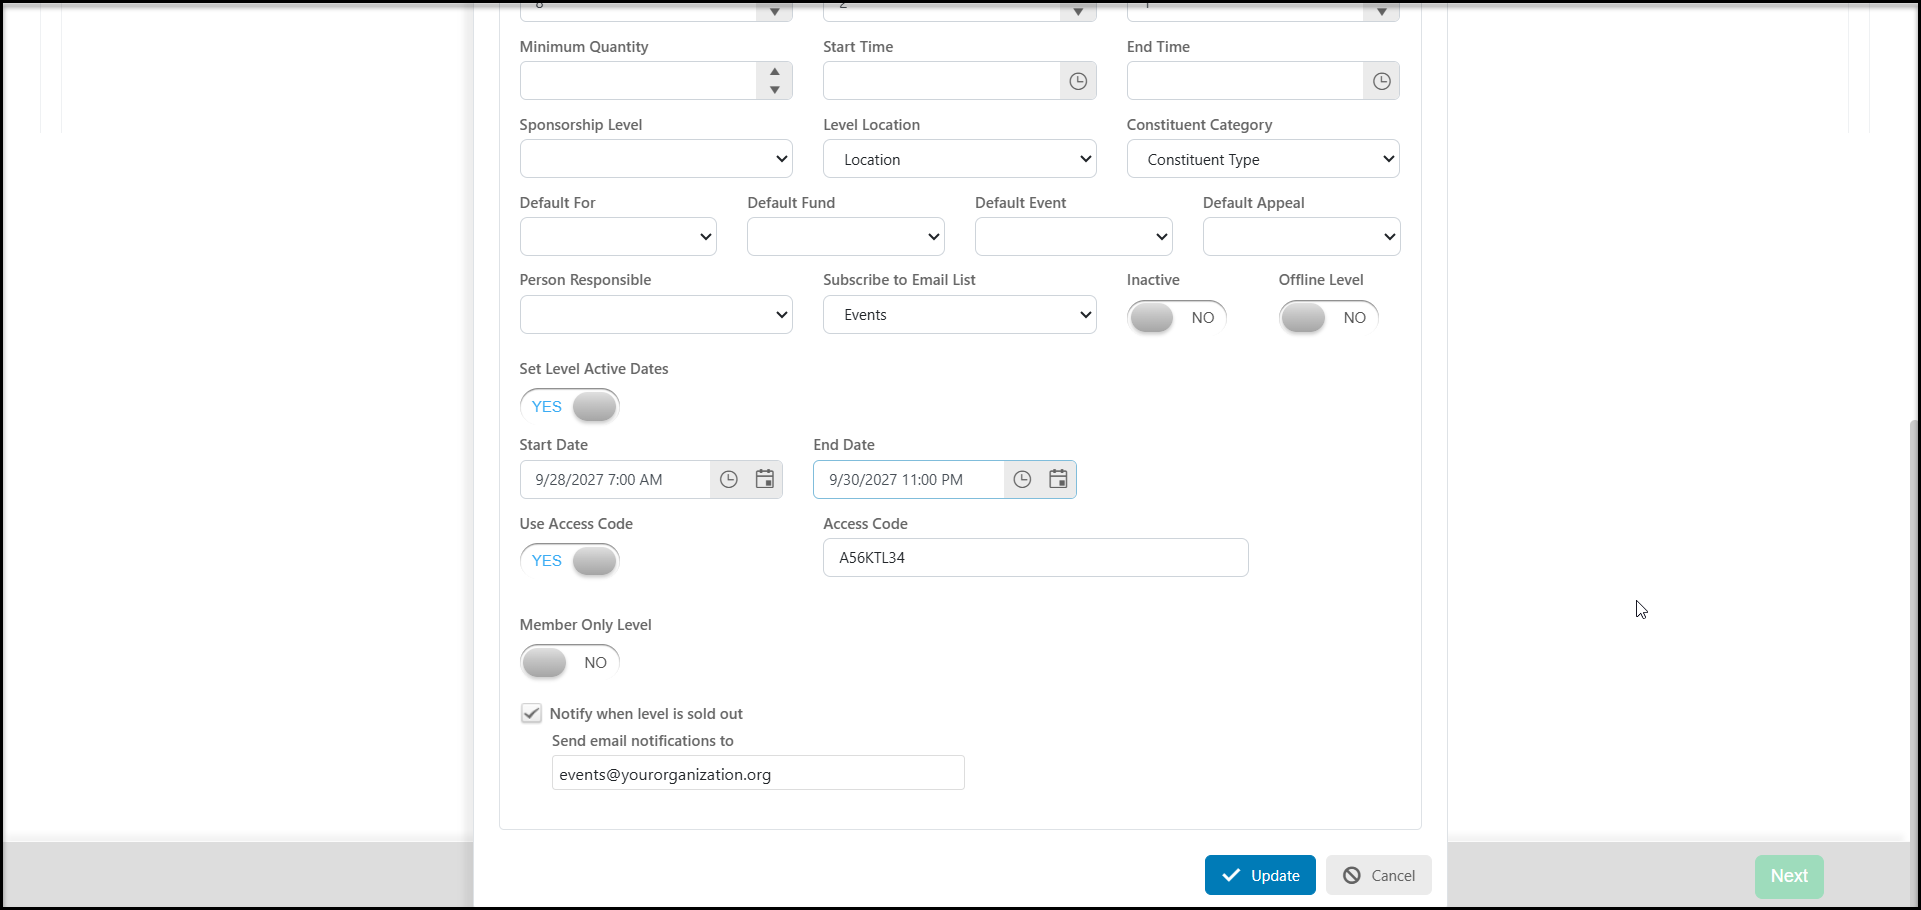
 - This level should use an **Access code** which you will provide to the approved waitlist constituents.
- If you also want this to be visible for a limited period time, you can also **Set Level Active Dates** to **YES** and enter the date and time range this level will be visible on the page.
- This level should use an **Access code** which you will provide to the approved waitlist constituents.
- If you also want this to be visible for a limited period time, you can also **Set Level Active Dates** to **YES** and enter the date and time range this level will be visible on the page.
 - Don't forget to extend your **Online Sales Starts and End Dates**on the Event Settings tab if necessary.
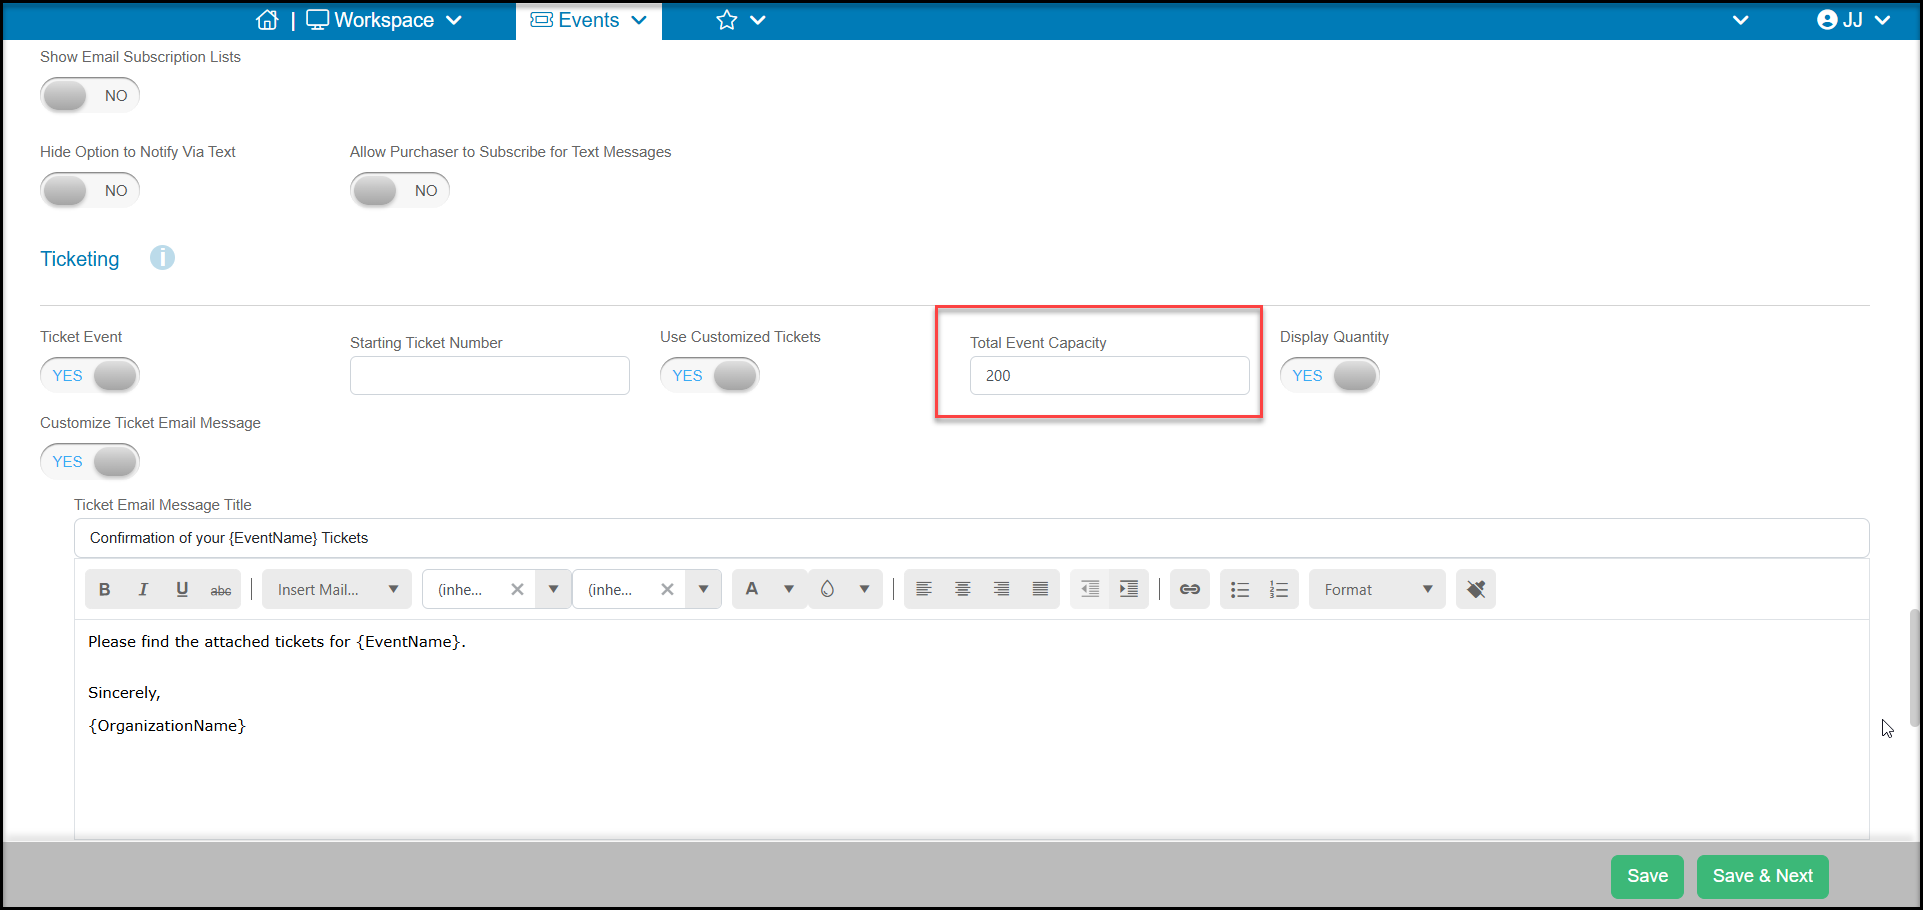
- If you have set a **Total Event Capacity**, be sure to increase the Total Event Capacity to account for the new waitlist attendees while also setting the Qty Avail for each of your sold out ticket levels to be equal to the number of tickets you have sold for that level.
- Don't forget to extend your **Online Sales Starts and End Dates**on the Event Settings tab if necessary.
- If you have set a **Total Event Capacity**, be sure to increase the Total Event Capacity to account for the new waitlist attendees while also setting the Qty Avail for each of your sold out ticket levels to be equal to the number of tickets you have sold for that level.