# How do I create an email list?
> Source: https://support.associationsphere.com/how-do-i-create-an-email-list | Updated: 2026-07-07T18:23:58Z
You can create email lists from the Actions menu from the main grids like the Constituent, Events, Gifts and Membership grid. You can also import an Excel or CSV file that includes the First Name, Last Name and Email address fields. Note that if you import a list, it will create new constituent records in your database.
**Creating Email Lists from Grids**
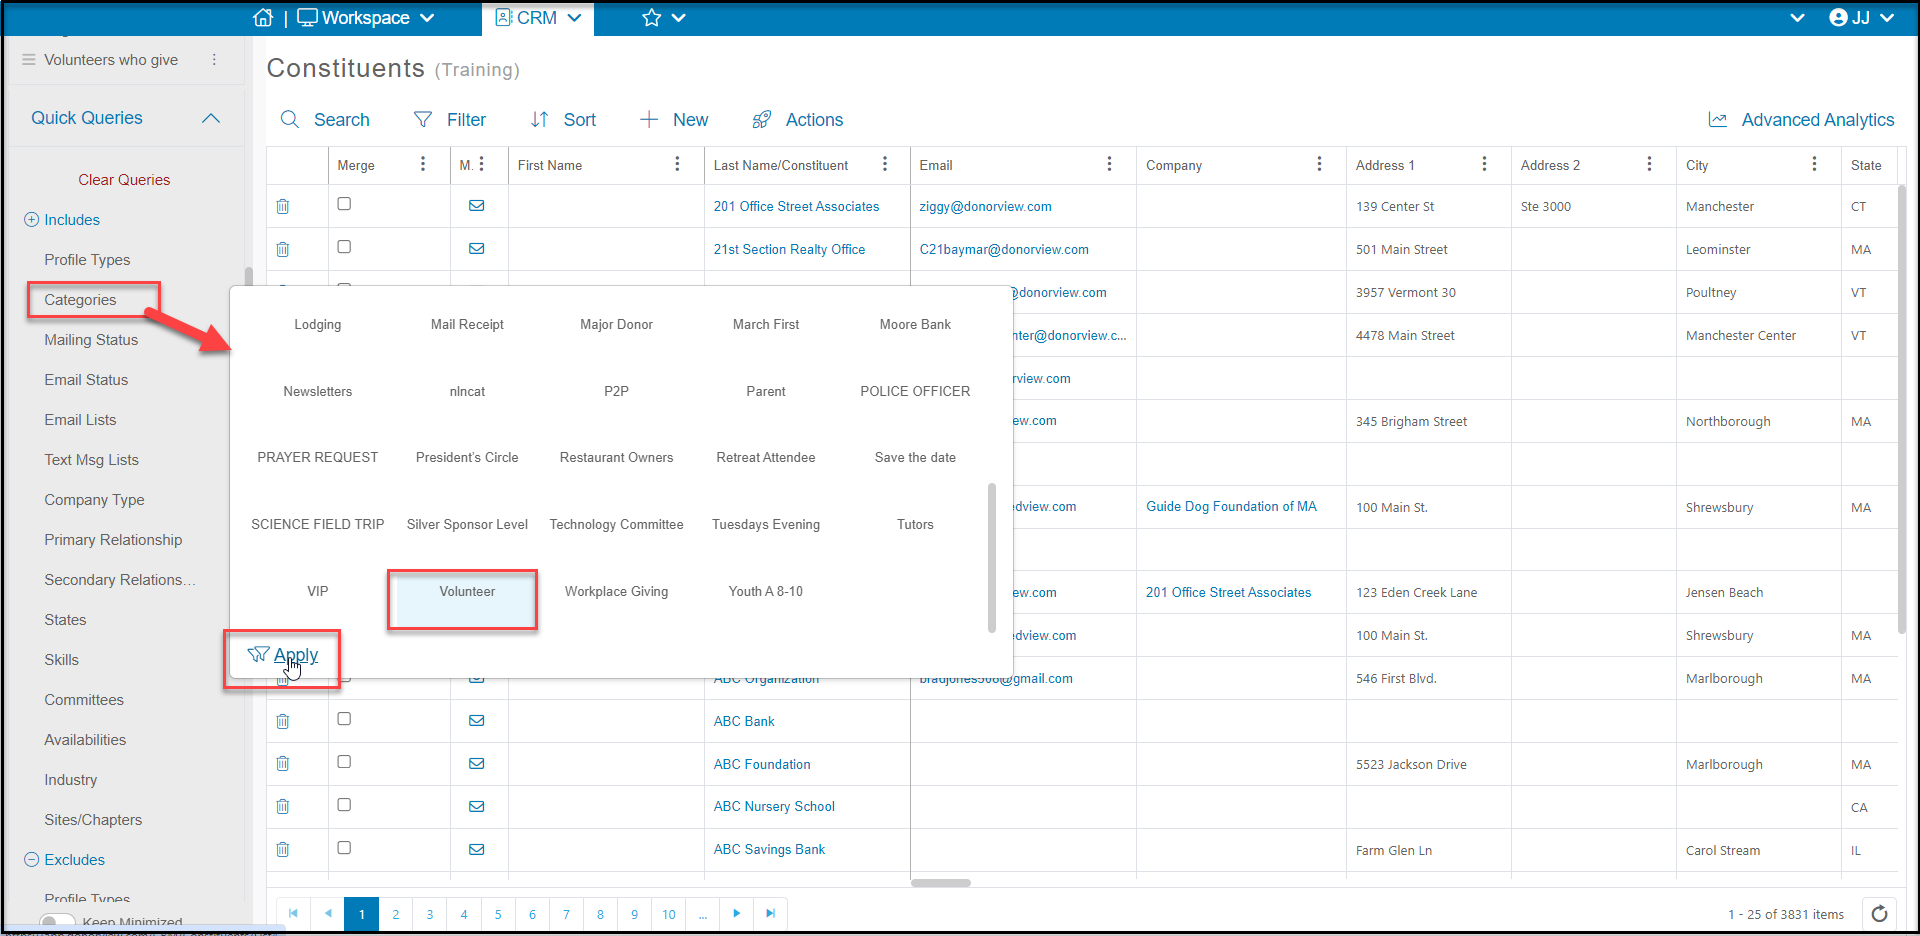
Begin by filtering your grid to identify those constituents you want to include in your email list. Some examples might be a list of all volunteers from your Constituents grid. You would begin be using the Quick Queries and selecting anyone who is identified as a Volunteer in their constituent Category.
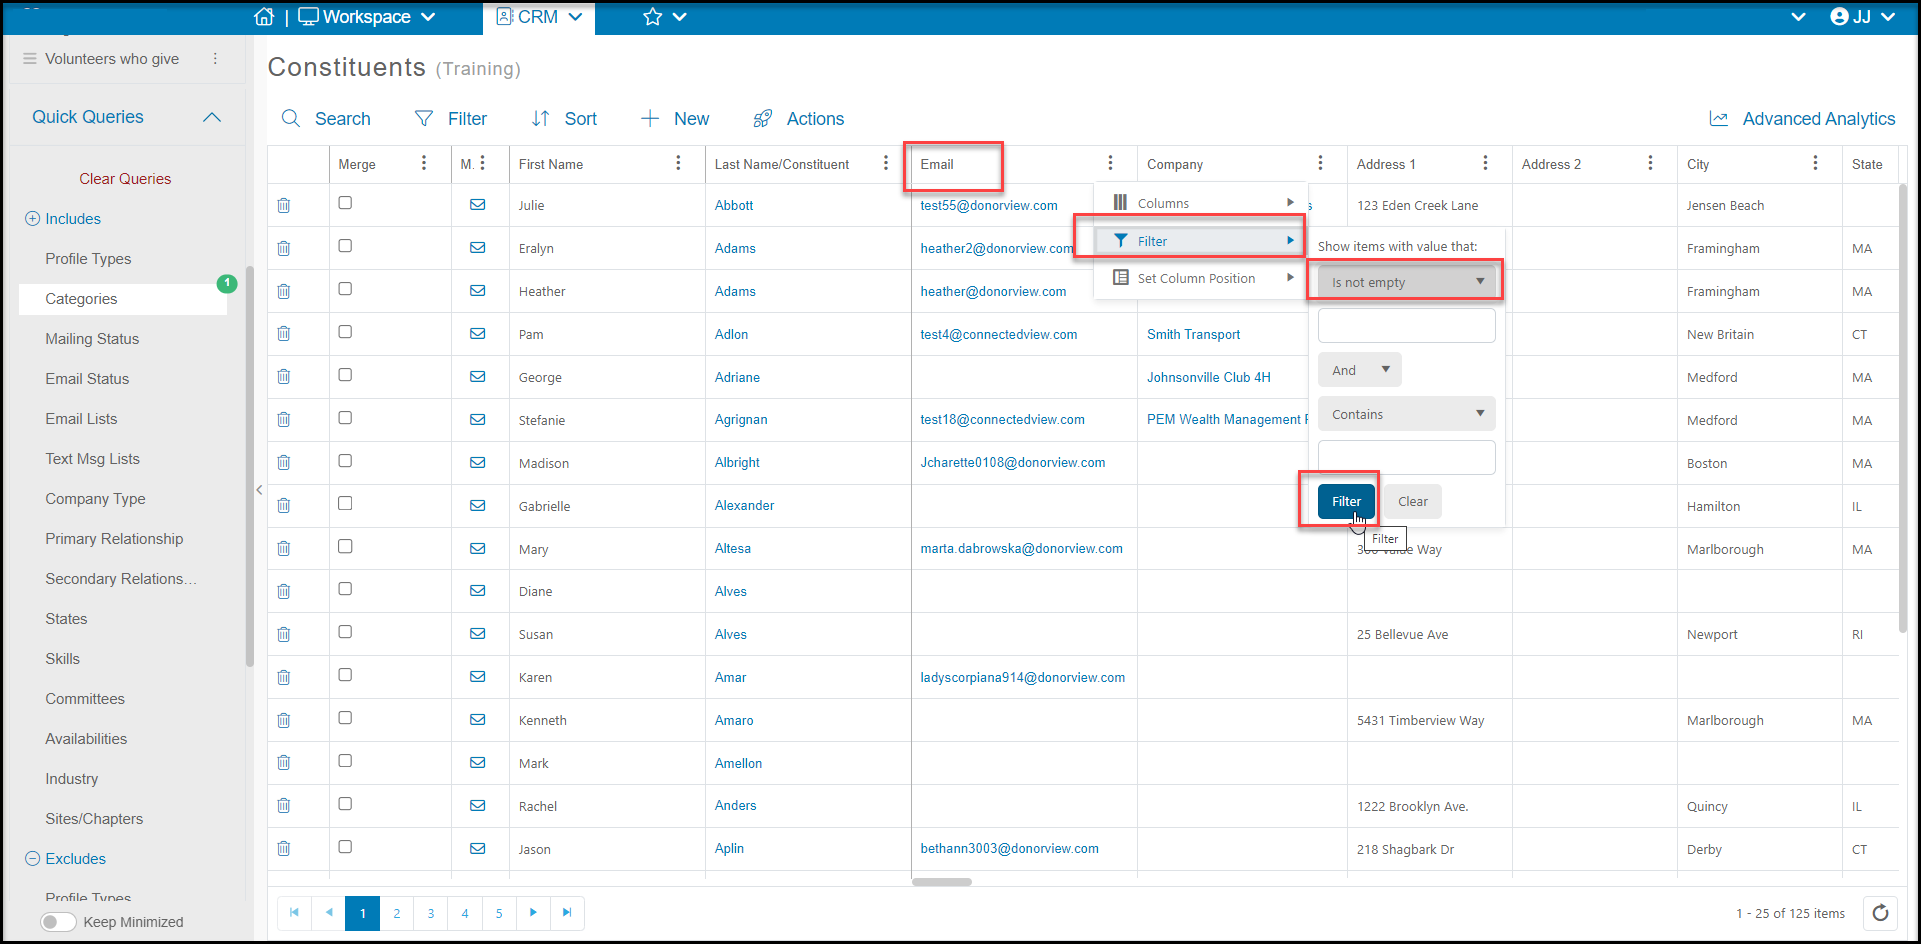
 Next, you can continue to add filters to identify your segmented list. We added another filter under Email of "Is Not Empty" to include only those constituents who had a primary email address.
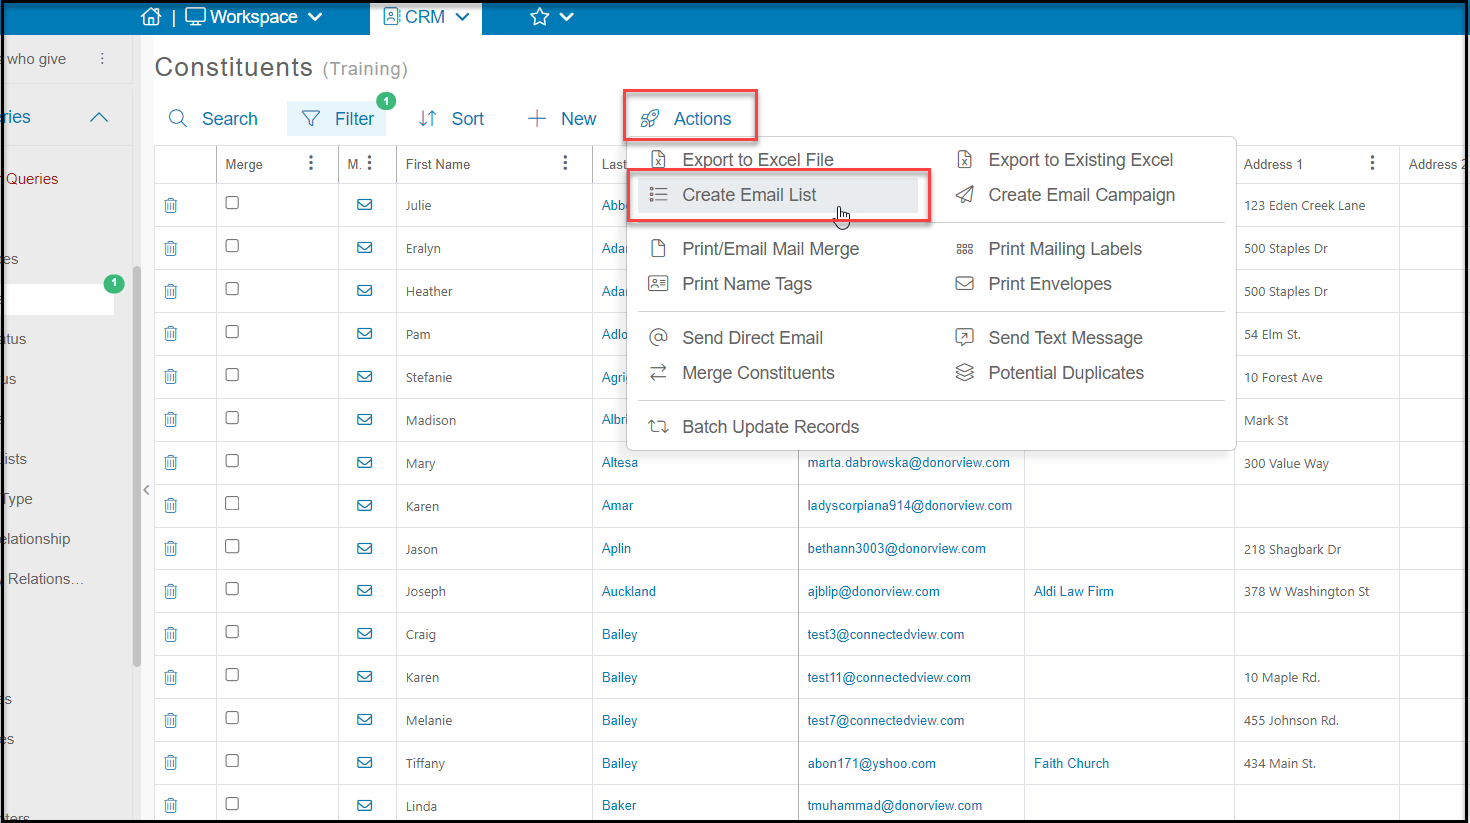
 With our filtered list, we can now use the **Actions** menu and **Create Email List** to either add them to an existing list or create a new email list.
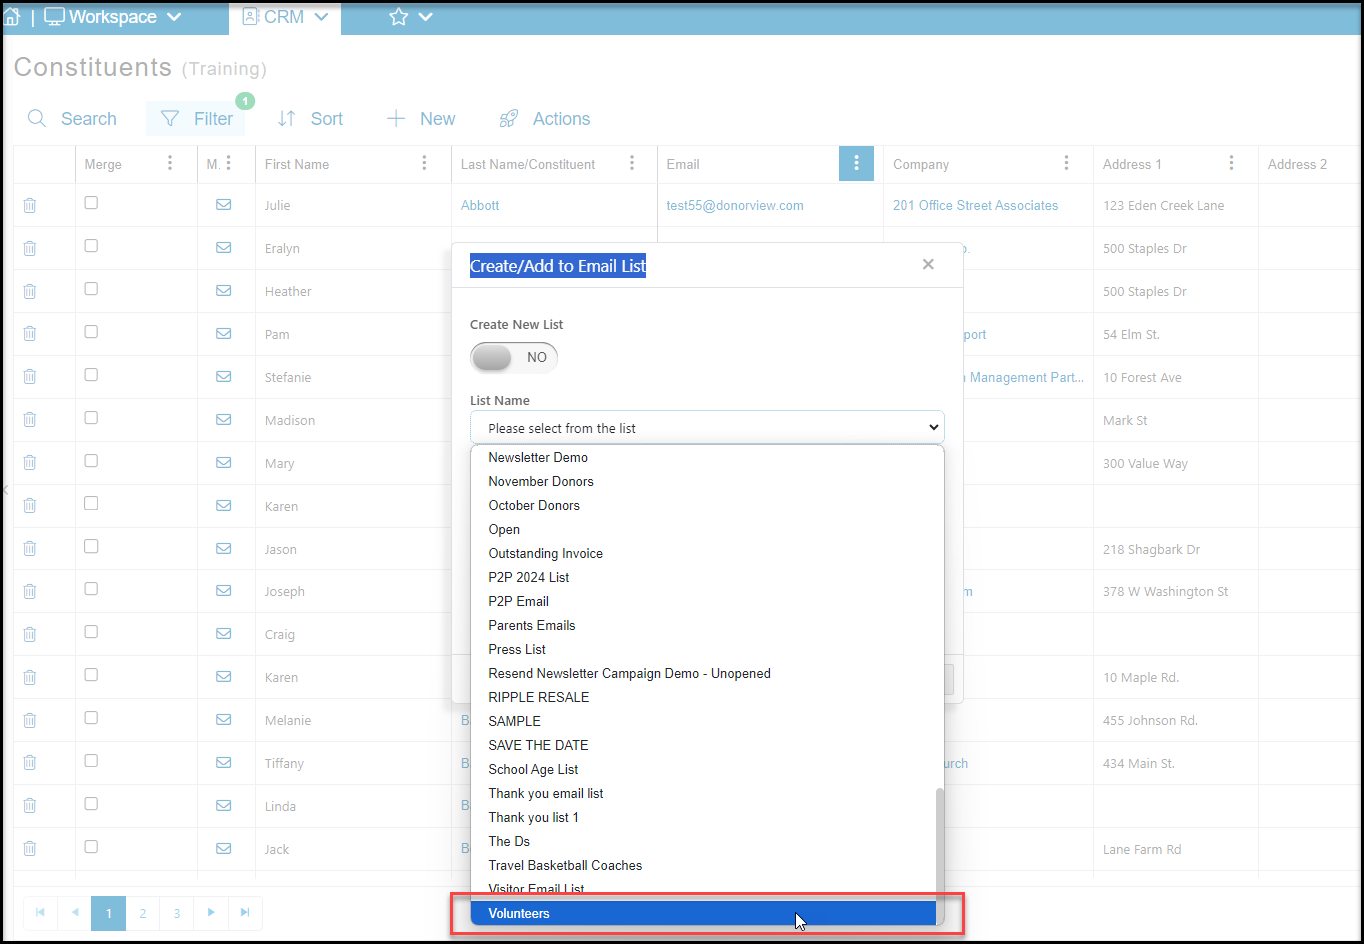
 To add this group to an existing list I can select it from the **List Name** picklist and click **Save**to add anyone who isn't already on the list to the list. Anyone who was already on the list will not be added twice.
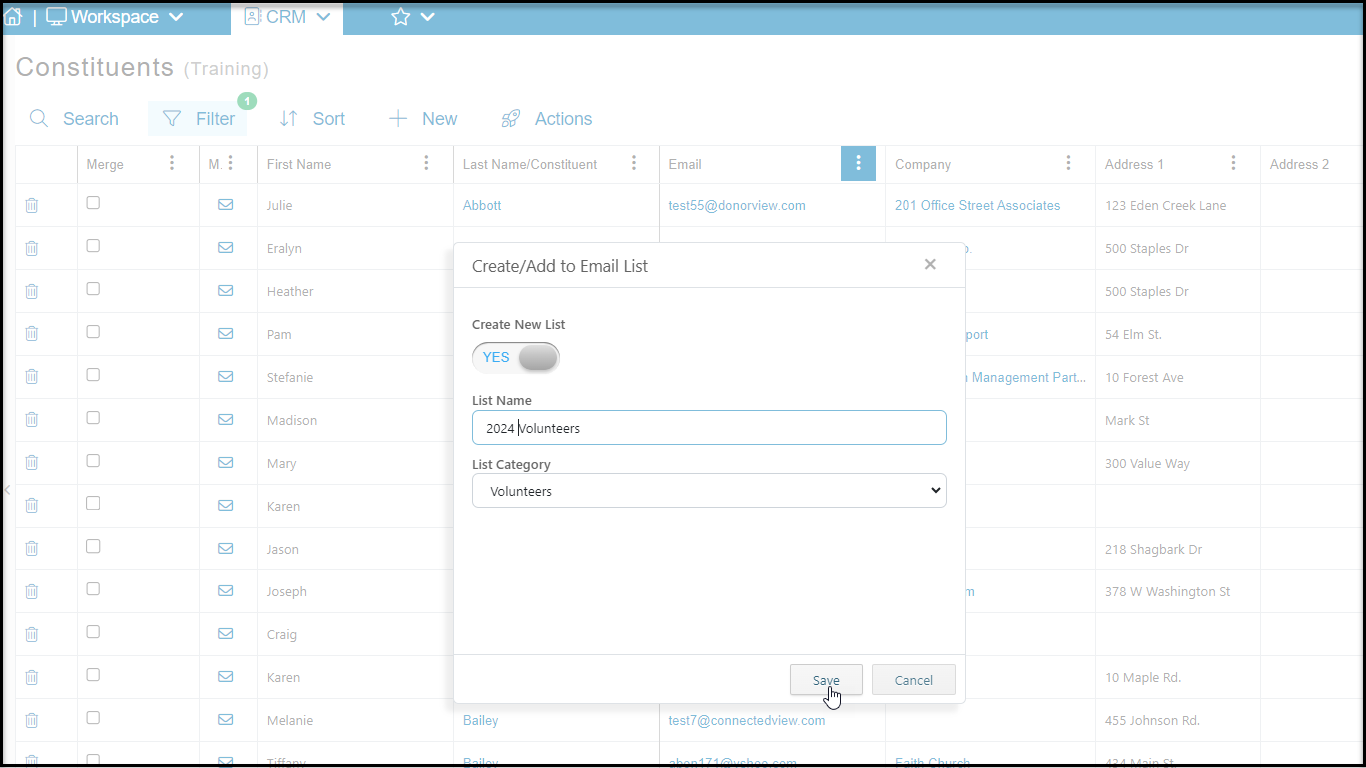
 To create a new list, toggle**Create New List** to **YES**and enter the **List Name**. You will also select a **List Category**. List Categories can be thought of like areas of interest. Click **Save** to create the new email list.
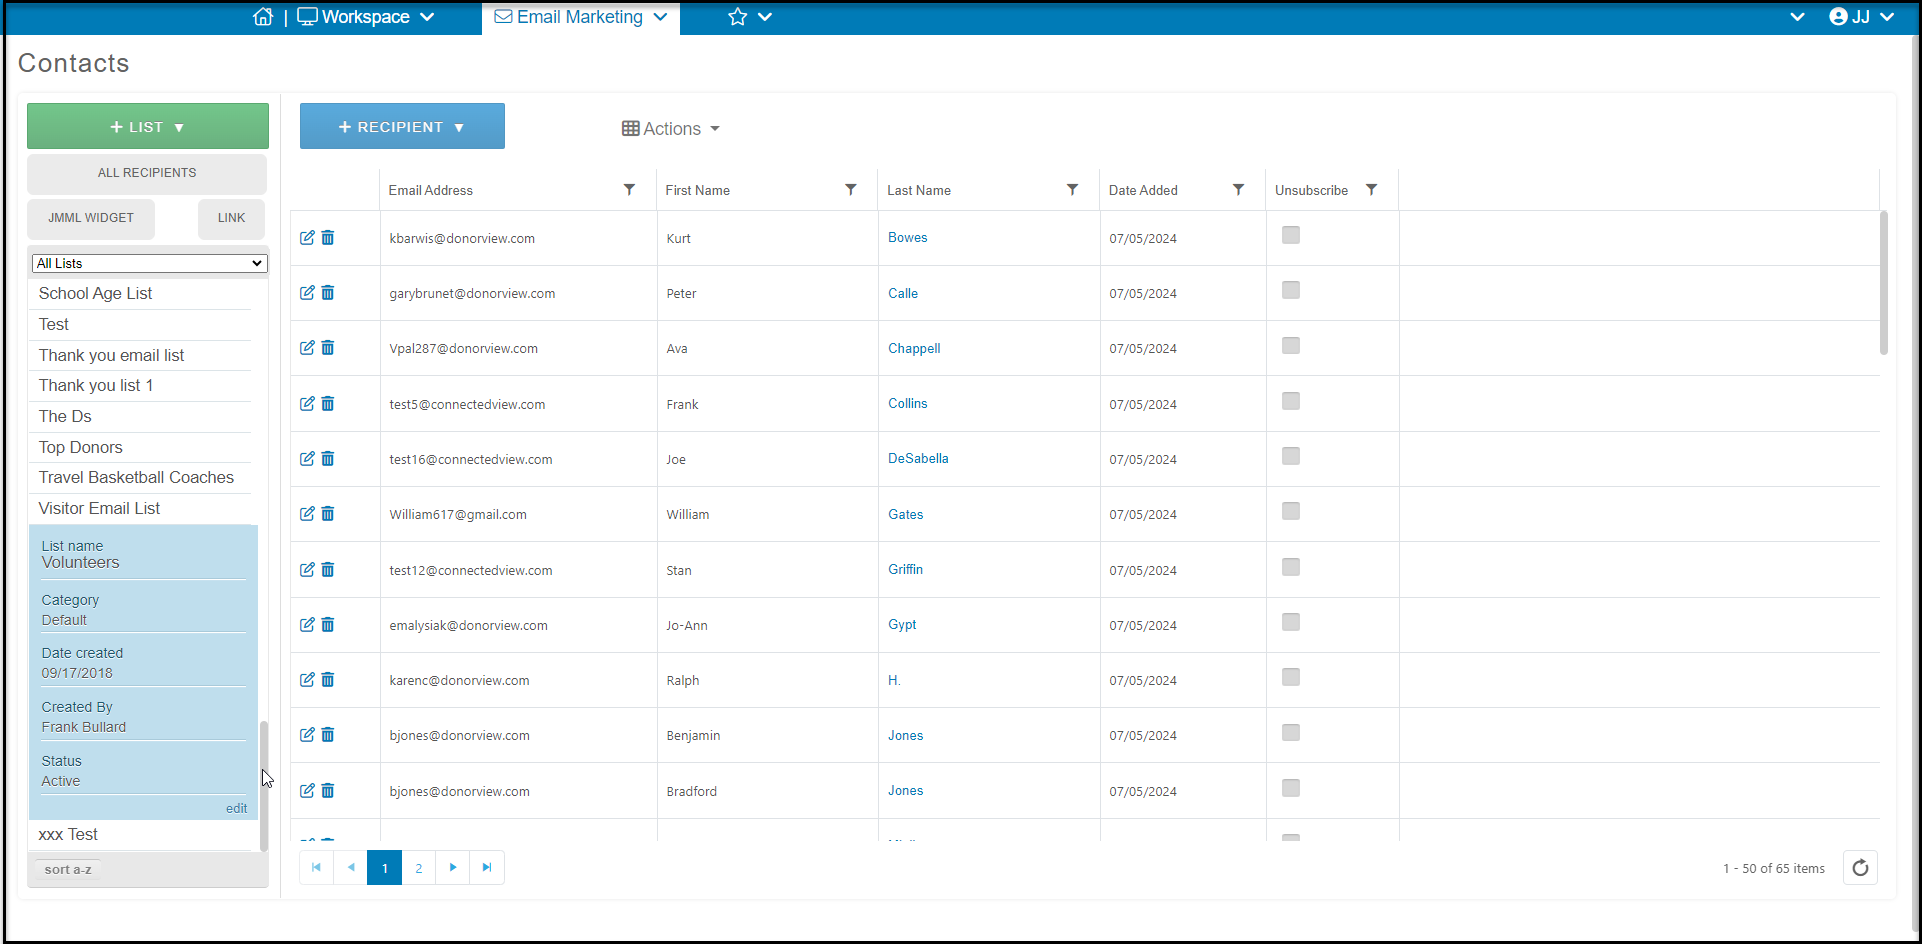
 Once the new list is created, you can use the Email Marketing module to select the list to send email campaigns. You can find the list on the Contacts page of the Email Marketing module.
 **Importing Email Lists**
If you have an email list that was not imported during your implementation process, you can import it into AssociationSphere, however you may want to check for duplicates before you import this list. The email list import process will attempt to match to existing constituents by primary email address. If a constituent already exists in your database, but does not have an email address or has a different email address than the one you are importing, a new constituent record will be created. You can compare your existing constituent list with your potential imports in Excel to identify duplicates and remove them prior to import.
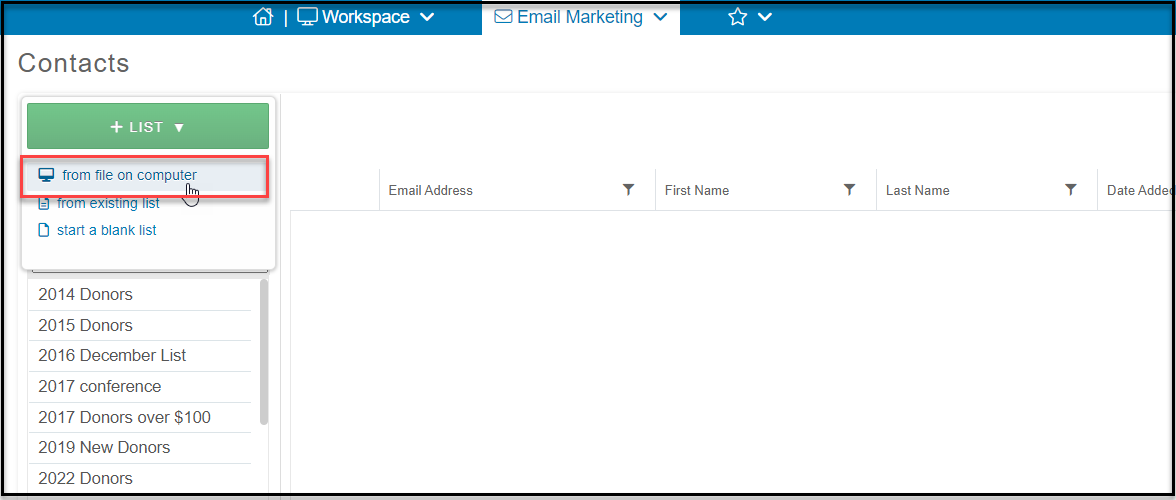
To import a list, go to the Email Marketing module Contacts page and click on the large green **+List** button to import a list. Click on **from file on computer.**
**Importing Email Lists**
If you have an email list that was not imported during your implementation process, you can import it into AssociationSphere, however you may want to check for duplicates before you import this list. The email list import process will attempt to match to existing constituents by primary email address. If a constituent already exists in your database, but does not have an email address or has a different email address than the one you are importing, a new constituent record will be created. You can compare your existing constituent list with your potential imports in Excel to identify duplicates and remove them prior to import.
To import a list, go to the Email Marketing module Contacts page and click on the large green **+List** button to import a list. Click on **from file on computer.**
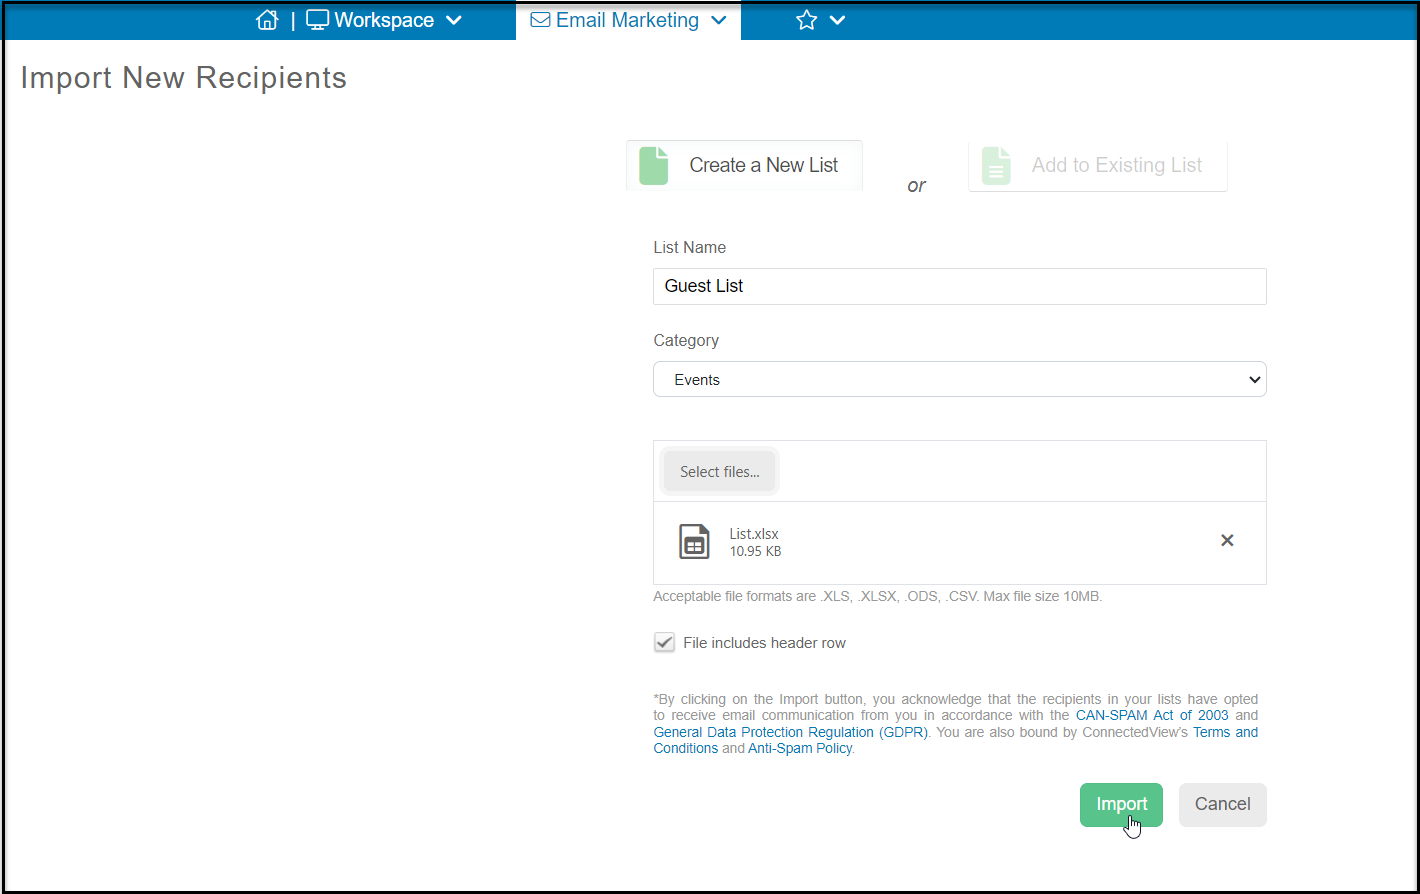
 Next you will enter the new **List Name**and List **Category**. Click on**Select files**to upload your file. Once the file is uploaded, you can check the box if your **File includes header row**. If your file does not have a header row, you can uncheck the box. Click**Import** to import the list.
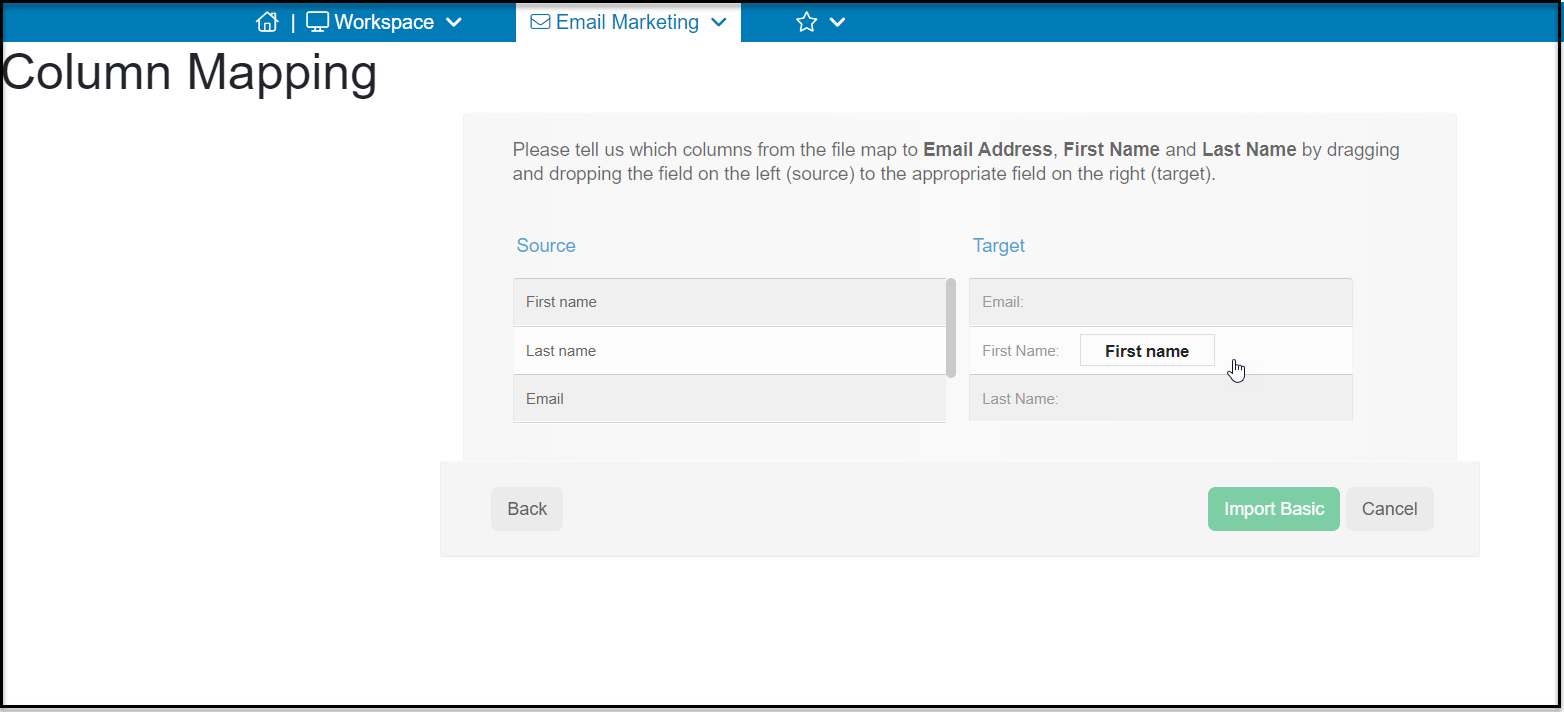
 With your list imported you will next map the fields to tell the software which column from your file matches to the Email, First Name and Last Name fields. You will drag the name of your column from the left onto the appropriate DonorView field on the right. Click on **Import Basic**to import your list. You will now be able to see your list on the Contacts page and see all the new constituents in your Constituents grid.