# How do I make gift cards available to purchase for an event?
> Source: https://support.associationsphere.com/how-do-i-make-gift-cards-available-to-purchase-for-an-event | Updated: 2026-09-08T02:58:45Z
*NOTE: This is the **first** event setup for Gift cards. Refer to the article "How do I set up an event page where gift cards can be used" for the second step.*
Gift cards can be set up in the software so that constituents can purchase gift cards to use when buying event tickets. The gift cards are similar to a gift card you might get to a local retail store. They have a value assigned, but can only be redeemed for event ticket purchases. There are two steps for utilizing the Gift Card feature in the software.
- Step 1 is to create an event to sell the gift cards.
- Step 2 is to authorize the use of gift cards on the applicable events.
**Step 1 - Creating an Event to Sell Gifts Cards**
You can create a special event page to sell gift cards or you can add this feature to an existing page. Note that you cannot sell gift cards and use them on the same page.
You will create your event page like any other with a few additional steps:
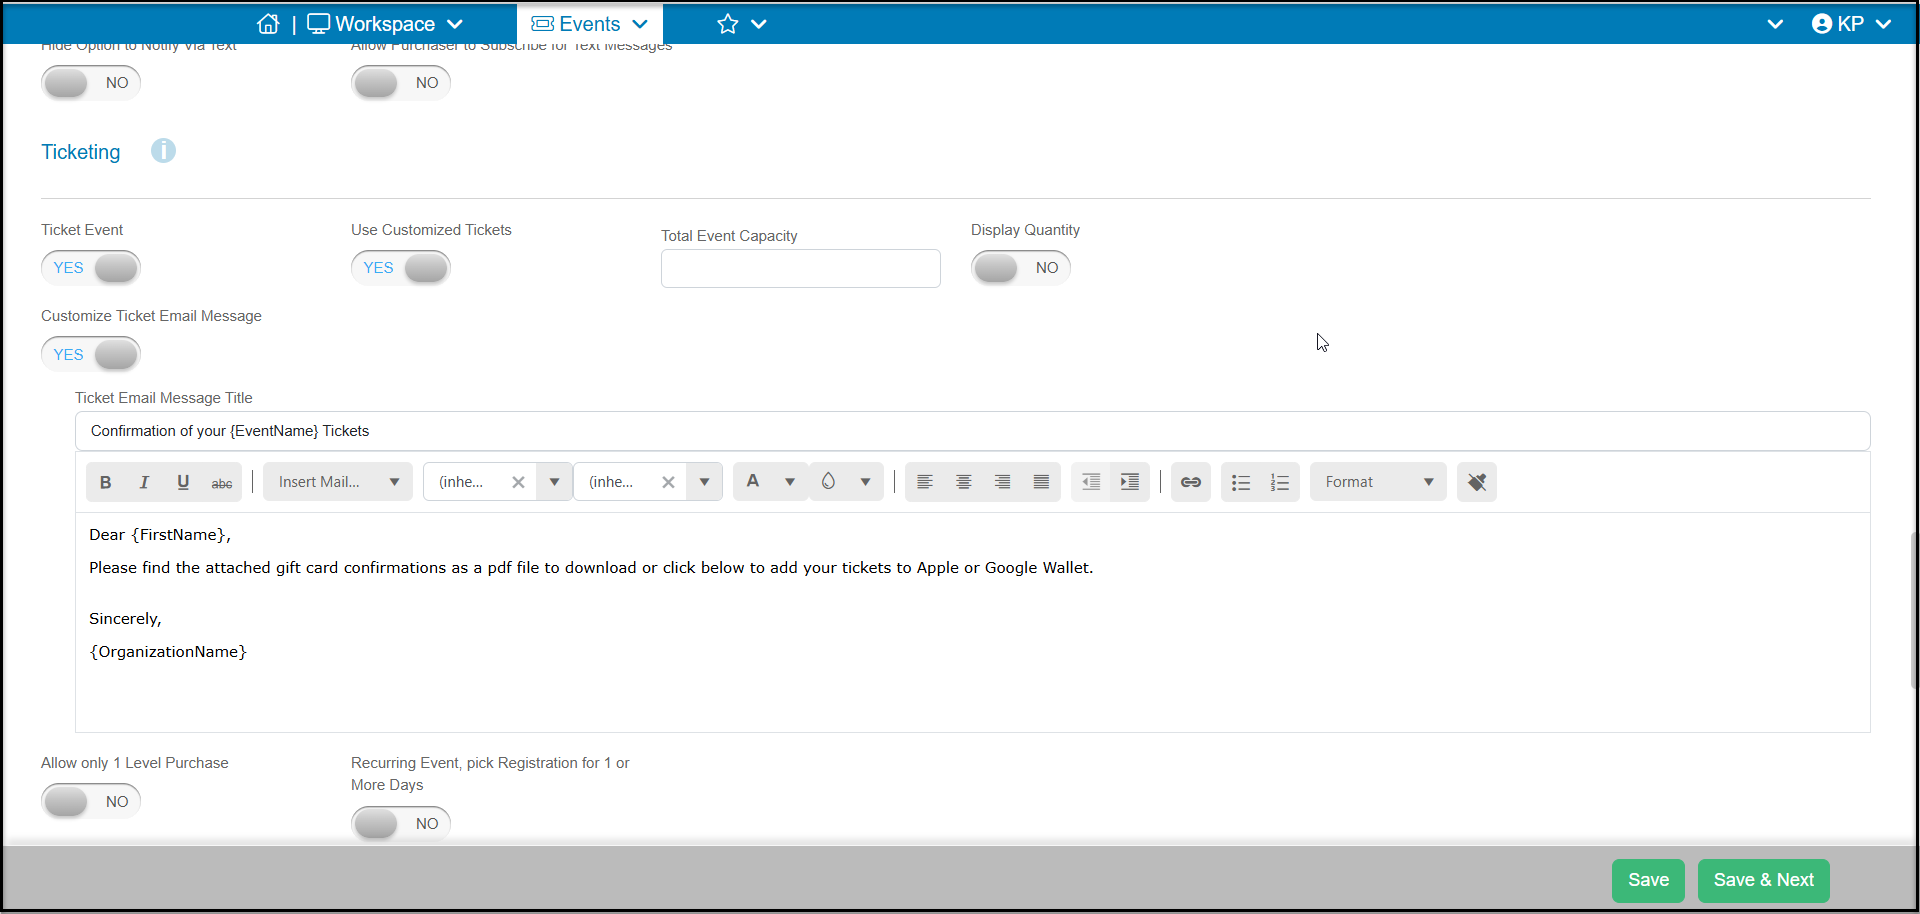
1. On the Event Settings tab, in the Ticketing section, set**Ticket Event** to YES.
2. Then set **Use Customized Tickets** to YES. This will create an 8 ½ x 11 gift card for each gift card that is purchased.
3. The purchaser will receive two emails, one set up with the Thank You Message tab as the receipt with the financial information on it and the second with the gift cards attached as a pdf. Set the **Custom Ticket Email Message** to YES to customize this second email and add details about the gift cards and how to use them.
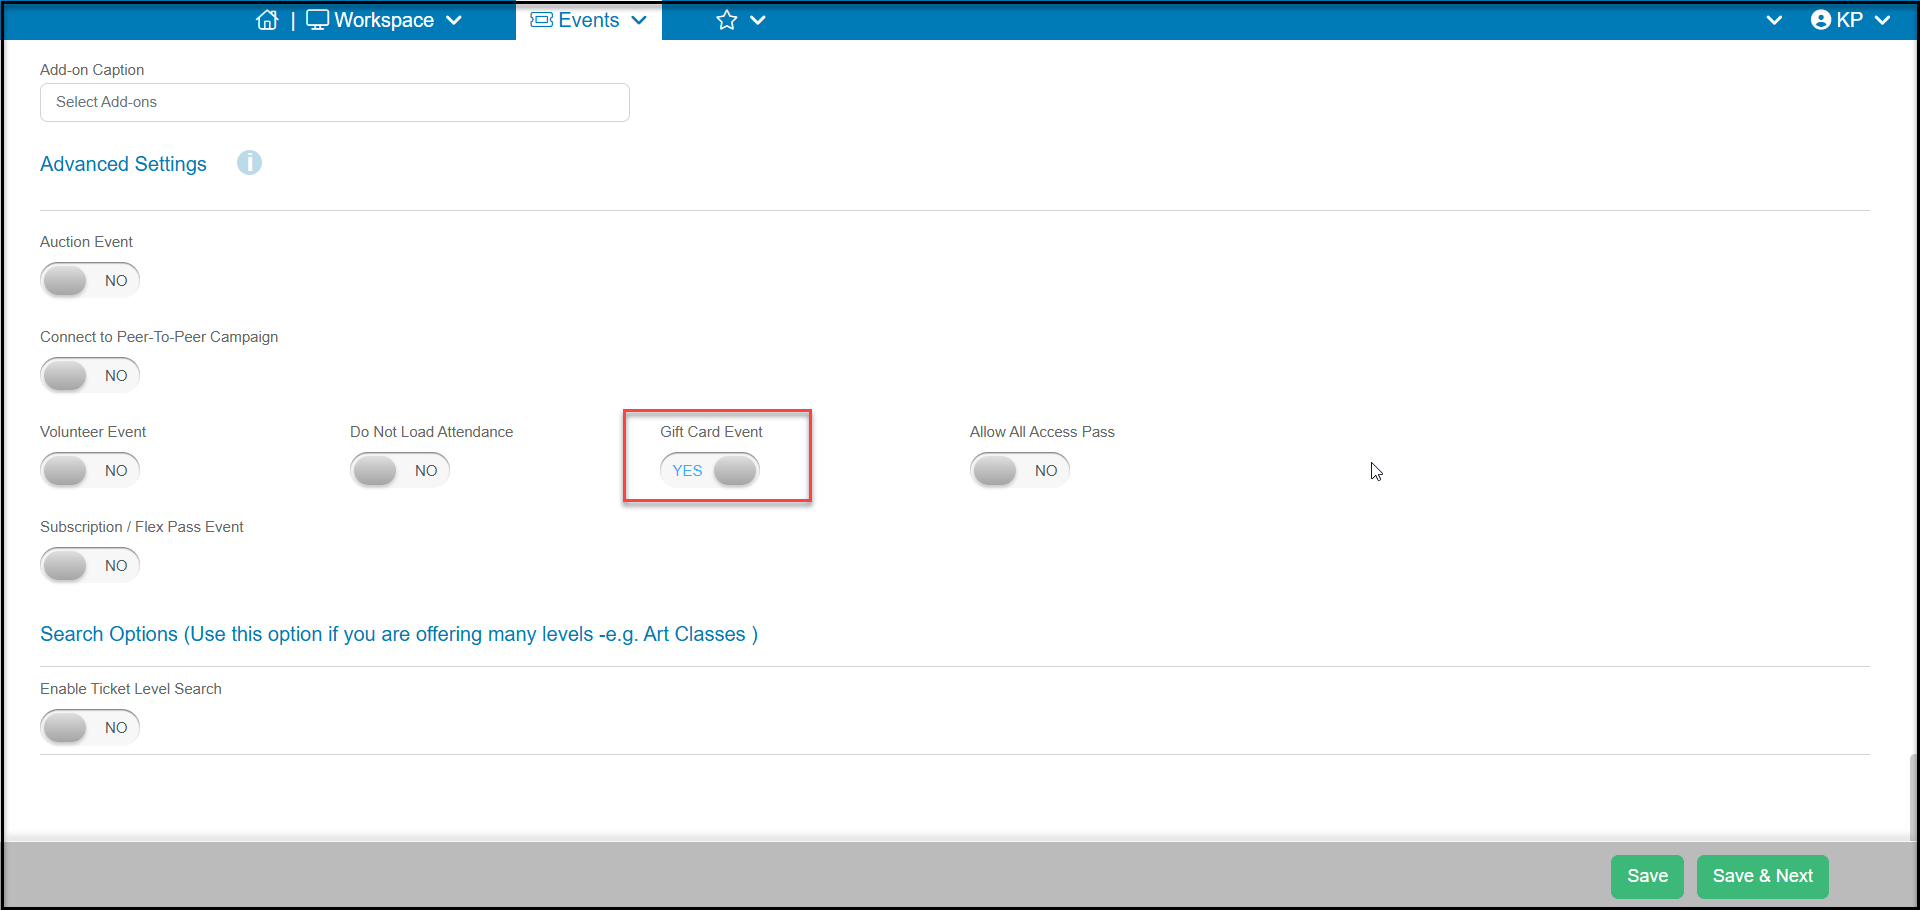
 4. Farther down the Event Settings tab, under the Advanced Settings section, set **Gift Card Event** to YES to use this event page to sell your gift cards.
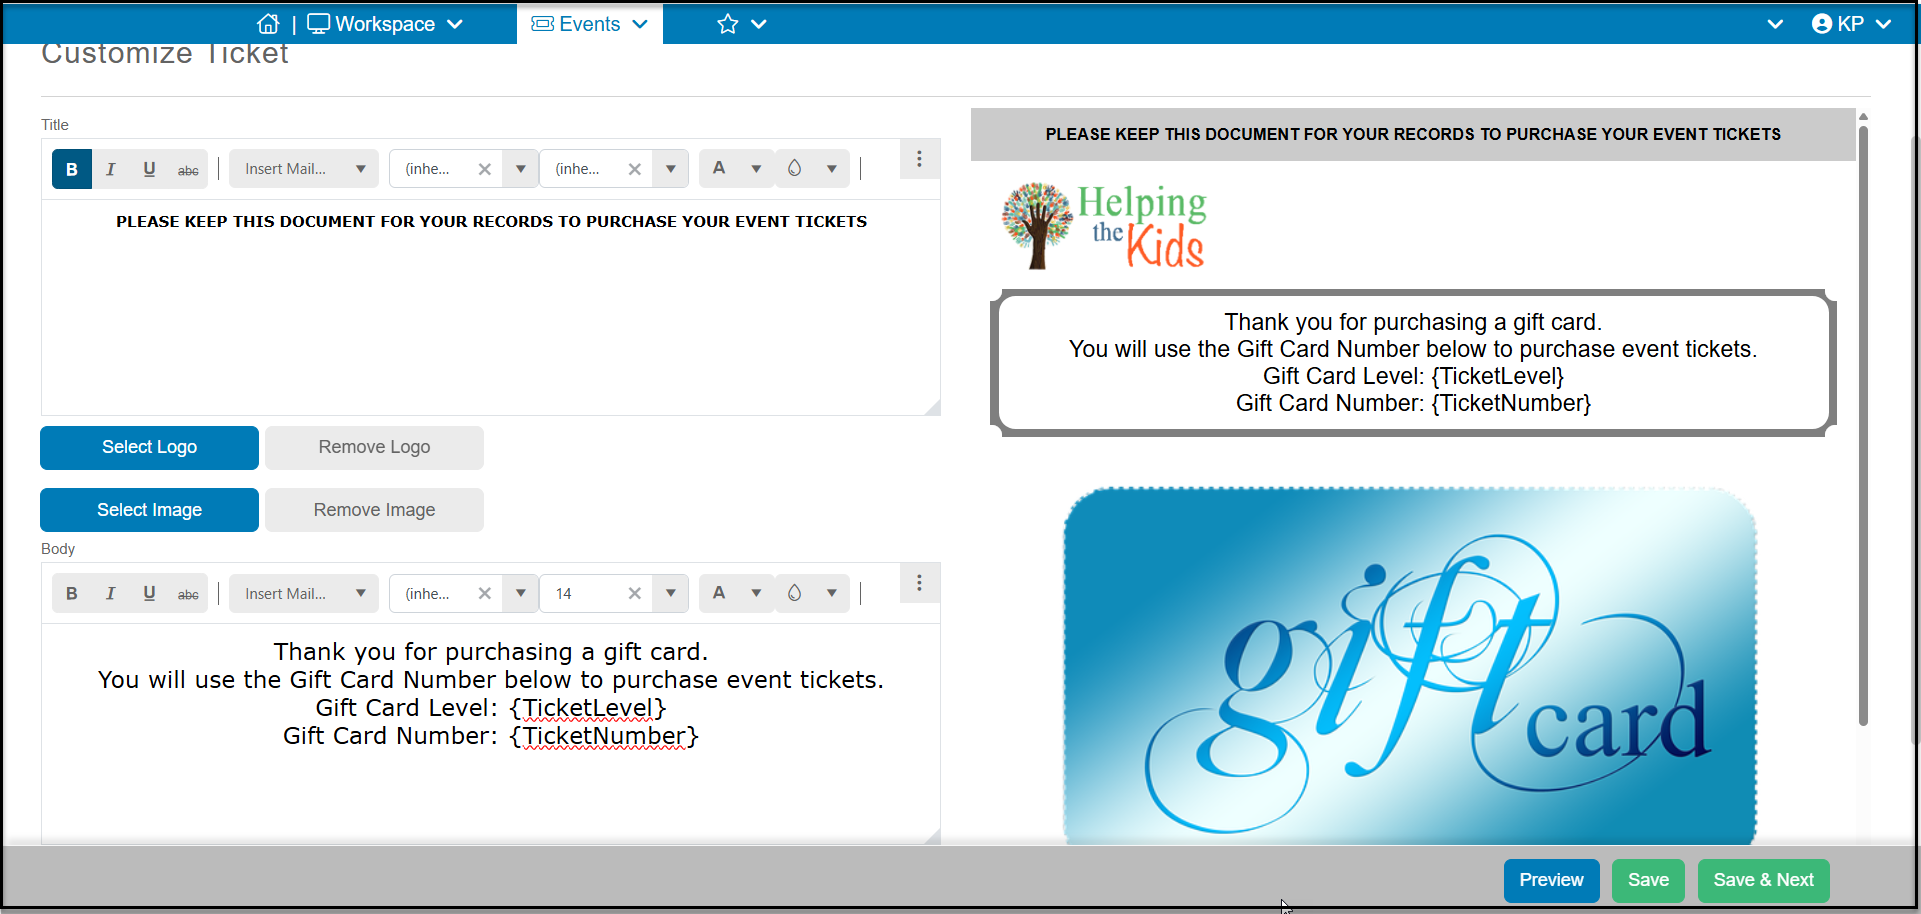
 5. On the Customize Ticket tab, you can customize the way the gift card looks. This will be the pdf file the purchaser will receive attached to the second email.
You can:
- Add information to the **Title** area at the top of the page
- Add a **Logos** and **Image**to the page
- Add more details about using the gift card in the**Body**.
- You must ensure that you keep the default fields **{TicketLevel}**, which is the name you assigned to the gift card ticket level and **{TicketNumber}**, which is the 16 digit gift card number that they insert when purchasing tickets.
- You can select additional merge fields to include using the **Insert Merge Field** dropdown list.
6. Be sure to click **Save** or **Save & Next**to save the changes you make to the ticket/gift card.
5. On the Customize Ticket tab, you can customize the way the gift card looks. This will be the pdf file the purchaser will receive attached to the second email.
You can:
- Add information to the **Title** area at the top of the page
- Add a **Logos** and **Image**to the page
- Add more details about using the gift card in the**Body**.
- You must ensure that you keep the default fields **{TicketLevel}**, which is the name you assigned to the gift card ticket level and **{TicketNumber}**, which is the 16 digit gift card number that they insert when purchasing tickets.
- You can select additional merge fields to include using the **Insert Merge Field** dropdown list.
6. Be sure to click **Save** or **Save & Next**to save the changes you make to the ticket/gift card.
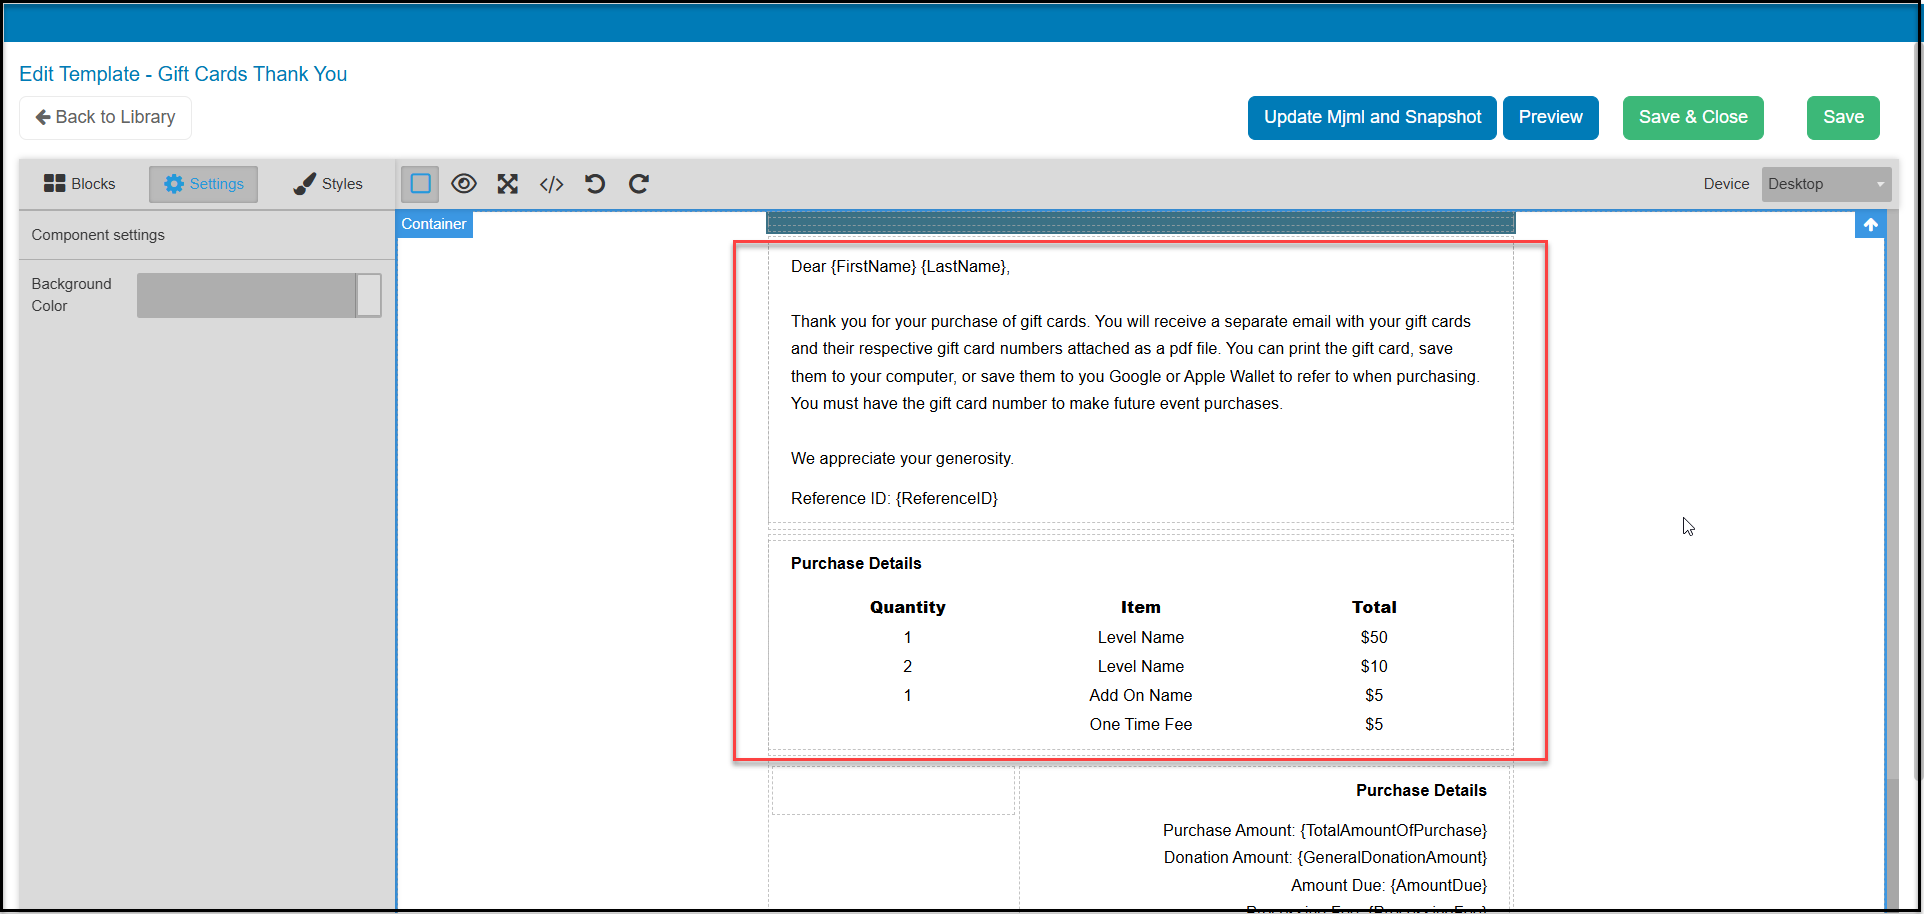
 7. On the Thank You Message tab, you can click on**Edit Message**to edit the thank you message. This will be the first email the purchaser receives and it will show on the screen after they complete their purchase.
8. Be sure to include details here about the second email and information about how to use the gift card.
9. Click**Save & Close** to save your changes.
7. On the Thank You Message tab, you can click on**Edit Message**to edit the thank you message. This will be the first email the purchaser receives and it will show on the screen after they complete their purchase.
8. Be sure to include details here about the second email and information about how to use the gift card.
9. Click**Save & Close** to save your changes.
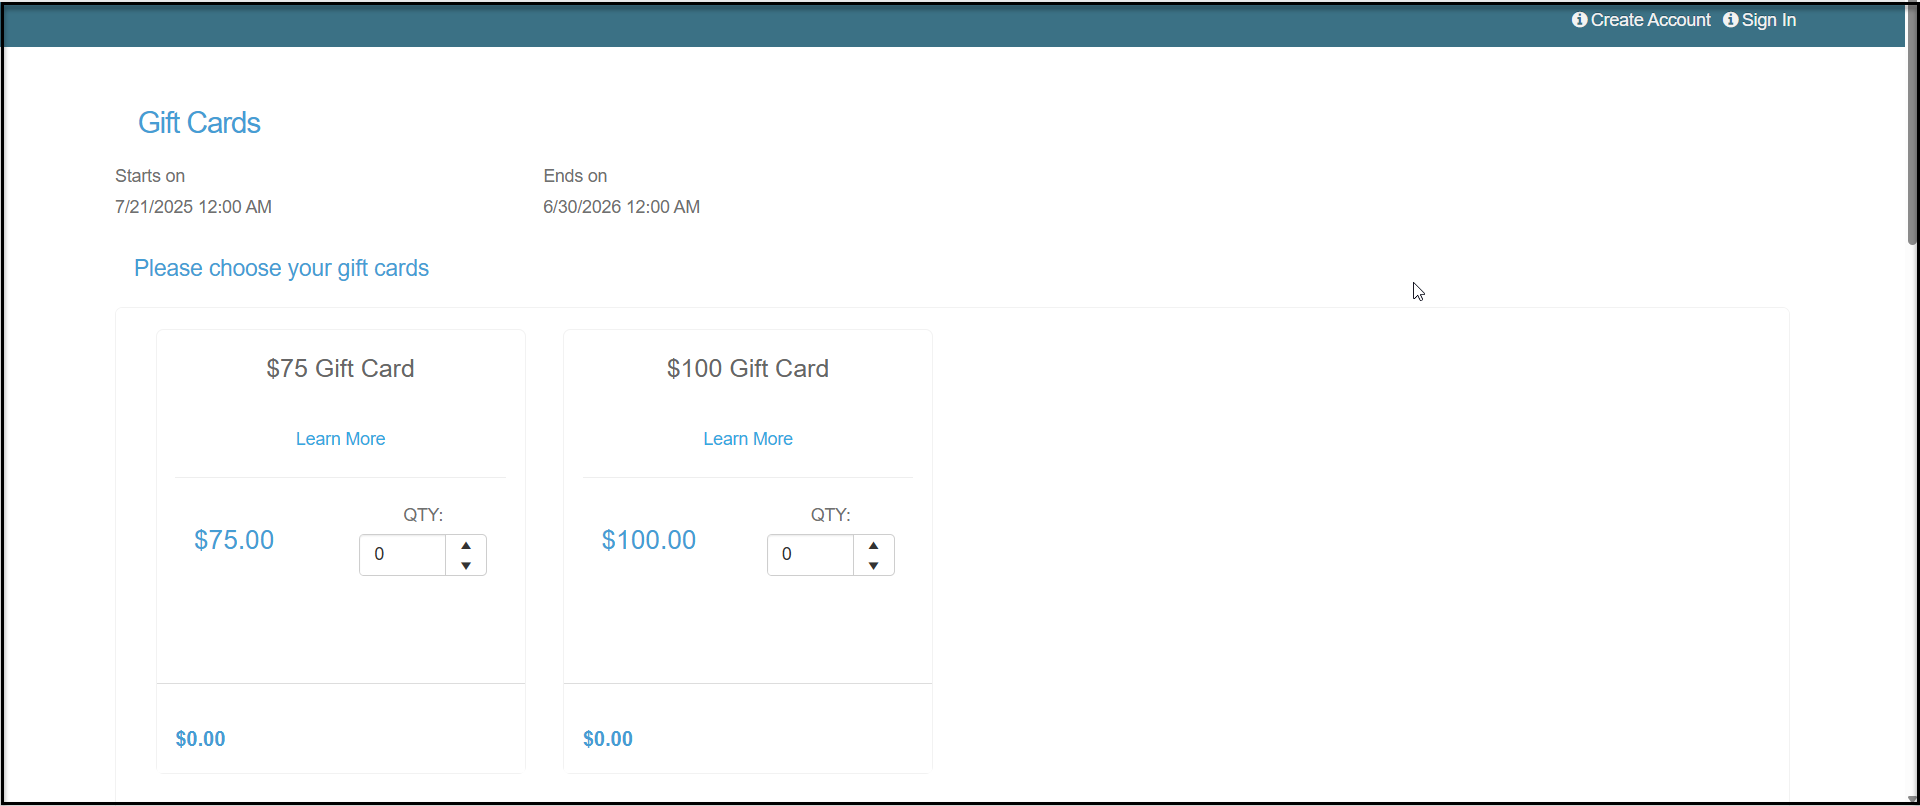
 10. Once you publish your event page, you can share it like any other. Purchasers can use the page to select the gift cards they wish to purchase and enter their credit card to purchase them.
11. You can also process internal gift card purchases and apply coupons to the page if they were set up with the Event Setup tab.
10. Once you publish your event page, you can share it like any other. Purchasers can use the page to select the gift cards they wish to purchase and enter their credit card to purchase them.
11. You can also process internal gift card purchases and apply coupons to the page if they were set up with the Event Setup tab.
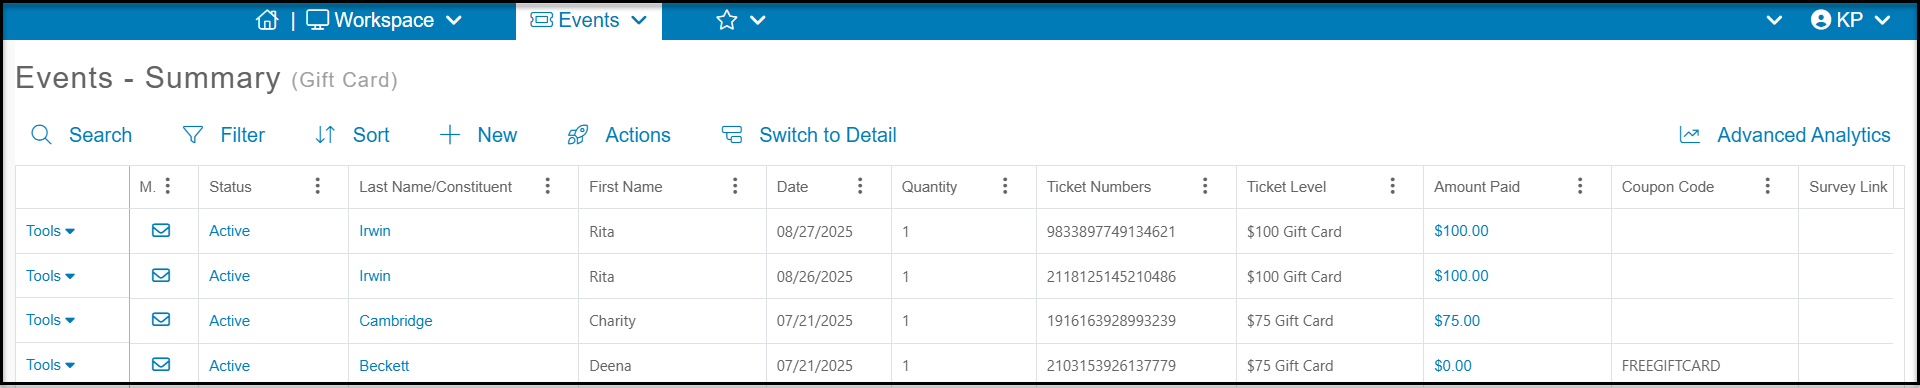
 12. You can see the gift card purchases on the Events grid. The **Ticket Number** is the gift card number. You can also see the **Ticket Level** to indicate which gift card was purchased, as well as the**Amount Paid**and **Coupon Code**used if applicable.
 13. The gift card information is also shown on the constituent's profile record on the **Payment Options**tab.
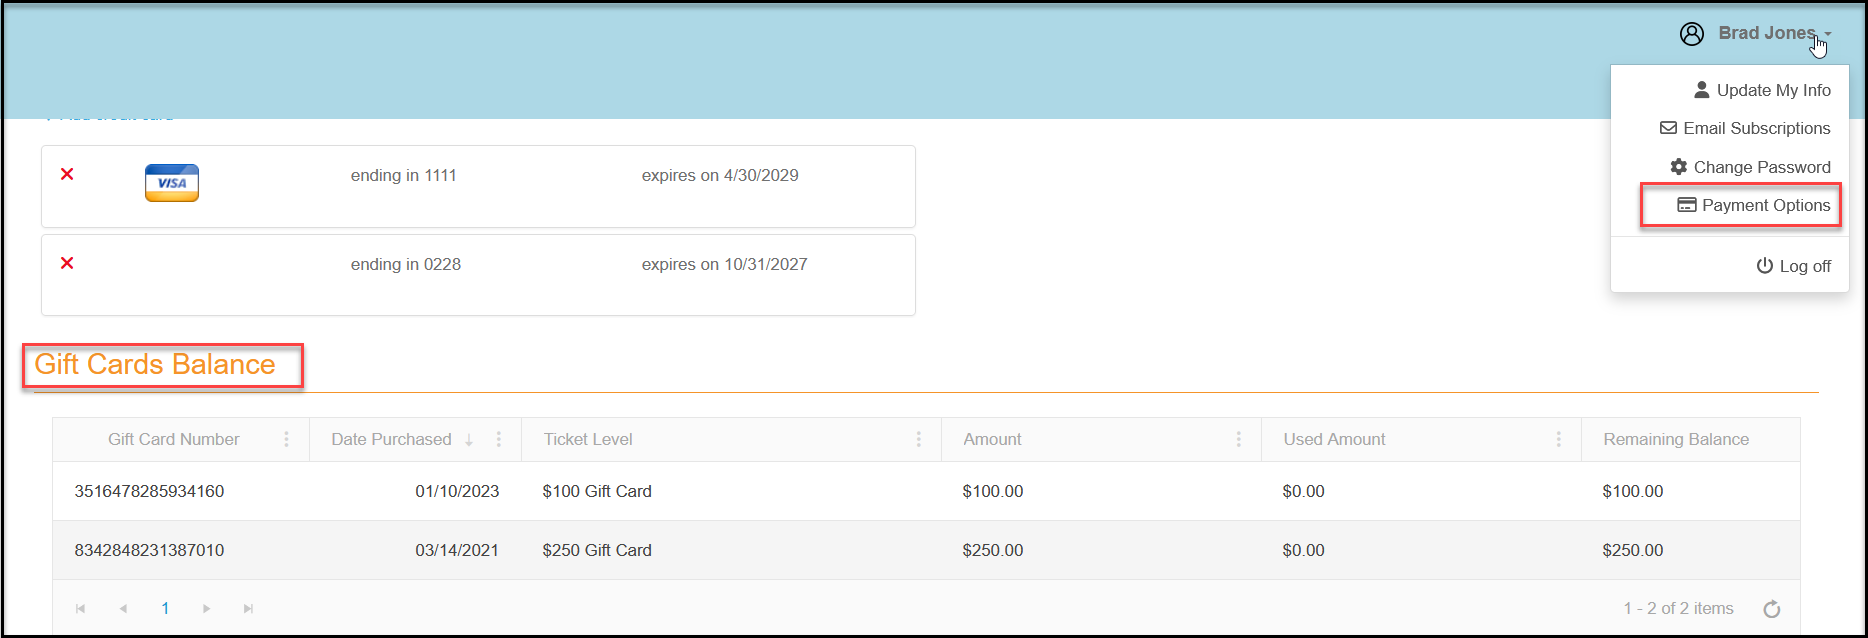
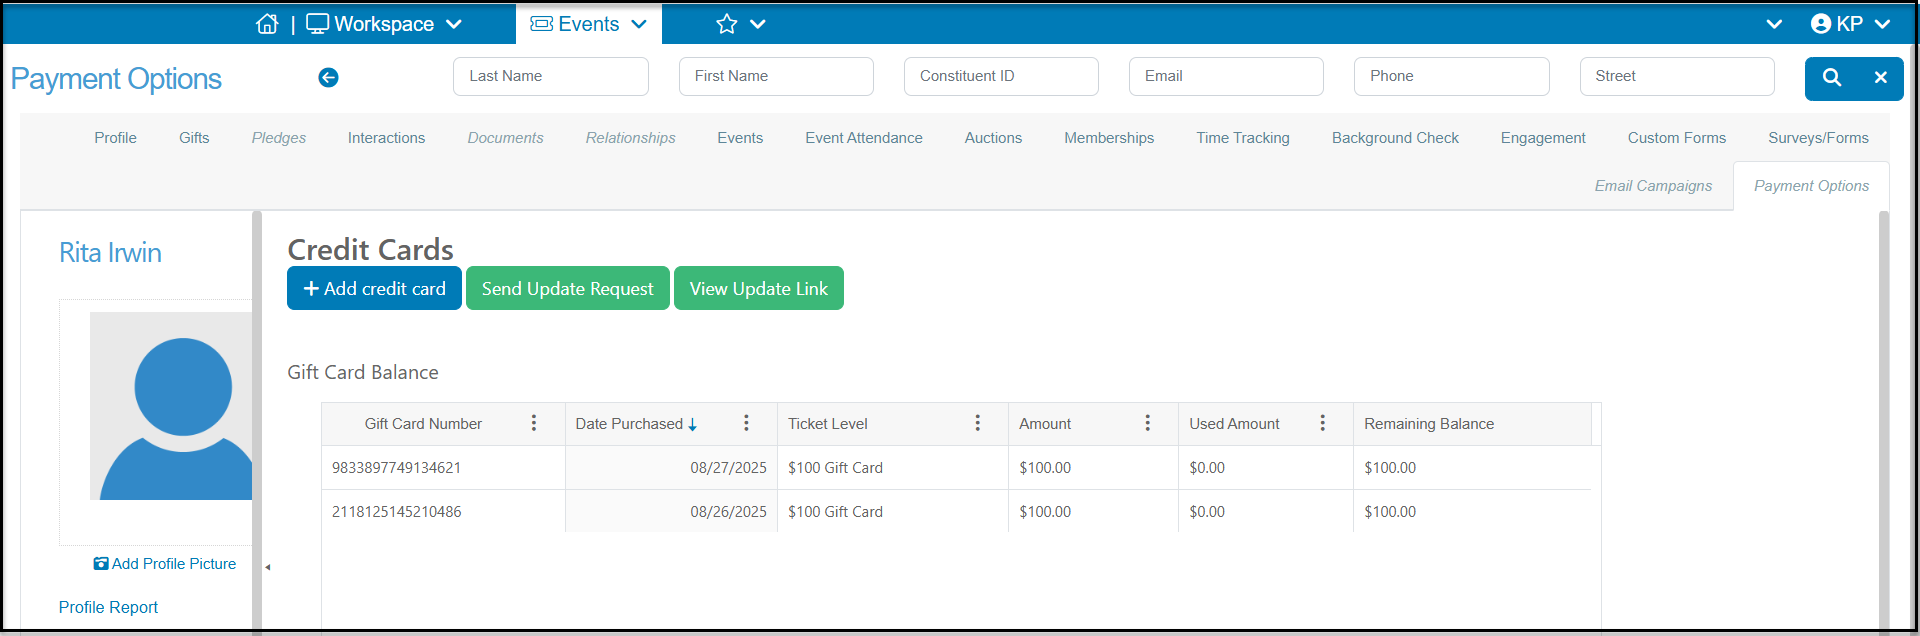 14. If a constituent has created a portal account, they can also see their gift card information under their name, then**Payment Options**. This information is available for both the Basic and Advanced portal.