# How is a CRM Automated Action Set Up?
> Source: https://support.associationsphere.com/how-is-a-crm-automated-action-set-up | Updated: 2026-09-08T02:58:47Z
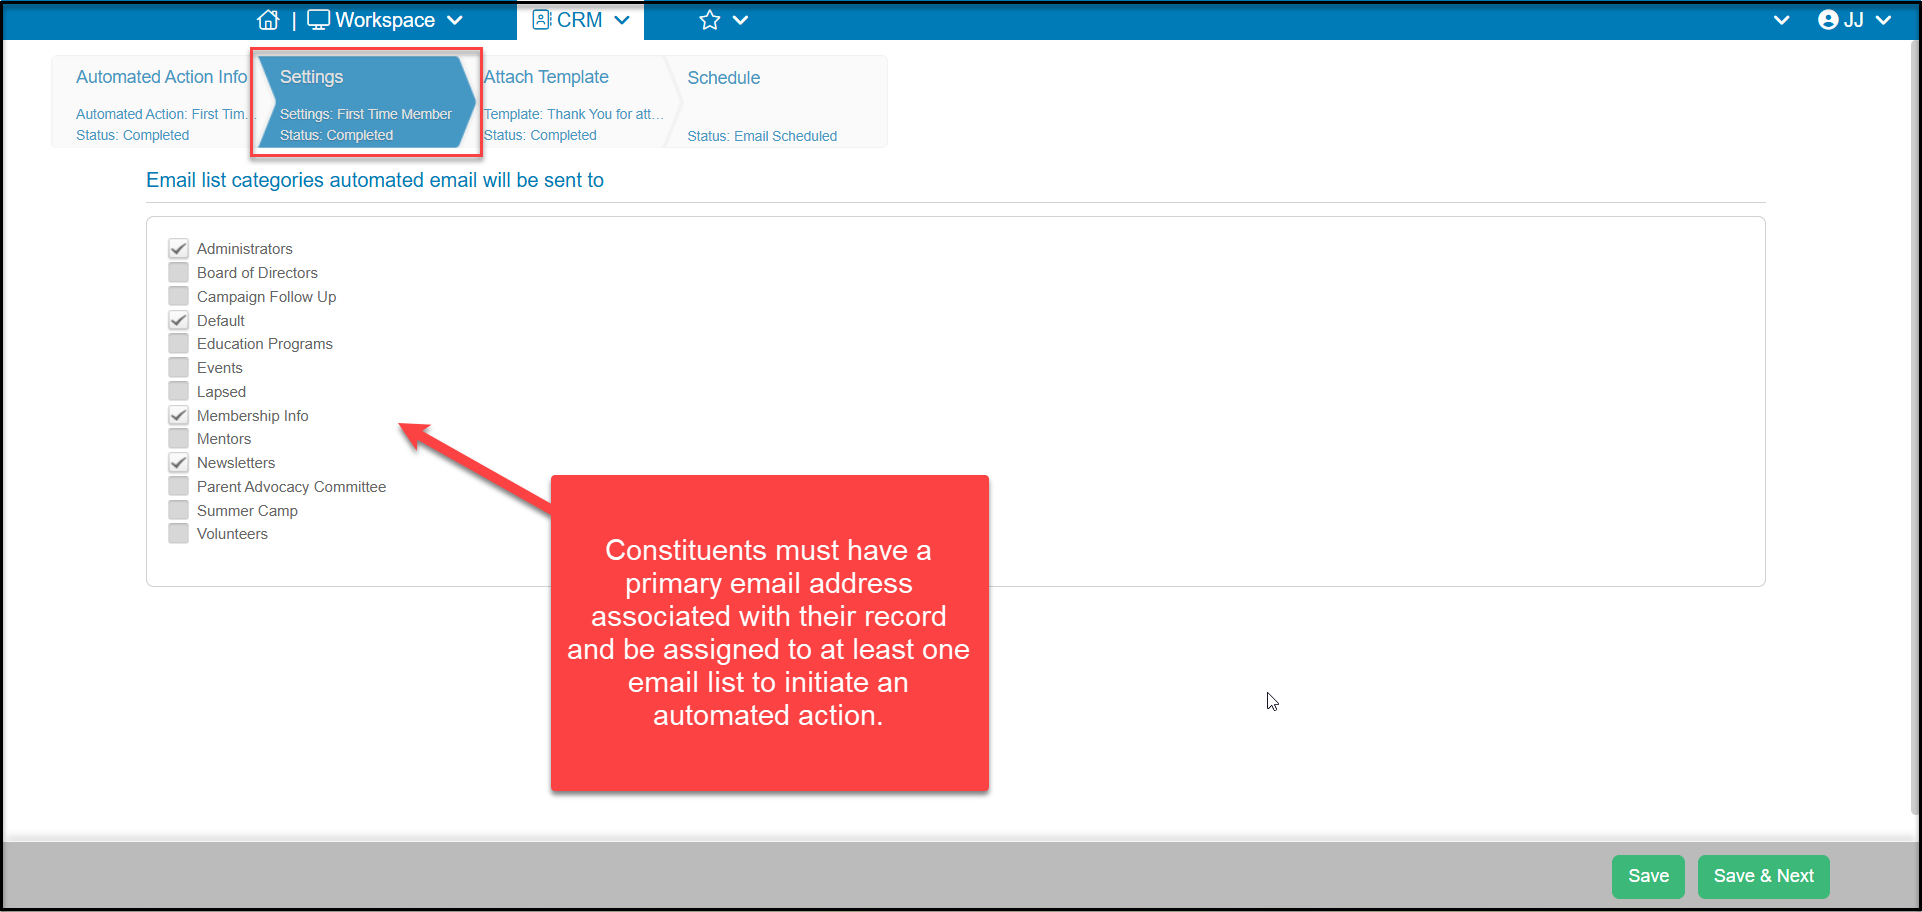
Automated actions are designed to be used in conjunction with email features. Automated actions will not be initiated if the constituent does not have two things:
- An primary email address associated with their profile record.
- Are assigned to at least one email list.
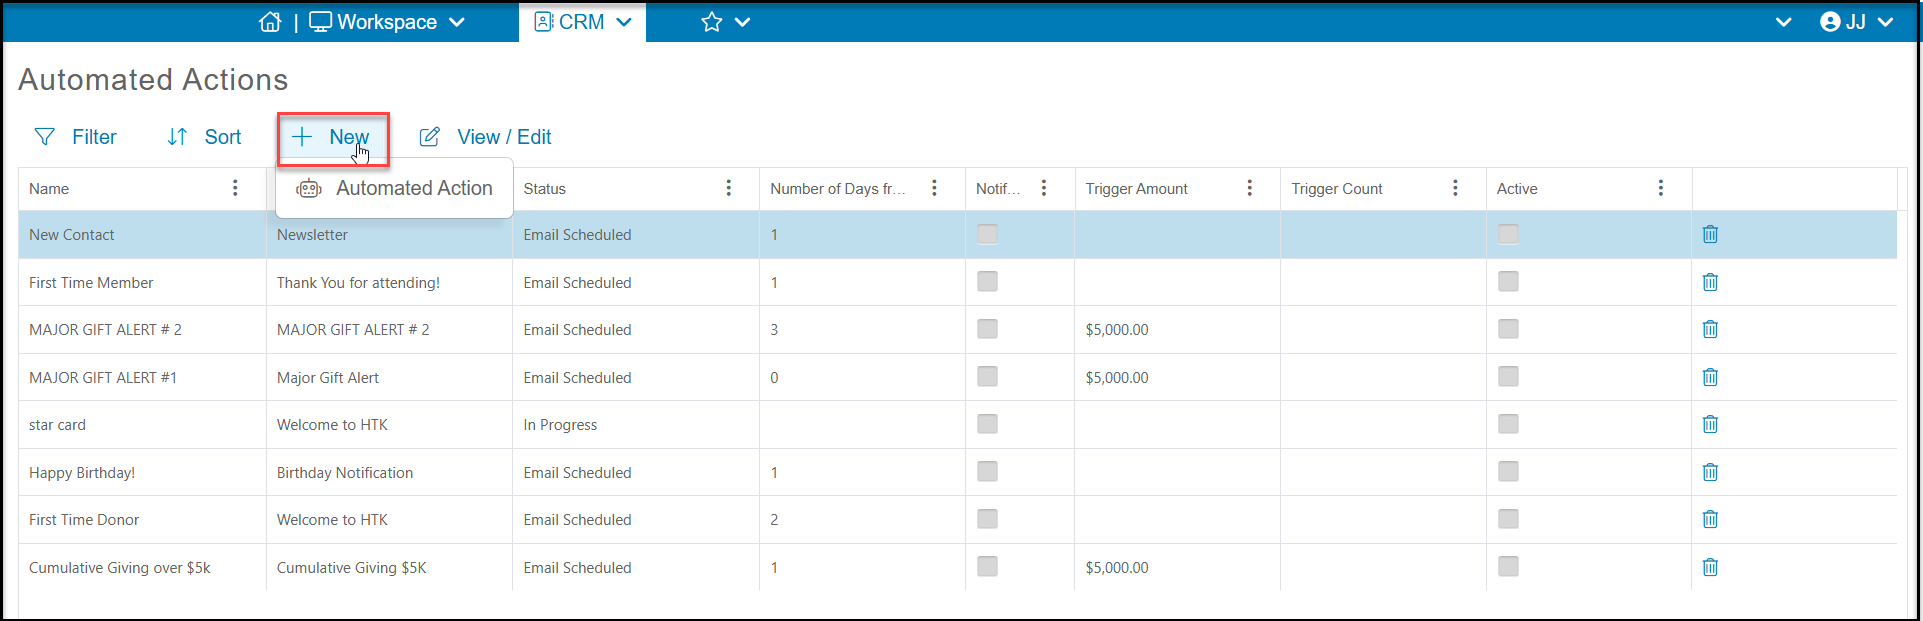
To create a new automated action, you will go to the CRM Module to the Automated Actions grid. Click on **+New**and click on **Automated Actio**n to go to the set up wizard. If you have an automated action already created and shown on the grid, you can click on the row and the new **View/Edit**menu option will appear at the top of the grid. You can click on **View/Edit**, then **Automated Action** to open an existing set up to make changes.
 **Step 1 - Info Tab**
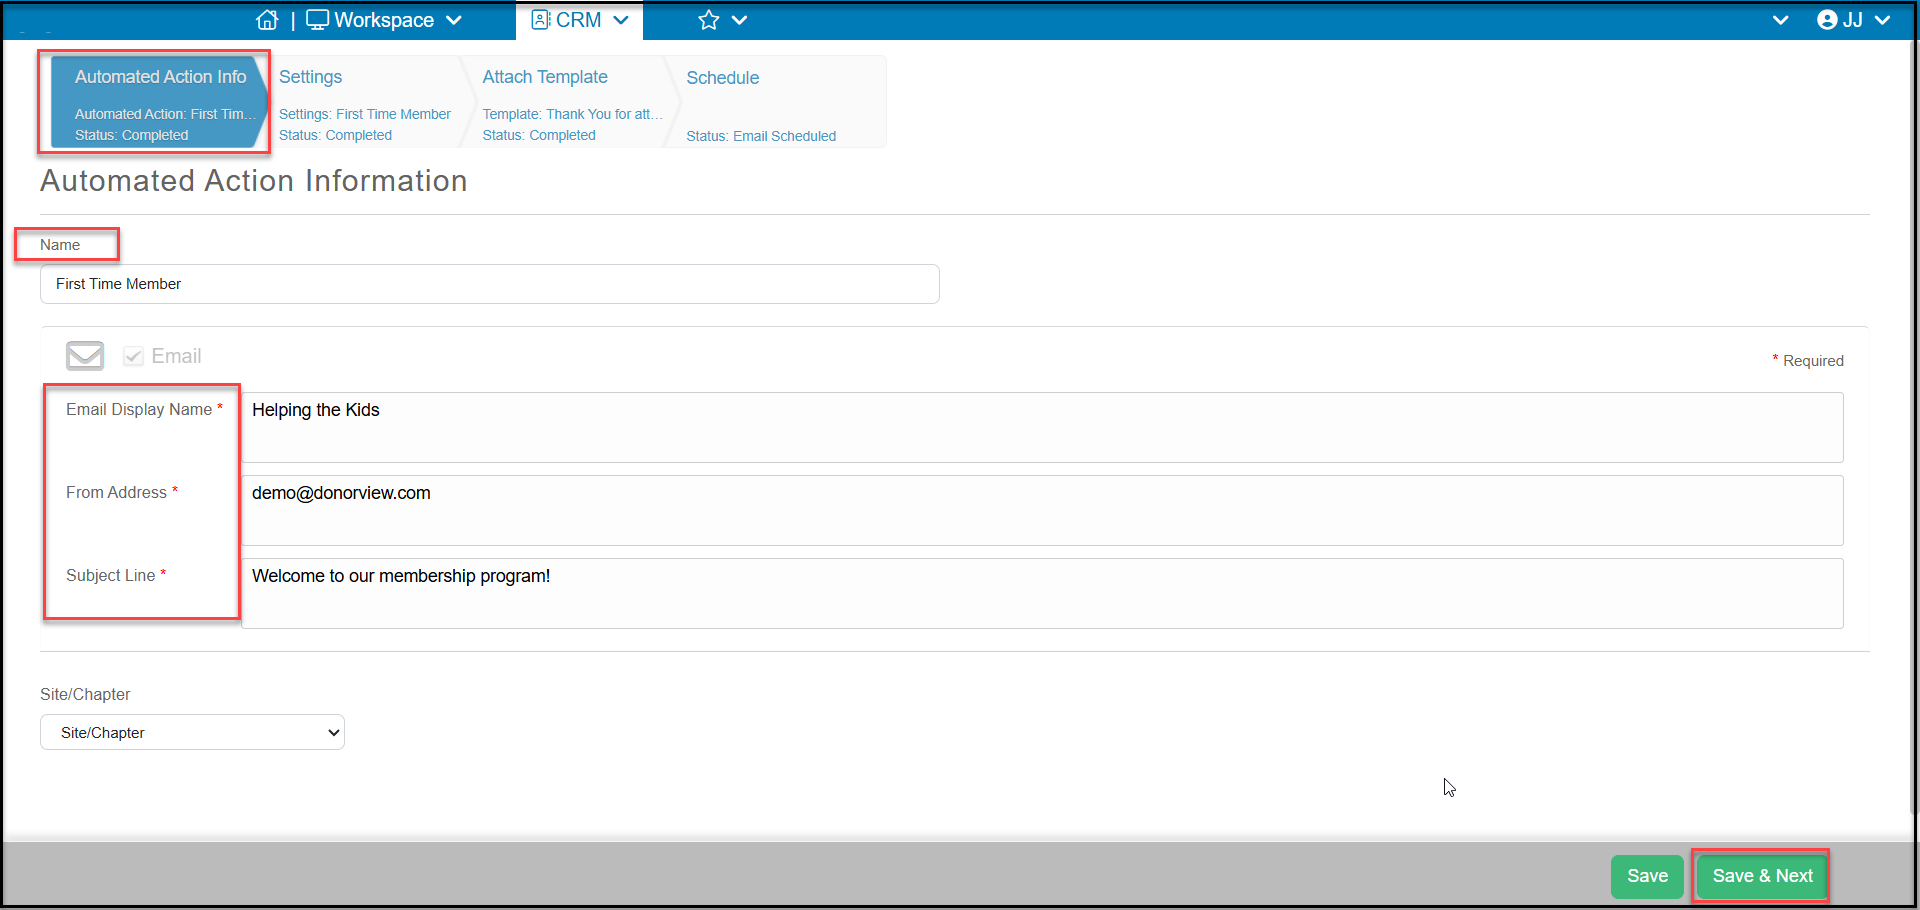
The first step for any page or campaign is the Information tab. This is where you can add a **Name**to your automated action. Even if you do not plan to send this message to the constituent, you will also be required to enter the:
- **Email Display Name:** for example the name of your organization or name of the person sending the email.
- **From Address:** the email address that is sending the message.
- **Subject Line:**the subject of the email.
Click **Save & Next** to go to the next step.
**Step 1 - Info Tab**
The first step for any page or campaign is the Information tab. This is where you can add a **Name**to your automated action. Even if you do not plan to send this message to the constituent, you will also be required to enter the:
- **Email Display Name:** for example the name of your organization or name of the person sending the email.
- **From Address:** the email address that is sending the message.
- **Subject Line:**the subject of the email.
Click **Save & Next** to go to the next step.
 **Step 2 - Settings Tab**
Because the automated actions was designed for use with email, this step requires you to select at least one email list category to include in the automated action. This means that in order to generate this automated action, a constituent must have a primary email address and must be assigned to at least one email list.
**Step 2 - Settings Tab**
Because the automated actions was designed for use with email, this step requires you to select at least one email list category to include in the automated action. This means that in order to generate this automated action, a constituent must have a primary email address and must be assigned to at least one email list.
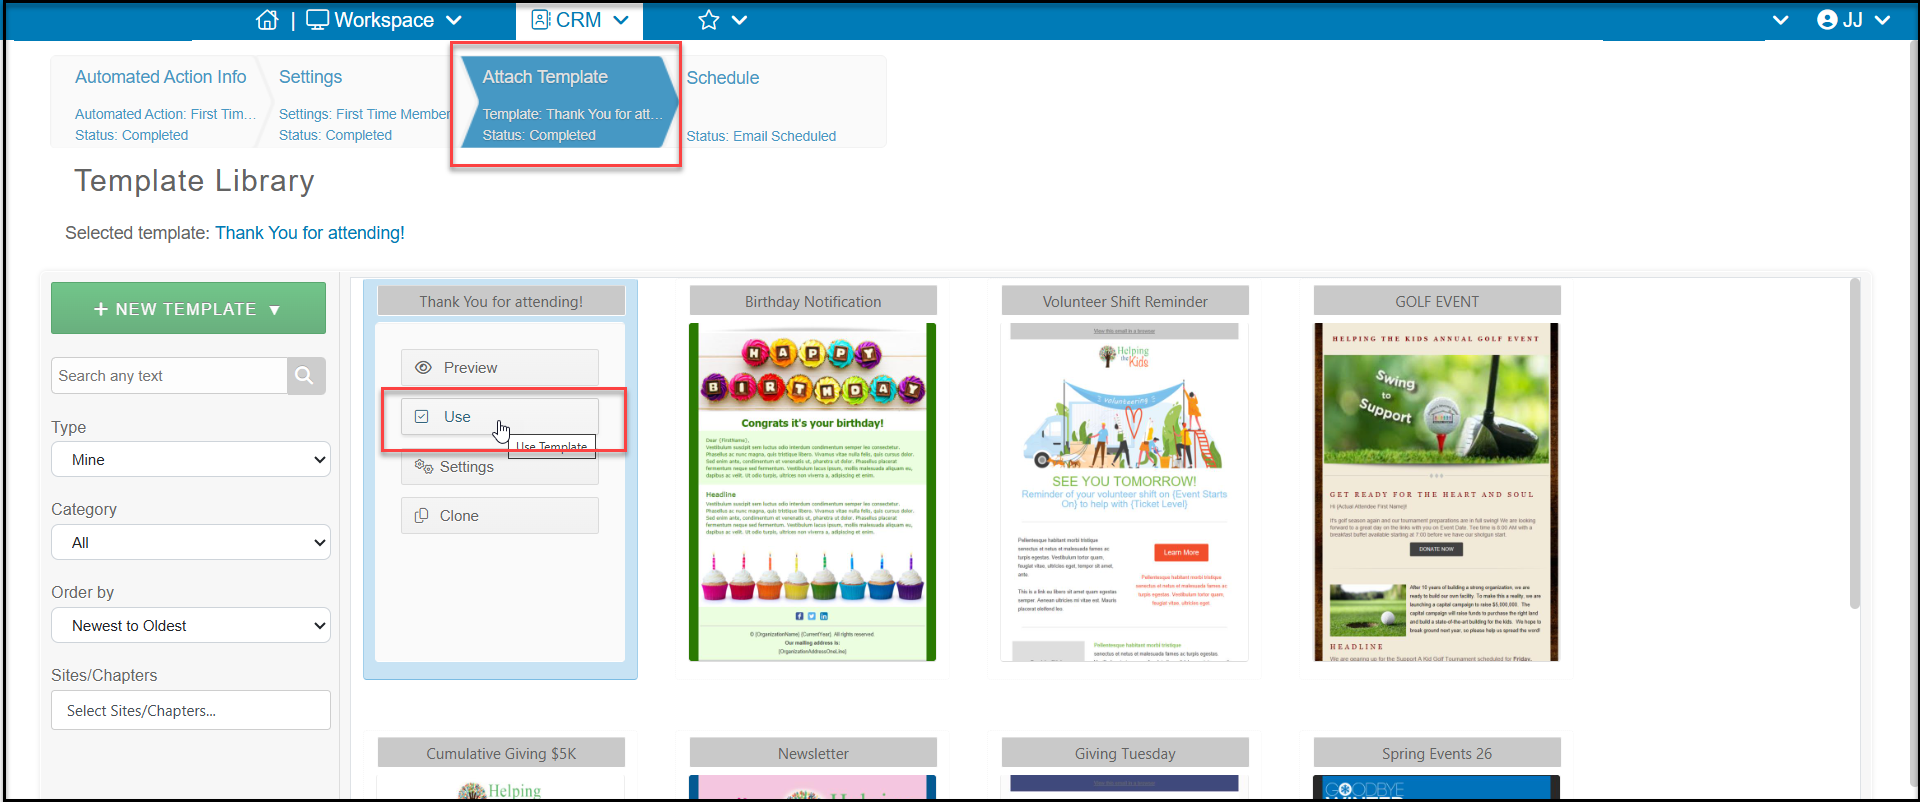
 **Step 3 - Attach Template Tab**
Again, because this feature is synced with email, you must select a template to use, even if you do not plan to send this message to the constituent. Click on “Use” for the template you would like to link to this automated action.
**Step 3 - Attach Template Tab**
Again, because this feature is synced with email, you must select a template to use, even if you do not plan to send this message to the constituent. Click on “Use” for the template you would like to link to this automated action.
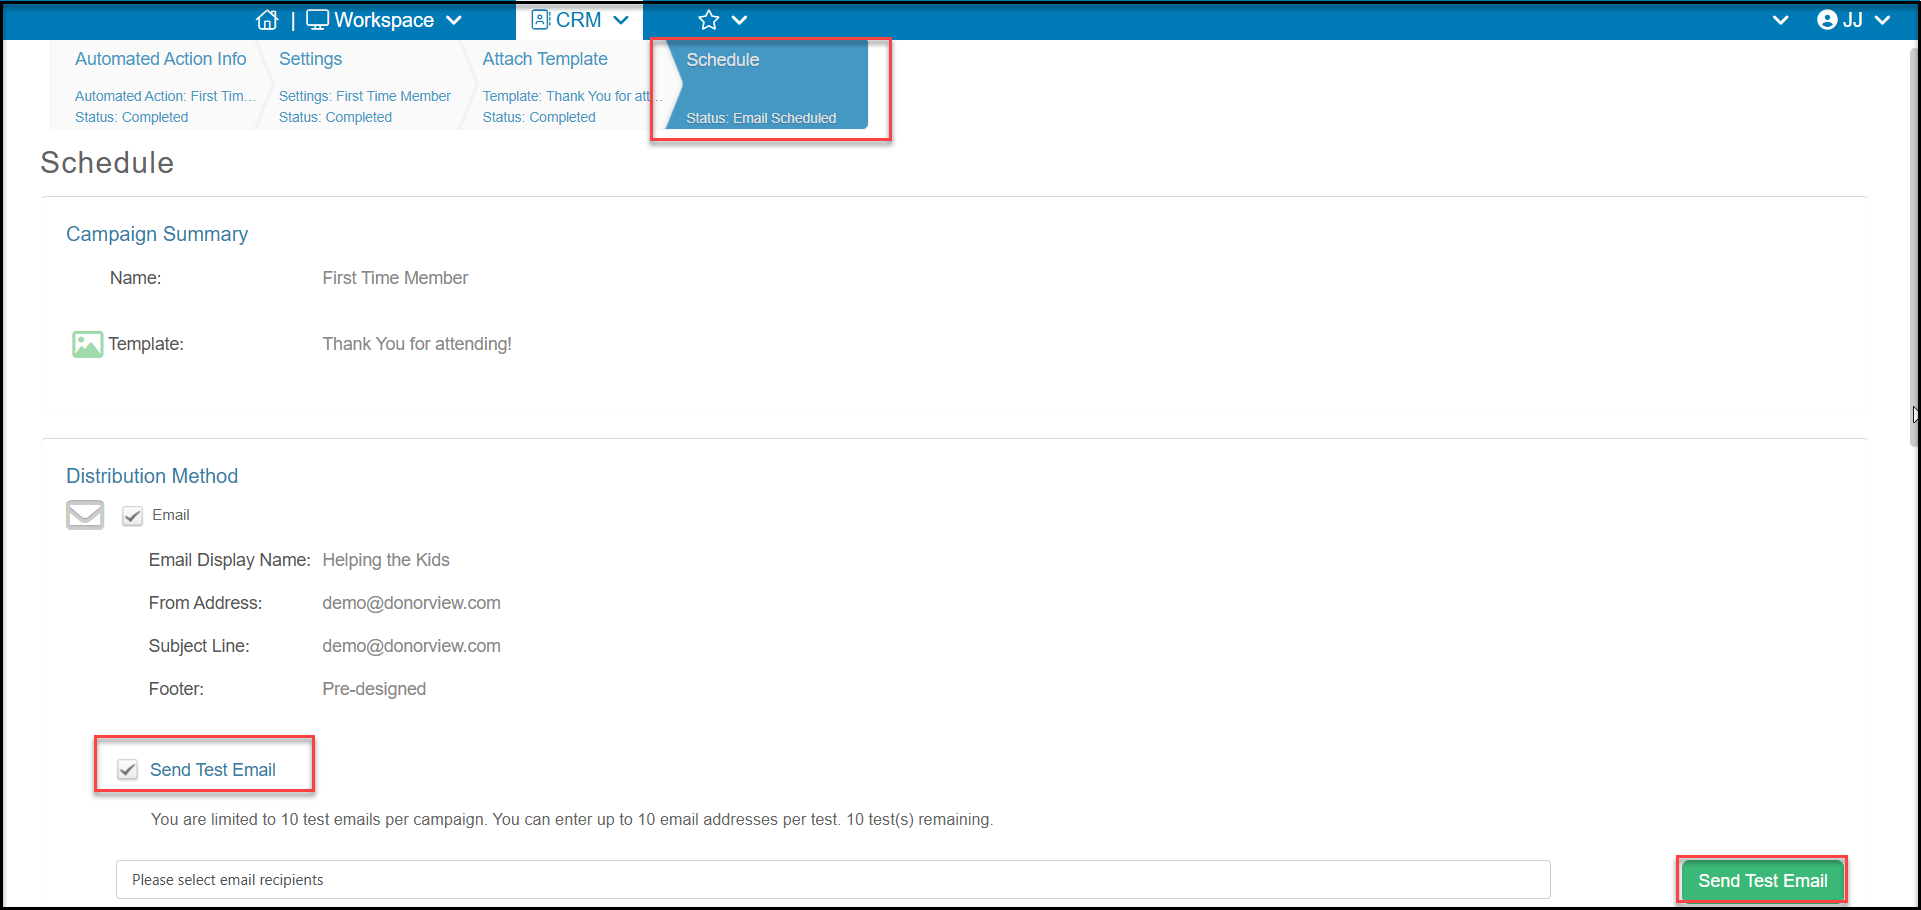
 **Step 4 - Schedule Tab**
The last step is where the trigger and actions are identified. At the top of the page, you can see a confirmation of the Campaign Summary and Email address information. You can also **Send a Test Email** if you would like to see how the message will look to your constituents.
**Step 4 - Schedule Tab**
The last step is where the trigger and actions are identified. At the top of the page, you can see a confirmation of the Campaign Summary and Email address information. You can also **Send a Test Email** if you would like to see how the message will look to your constituents.
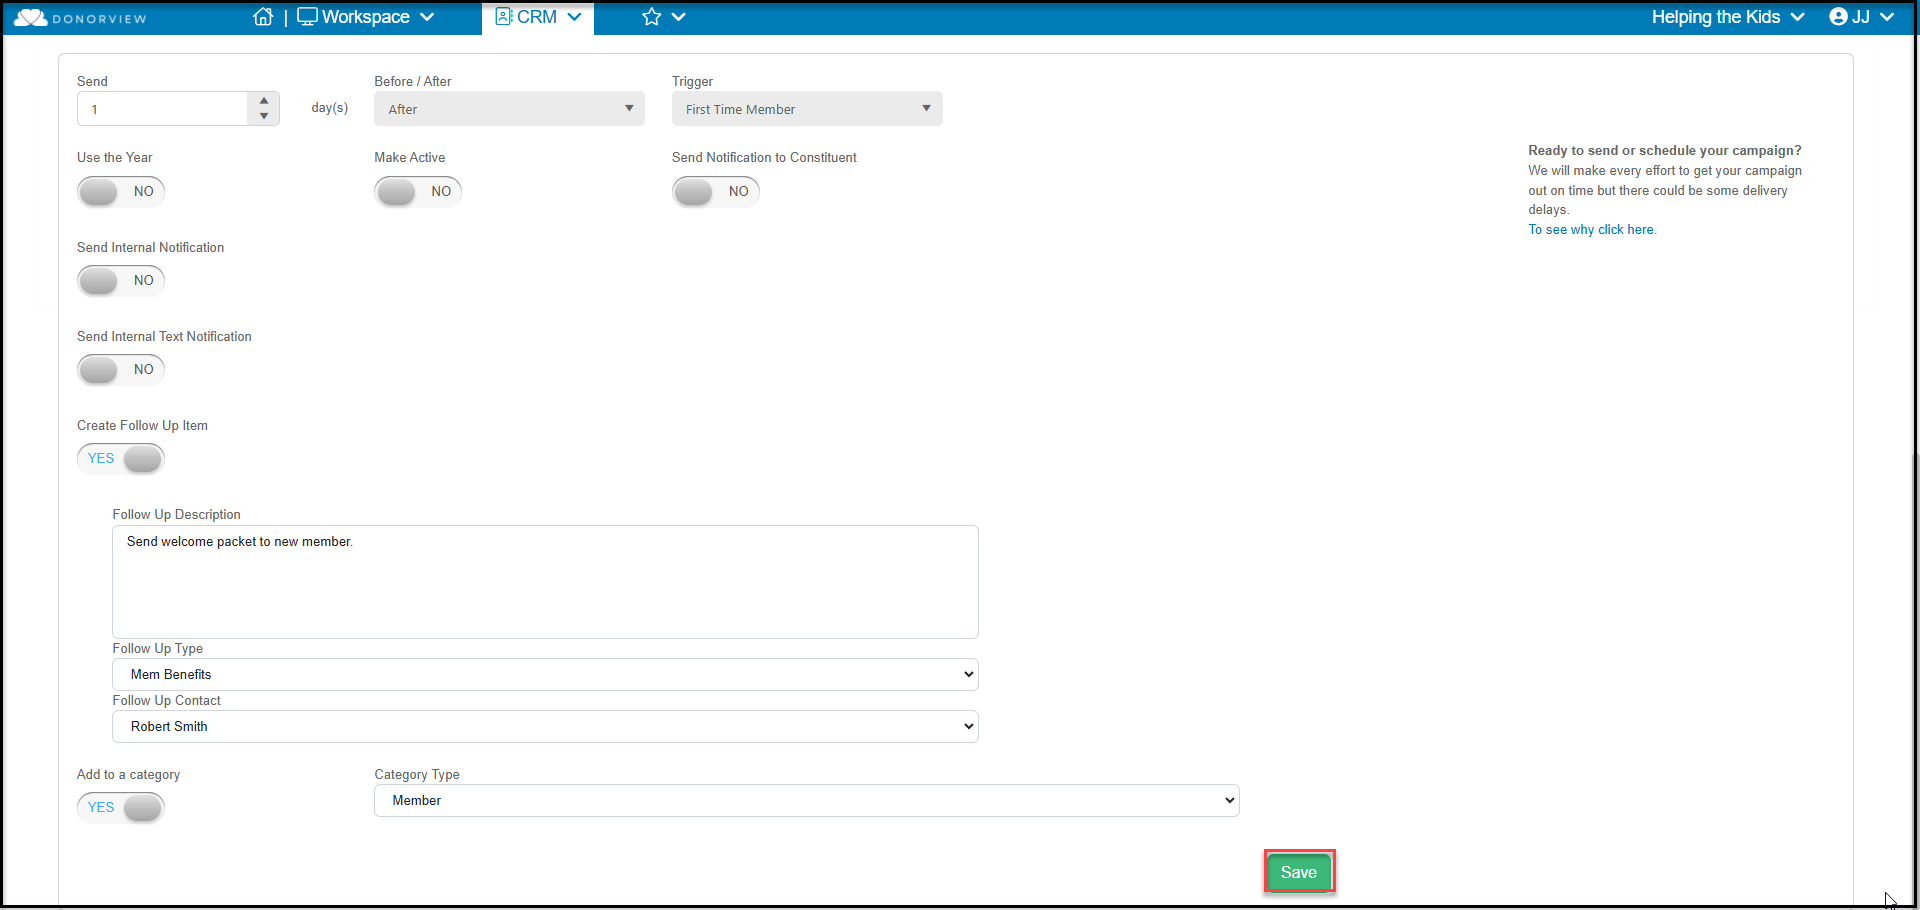
 Scrolling farther down the page you find the trigger setups. Once you select the trigger and notification options, click **Save** to set up this automated action.
Please see this article "Automated Action Triggers" for a description and details of all the different trigger and notifications options available.
Scrolling farther down the page you find the trigger setups. Once you select the trigger and notification options, click **Save** to set up this automated action.
Please see this article "Automated Action Triggers" for a description and details of all the different trigger and notifications options available.