# Portal Features for Pledges
> Source: https://support.associationsphere.com/portal-features-for-pledges | Updated: 2026-06-05T15:12:33Z
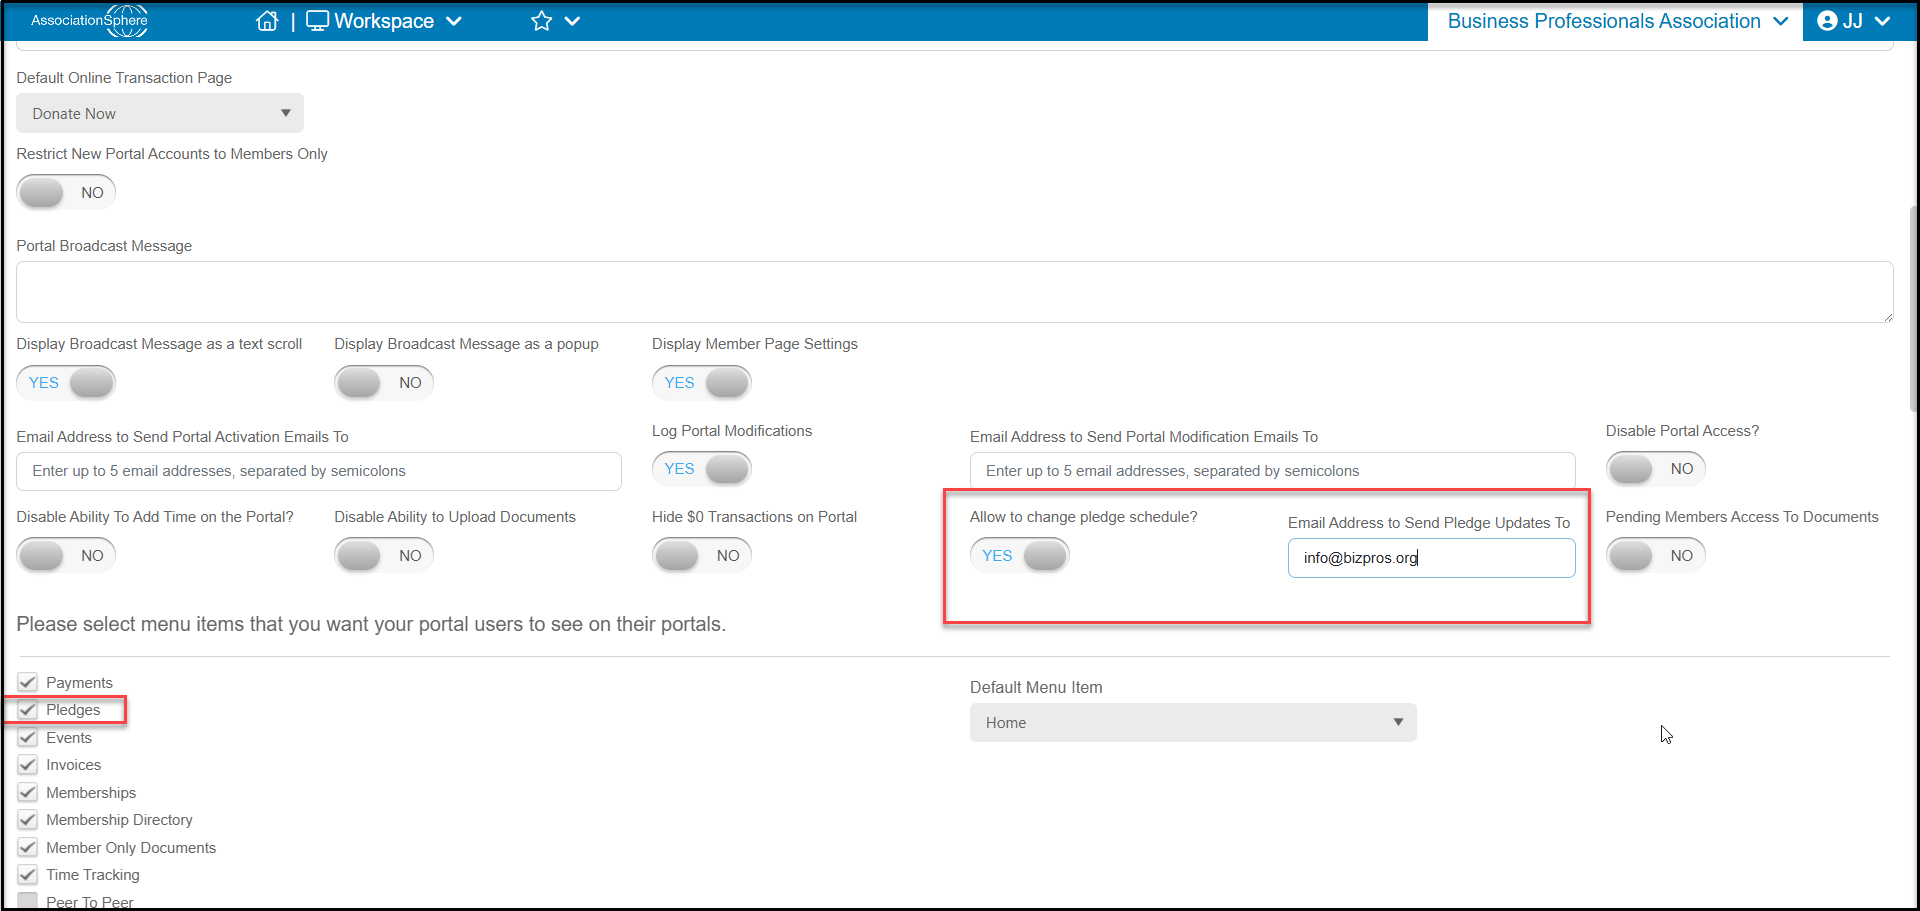
If you have the Advanced Portal activated and you have selected **Pledges** in the list of options available for the portal, your constituents will be able to see their pledges and pledge payments. You also have the option allow constituents to make changes to their pledge schedule and receive notifications for any changes made.
Note that pledges are created for any memberships that are paid in installments (monthly or quarterly recurring payments). Pledges are the internal processing used by the software to automatically charge the constituent's credit card for their membership payments.
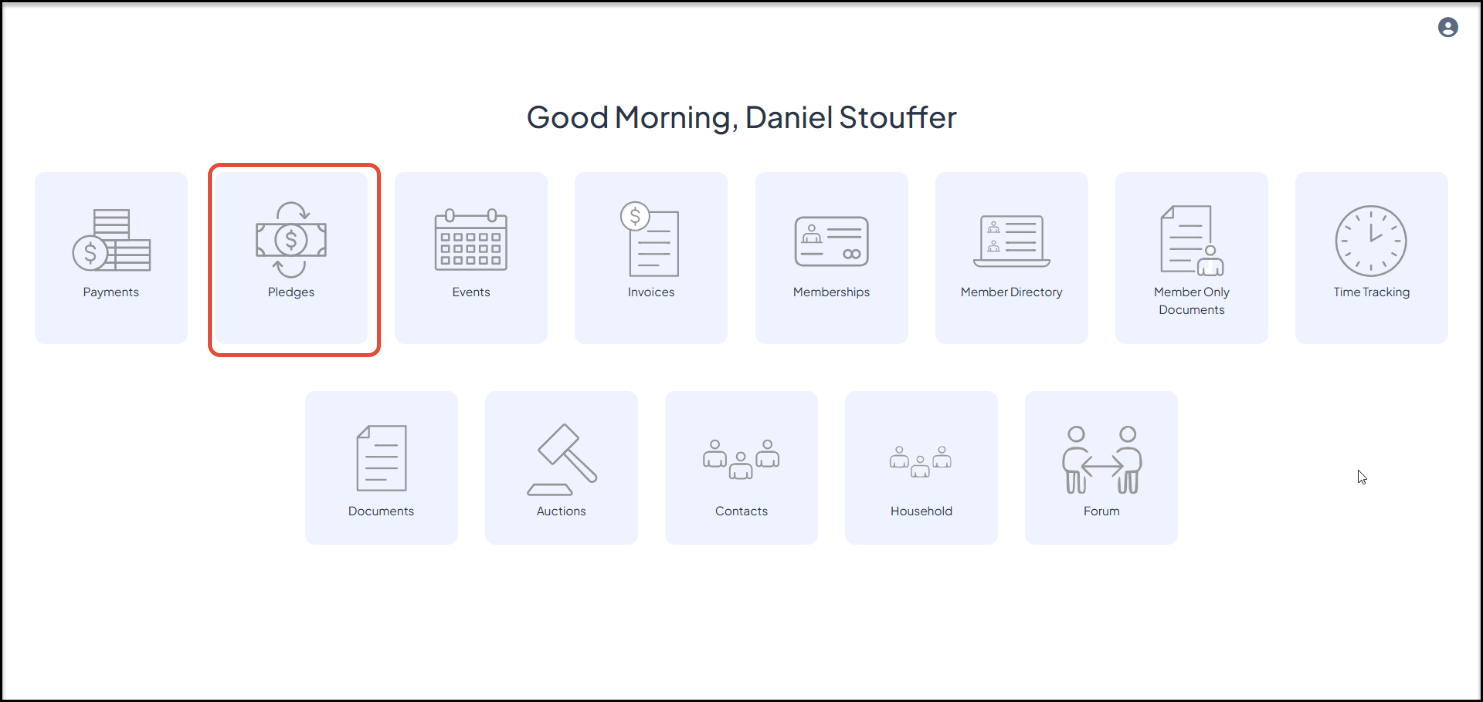
 After logging into the portal, the constituent can click on the Pledges icon to launch this feature.
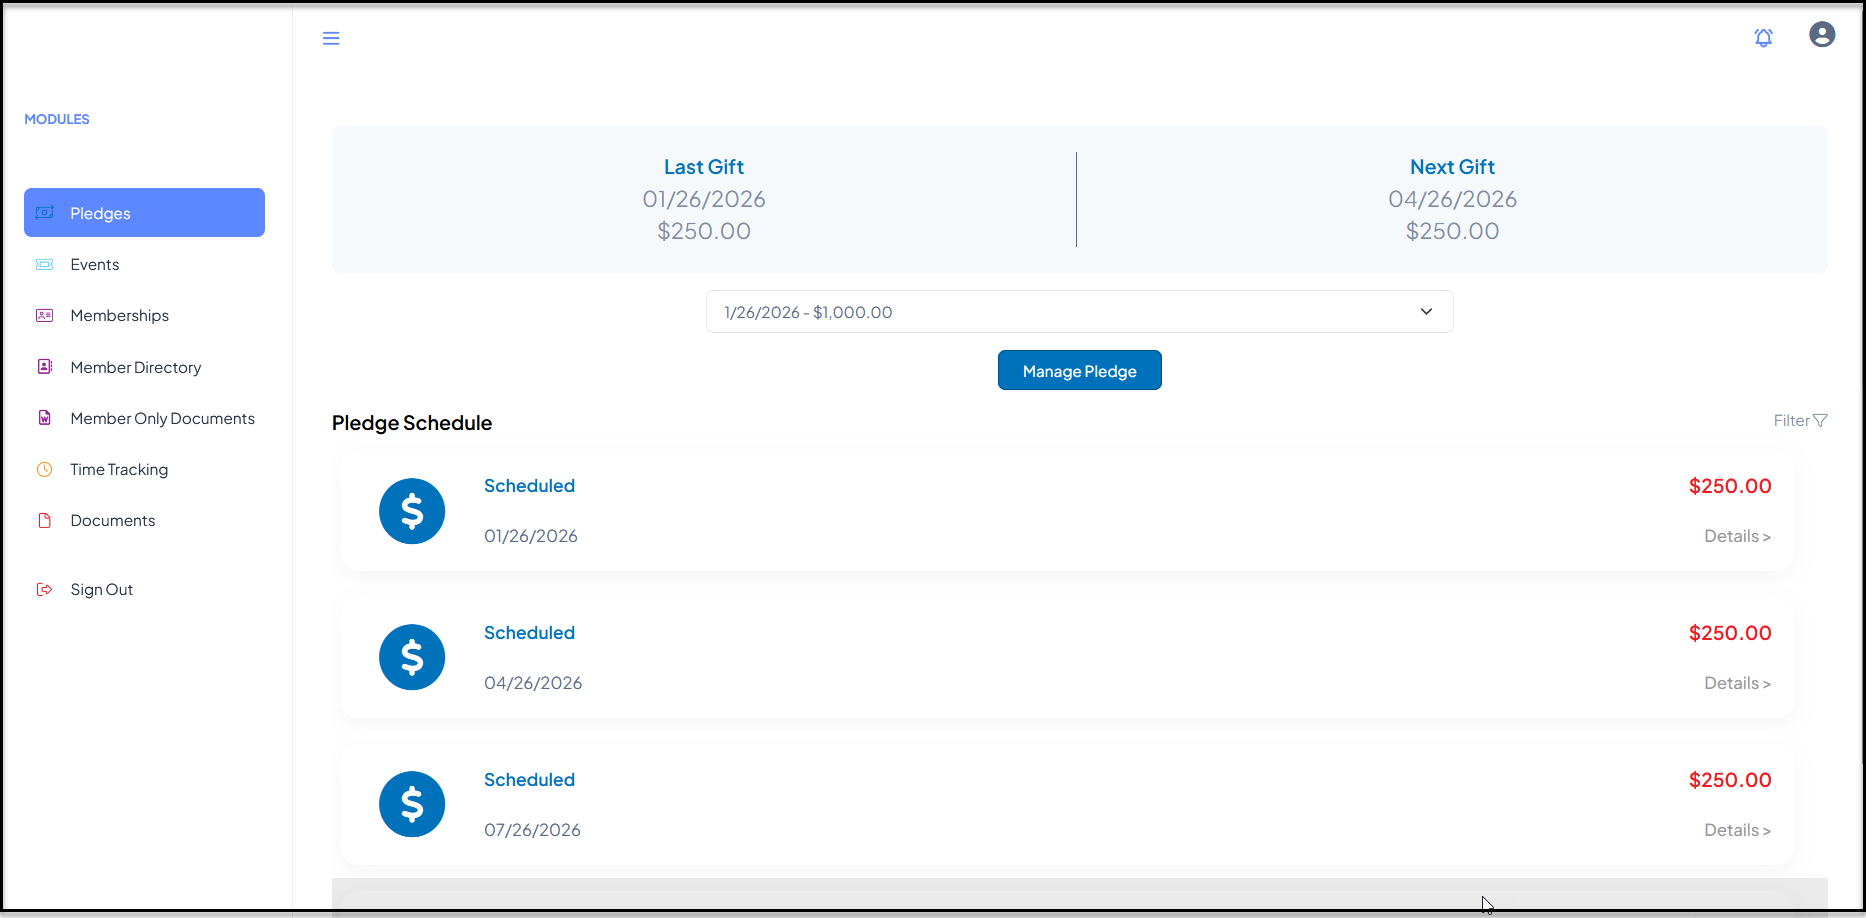
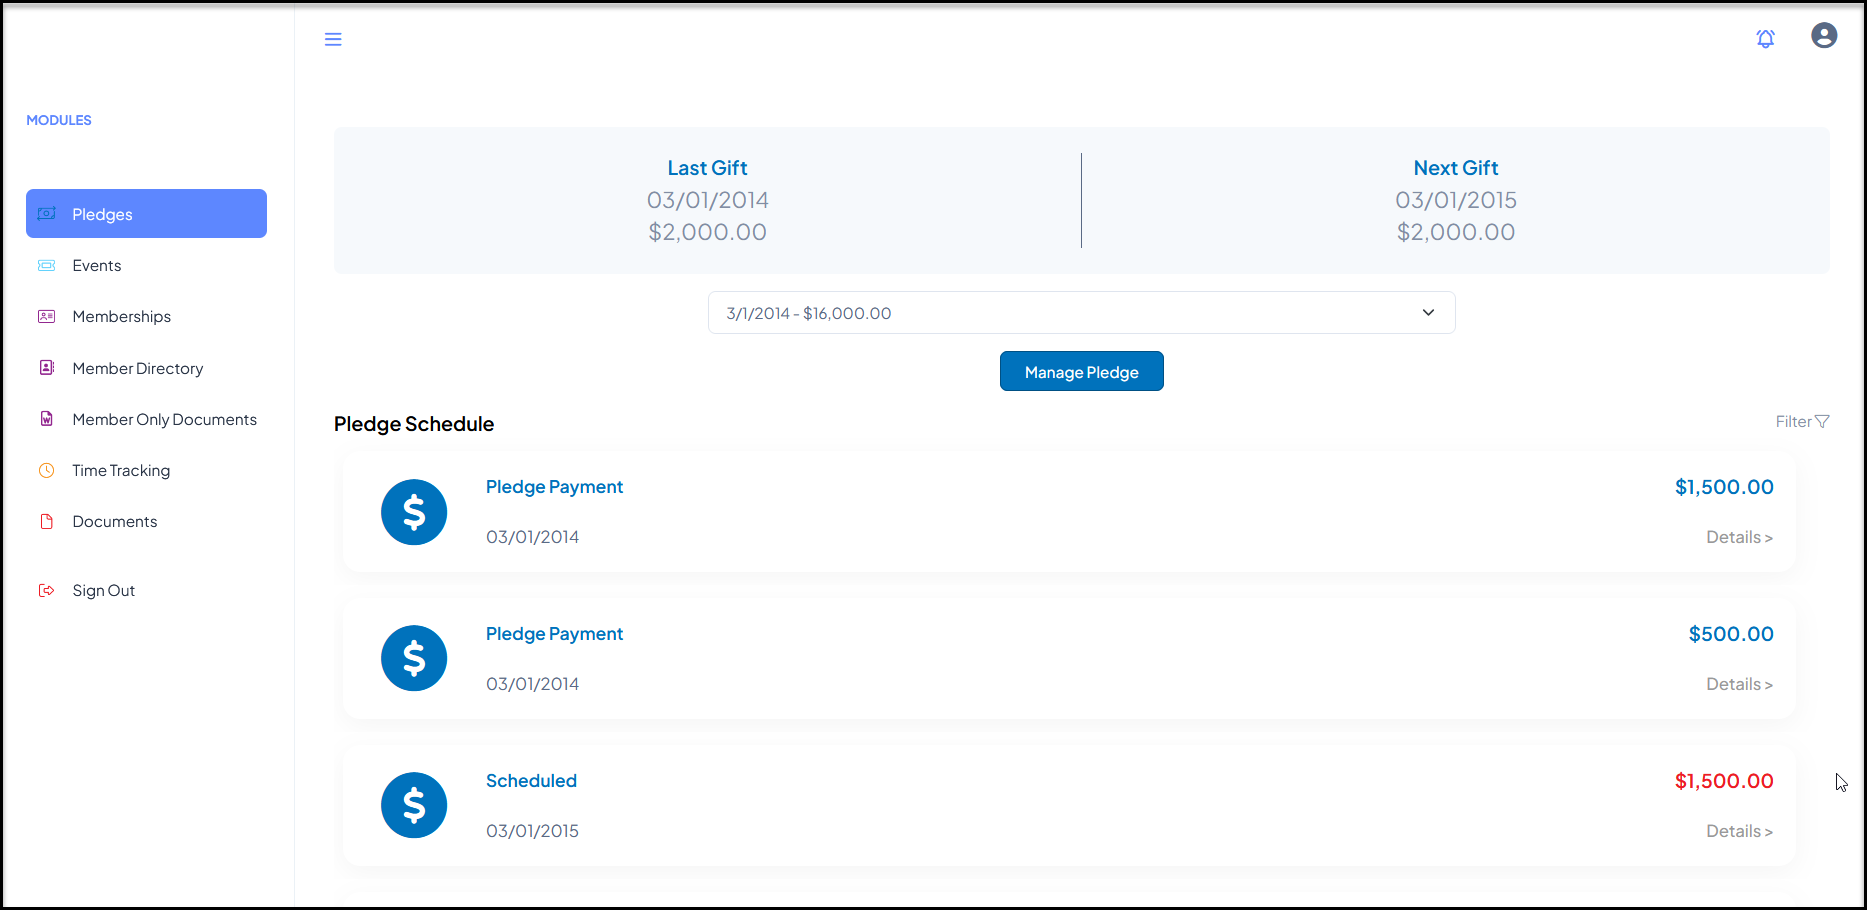
 After clicking on the Pledges icon, the constituent can see the date and amount of their last payment and the date and amount of their next payment due for the selected pledge. If the constituent has multiple pledges, they can be selected from the dropdown menu.
If you have activated the option to allow constituents to manage their pledges, you will see the blue **Manage Pledge**button. If you have not activated this feature, the blue button will not be shown.
After clicking on the Pledges icon, the constituent can see the date and amount of their last payment and the date and amount of their next payment due for the selected pledge. If the constituent has multiple pledges, they can be selected from the dropdown menu.
If you have activated the option to allow constituents to manage their pledges, you will see the blue **Manage Pledge**button. If you have not activated this feature, the blue button will not be shown.
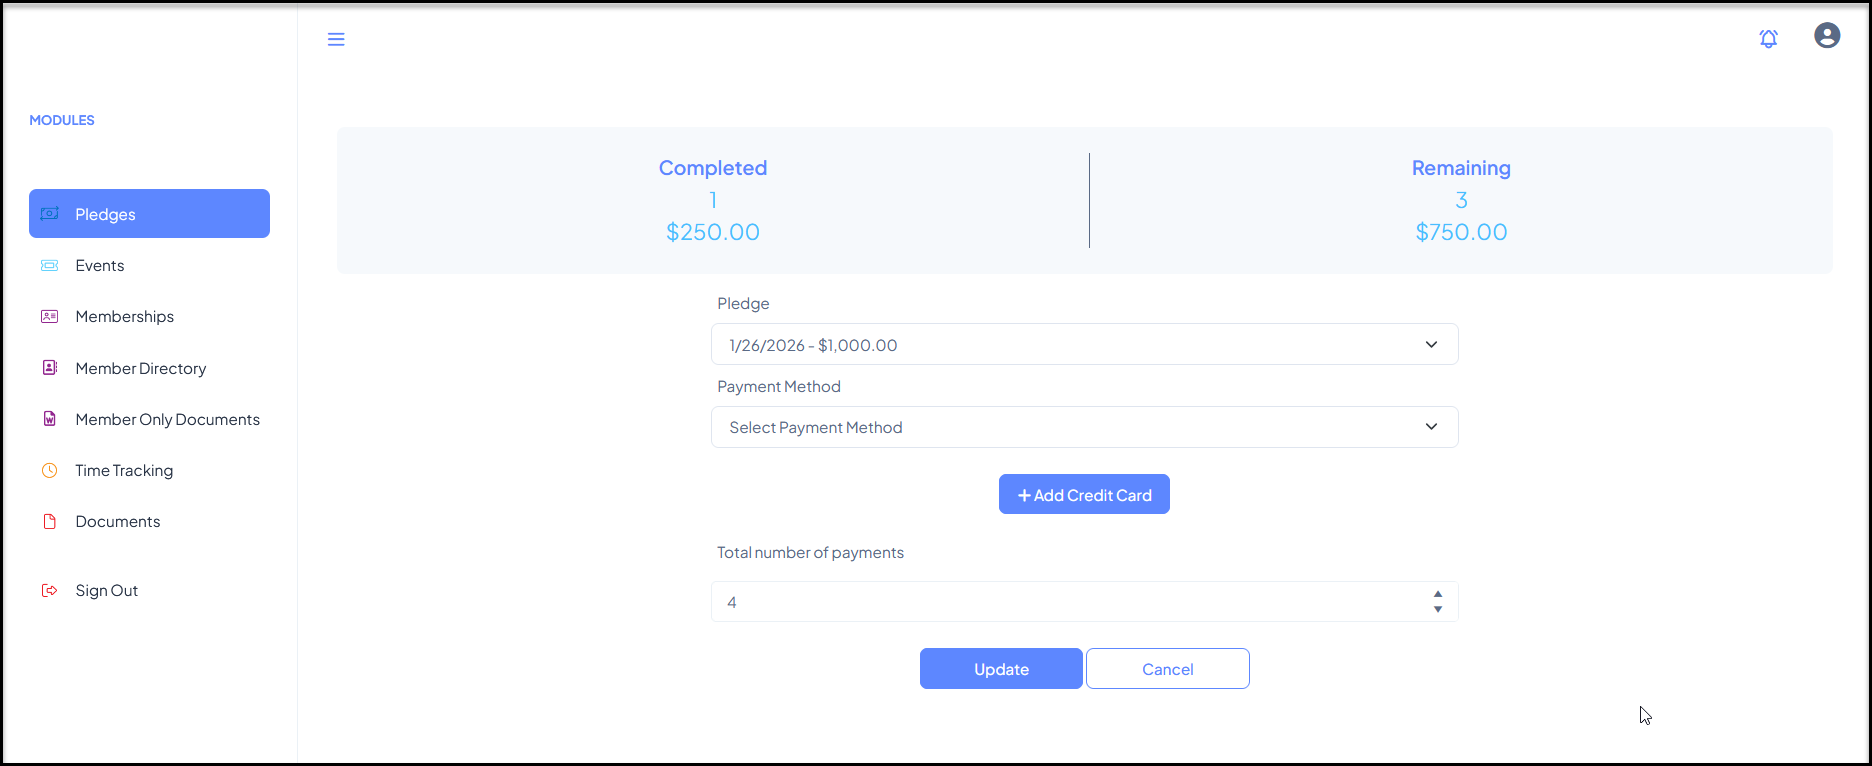
 Clicking on Manage Pledge will open a new window where the constituent can see how many payments have been made under **Completed**and how many are **Remaining** in their current pledge.
They can change which pledge they are viewing/managing using the dropdown menu under **Pledge**.
They can select a different payment method, or add a new one with **+Add Credit Card** to open the link to add a new card number. Once the new number is added, it can be selected for auto payments for this pledge.
They can also change the **Total number of payments**.
Once they have made their changes, they will click **Update** to save to changes.
Clicking on Manage Pledge will open a new window where the constituent can see how many payments have been made under **Completed**and how many are **Remaining** in their current pledge.
They can change which pledge they are viewing/managing using the dropdown menu under **Pledge**.
They can select a different payment method, or add a new one with **+Add Credit Card** to open the link to add a new card number. Once the new number is added, it can be selected for auto payments for this pledge.
They can also change the **Total number of payments**.
Once they have made their changes, they will click **Update** to save to changes.
 Pledge payments that have been received are shown as a Pledge Payment with the payment date under the Pledge Schedule and the amount is shown in blue.
Those that are due show as Scheduled with a due date listed below. The amount is shown in red.
Pledge payments that have been received are shown as a Pledge Payment with the payment date under the Pledge Schedule and the amount is shown in blue.
Those that are due show as Scheduled with a due date listed below. The amount is shown in red.
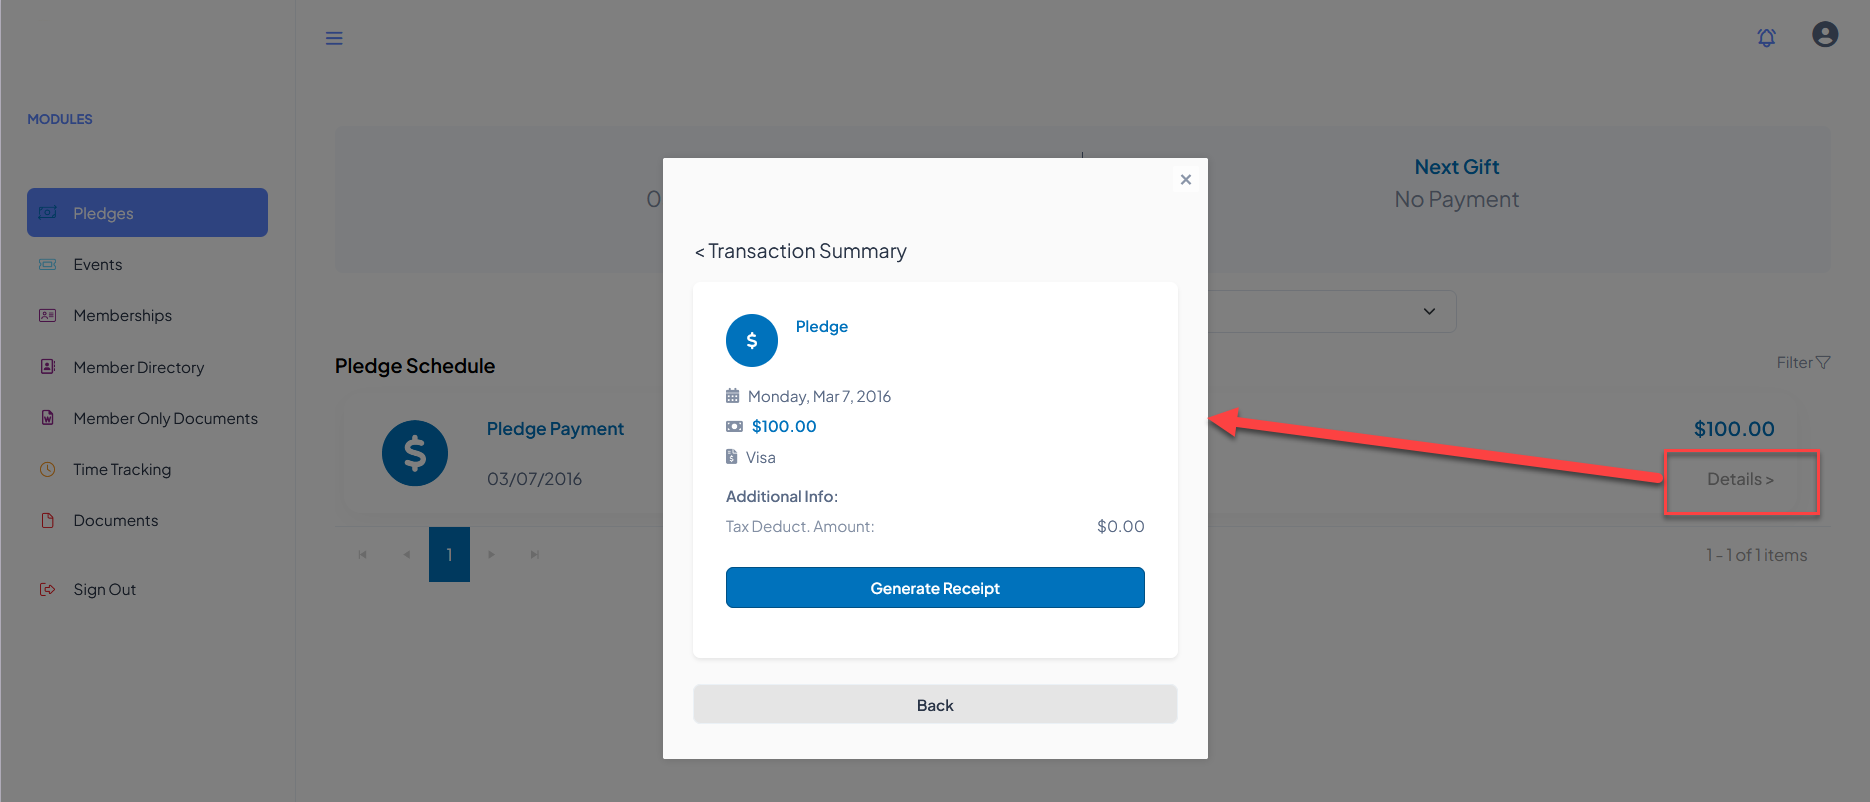
 For payments that have been made, clicking on the Details link will open a new window to **Generate a Receipt** for the transaction.
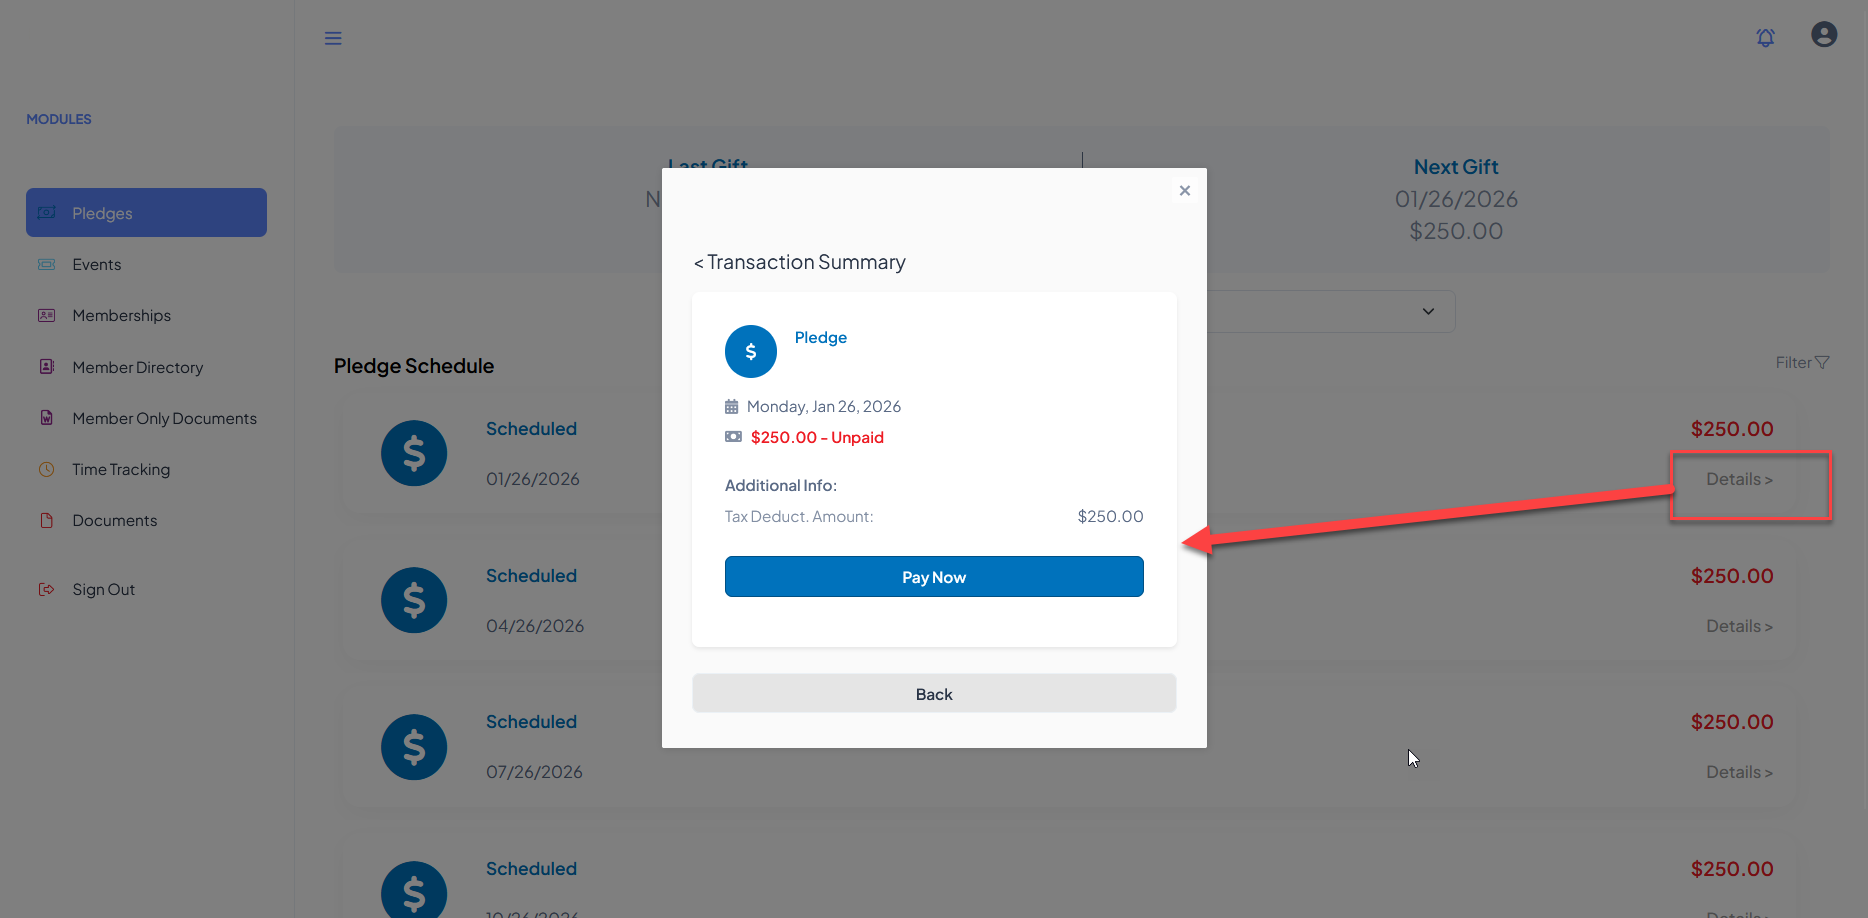
 For pledge payments that are due, clicking the Details link will open a window with a**Pay Now** option.
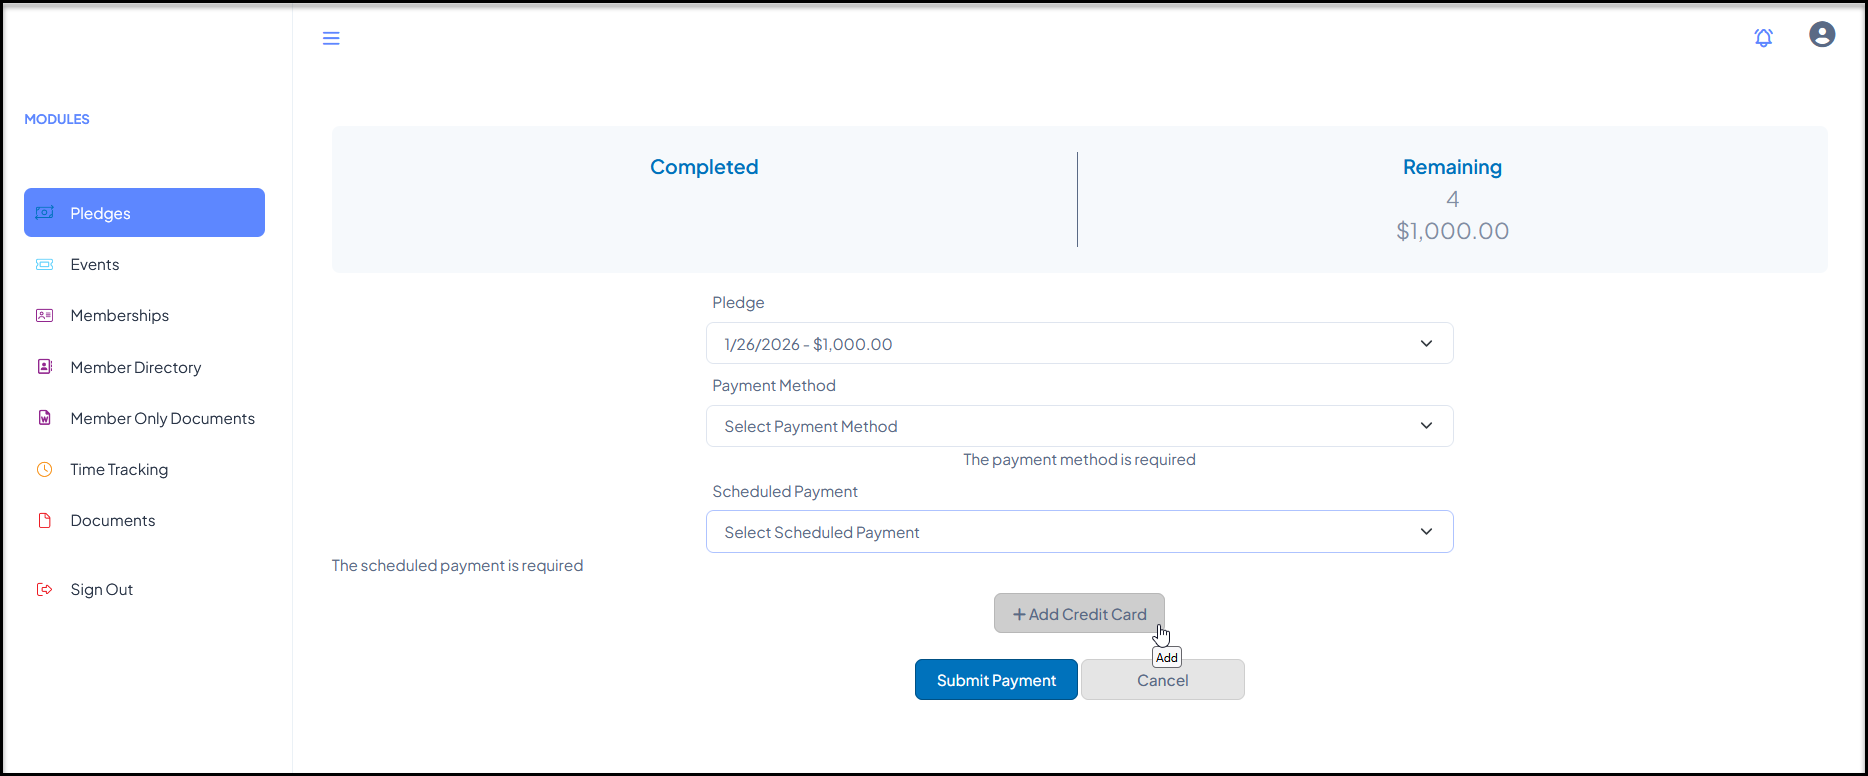
 Clicking on **Pay Now** will open a window to choose the pledge to pay under **Pledge**.
Select which **Payment Method**to use if there are card numbers on file.
And then select which upcoming payment to pay under **Scheduled Payment**. Only one upcoming payment can be selected at a time.
If no credit cards are on file, they can click on **+Add Credit Card** to add the information, then choose it for payment.
Once the selections are made, they can click on**Submit Payment**to complete the transaction.
Clicking on **Pay Now** will open a window to choose the pledge to pay under **Pledge**.
Select which **Payment Method**to use if there are card numbers on file.
And then select which upcoming payment to pay under **Scheduled Payment**. Only one upcoming payment can be selected at a time.
If no credit cards are on file, they can click on **+Add Credit Card** to add the information, then choose it for payment.
Once the selections are made, they can click on**Submit Payment**to complete the transaction.
 The user can navigate to another module using the links on the left menu or go to the homepage by clicking on the organization's logo in the top left corner.