# Running Background Checks on Individual Constituents
> Source: https://support.associationsphere.com/running-background-checks-on-individual-constituents | Updated: 2025-03-31T15:24:00Z
Background checks can now be run on any **Individual Constituent** appearing in your Constituent grid.
### User Permissions
Before running a background check, a user may need their **User Security Settings** updated.
Admin users can modify these settings by navigating to a user’s profile under **Account > User Settings**. Once the user is selected, hover over **View/Edit** and click **Security Settings**.
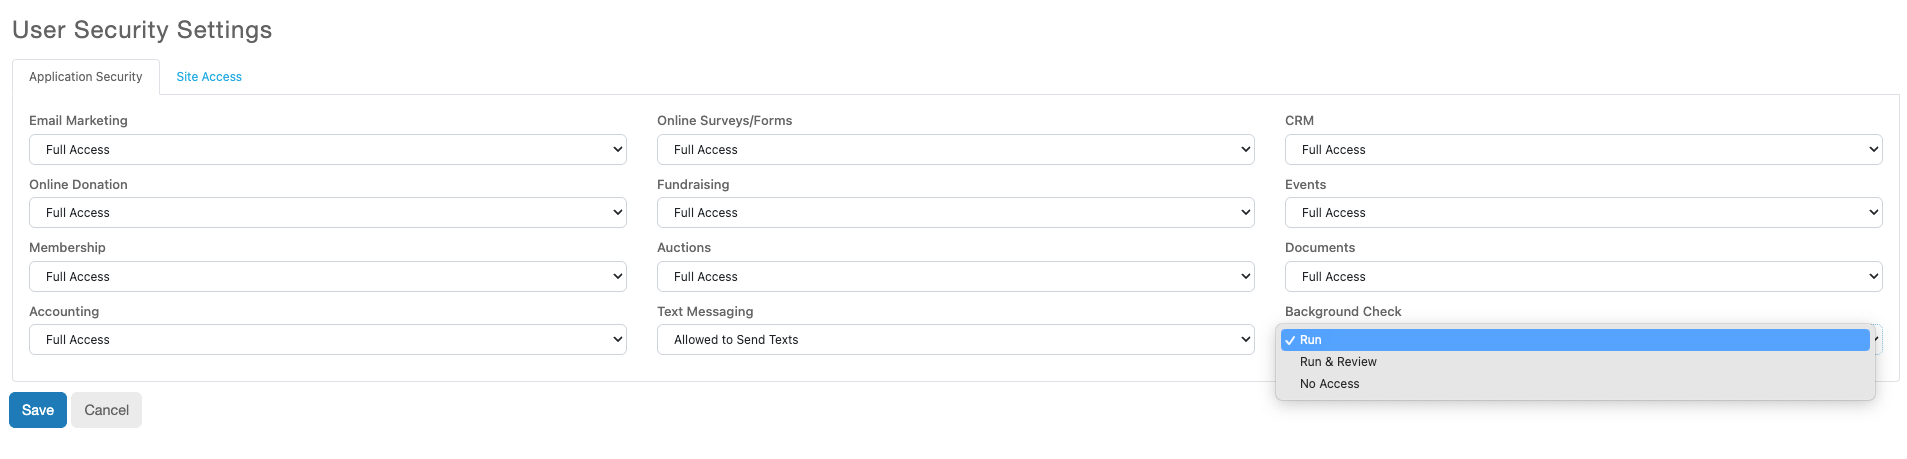
On the **User Security Settings** page, you'll find a dropdown labeled **"Background Check"** with three options:
- **Run** – Users can initiate a background check but **cannot** view the results.
- **Run & Review** – Users can initiate background checks **and** view the results.
- **No Access** – Background check fields and pages are completely hidden from the user.
 ---
### Initiating a Background Check
Once permissions are properly set (to **Run** or **Run & Review**), users can:
1. Navigate to the **Constituent grid**.
2. Click the **inline Tools menu** for any **Individual Constituent**.
3. Select **"Background Check"** to launch the check submission dialog.
---
### Initiating a Background Check
Once permissions are properly set (to **Run** or **Run & Review**), users can:
1. Navigate to the **Constituent grid**.
2. Click the **inline Tools menu** for any **Individual Constituent**.
3. Select **"Background Check"** to launch the check submission dialog.
 ---
### Background Check Dialog
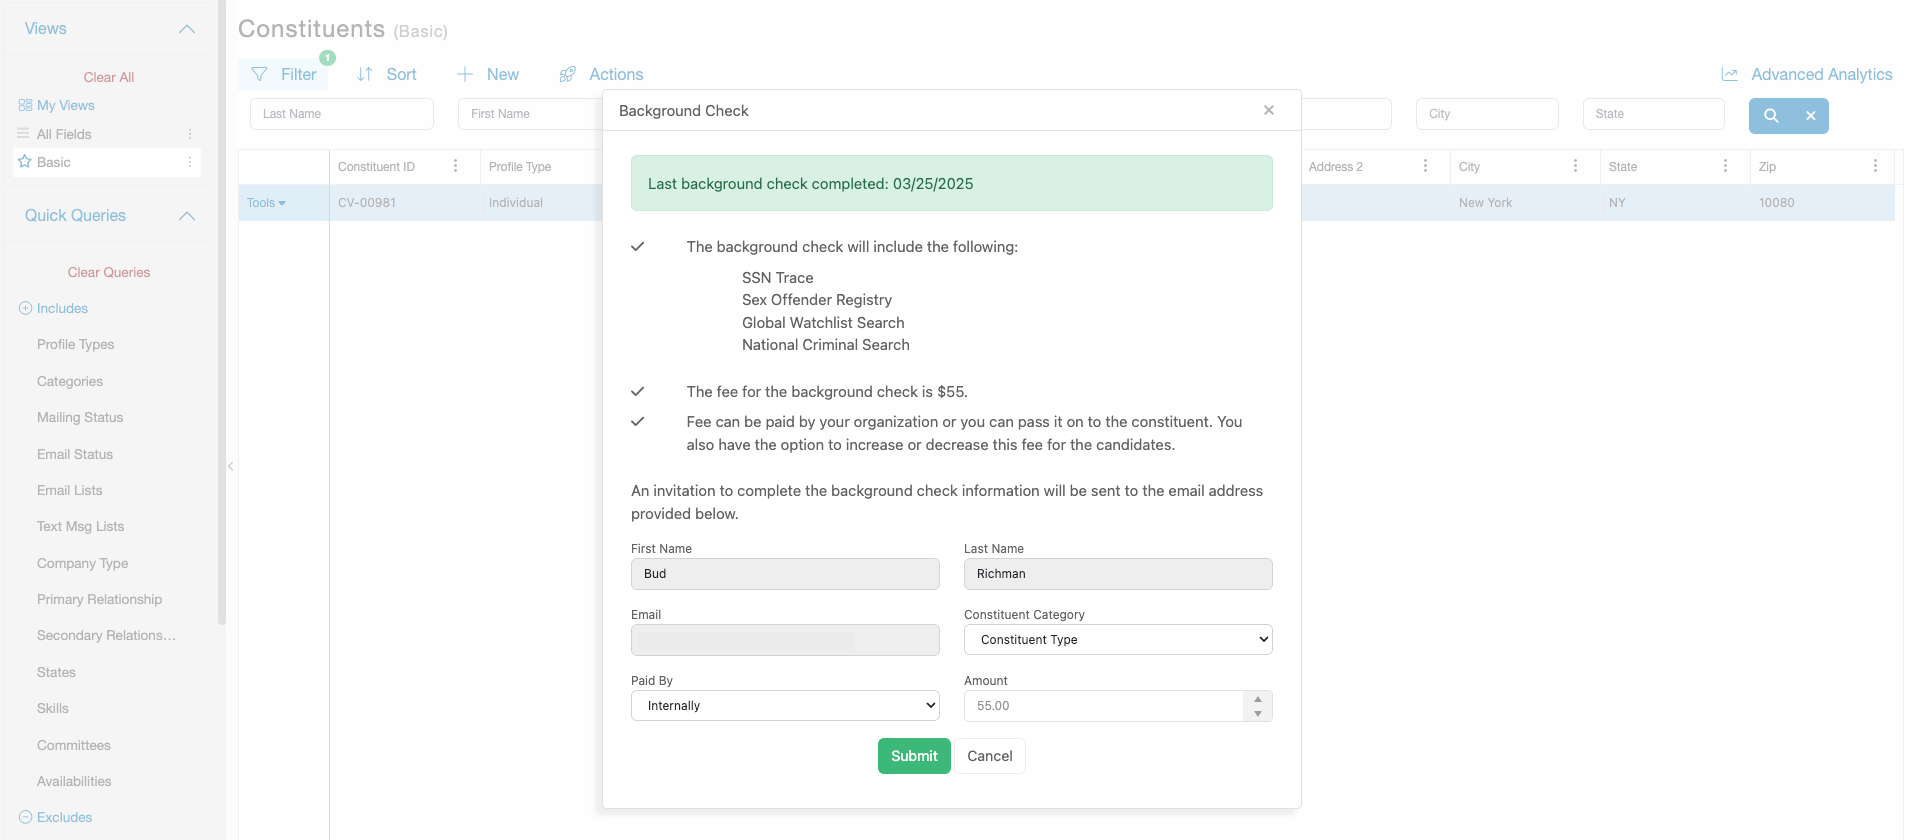
This dialog will show:
- A breakdown of what's included in the background check.
- The cost of the check.
- The name and email of the constituent.
- A **“Constituent Category”** dropdown to optionally assign a category to the constituent as part of the process.
---
### Background Check Dialog
This dialog will show:
- A breakdown of what's included in the background check.
- The cost of the check.
- The name and email of the constituent.
- A **“Constituent Category”** dropdown to optionally assign a category to the constituent as part of the process.
 ---
### Payment Options
Two dropdown fields determine **how payment is handled**:
- **Paid By**
- **Internally** – The organization covers the cost; the constituent is not charged.
- **By Candidate** – The constituent pays for the background check.
If **“By Candidate”** is selected, an additional field appears to enter the **amount to charge**.
---
### Submission and Email Process
Once all fields are completed, click **Submit** to start the automated process.
- If **By Candidate** is selected, the system sends an **automated email** to the constituent.
The email:
- Notifies them of the background check request.
- Includes the cost.
- Provides a link to the **online payment page**, where they can pay the custom amount.
- If **Internally** is selected (or payment has already been made), the email will:
- Include instructions for completing the background check.
- Provide a link to submit the necessary information and consent.
---
### After Submission
Once the constituent completes the required steps, the background check will run. You will be **notified** once the results are available.
You can access the results in two ways:
- Navigate to **Workspace > CRM > Background Check Results**, or
- Open the constituent’s record and click the **“Background Check”** tab.
---
### Payment Options
Two dropdown fields determine **how payment is handled**:
- **Paid By**
- **Internally** – The organization covers the cost; the constituent is not charged.
- **By Candidate** – The constituent pays for the background check.
If **“By Candidate”** is selected, an additional field appears to enter the **amount to charge**.
---
### Submission and Email Process
Once all fields are completed, click **Submit** to start the automated process.
- If **By Candidate** is selected, the system sends an **automated email** to the constituent.
The email:
- Notifies them of the background check request.
- Includes the cost.
- Provides a link to the **online payment page**, where they can pay the custom amount.
- If **Internally** is selected (or payment has already been made), the email will:
- Include instructions for completing the background check.
- Provide a link to submit the necessary information and consent.
---
### After Submission
Once the constituent completes the required steps, the background check will run. You will be **notified** once the results are available.
You can access the results in two ways:
- Navigate to **Workspace > CRM > Background Check Results**, or
- Open the constituent’s record and click the **“Background Check”** tab.
 ---
### Understanding the Results Grid
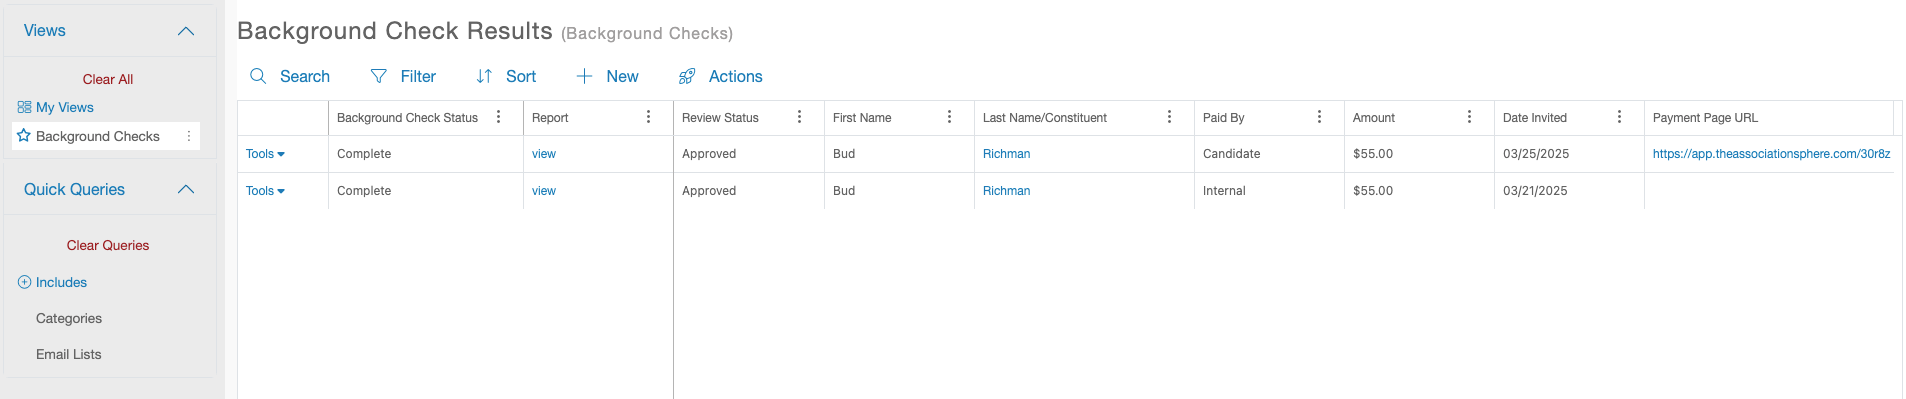
The results grid includes:
- **Status** – Complete, Expired, or Pending
- **Payment Page URL** – The payment link (helpful if the constituent didn’t receive or misplaced the email)
- **Invitation URL** – The link for the constituent to submit their background check info and approval
- **Review Completed Date** – When the background check was reviewed
- **Report** – Click the **“View”** link to open the results
---
### Understanding the Results Grid
The results grid includes:
- **Status** – Complete, Expired, or Pending
- **Payment Page URL** – The payment link (helpful if the constituent didn’t receive or misplaced the email)
- **Invitation URL** – The link for the constituent to submit their background check info and approval
- **Review Completed Date** – When the background check was reviewed
- **Report** – Click the **“View”** link to open the results
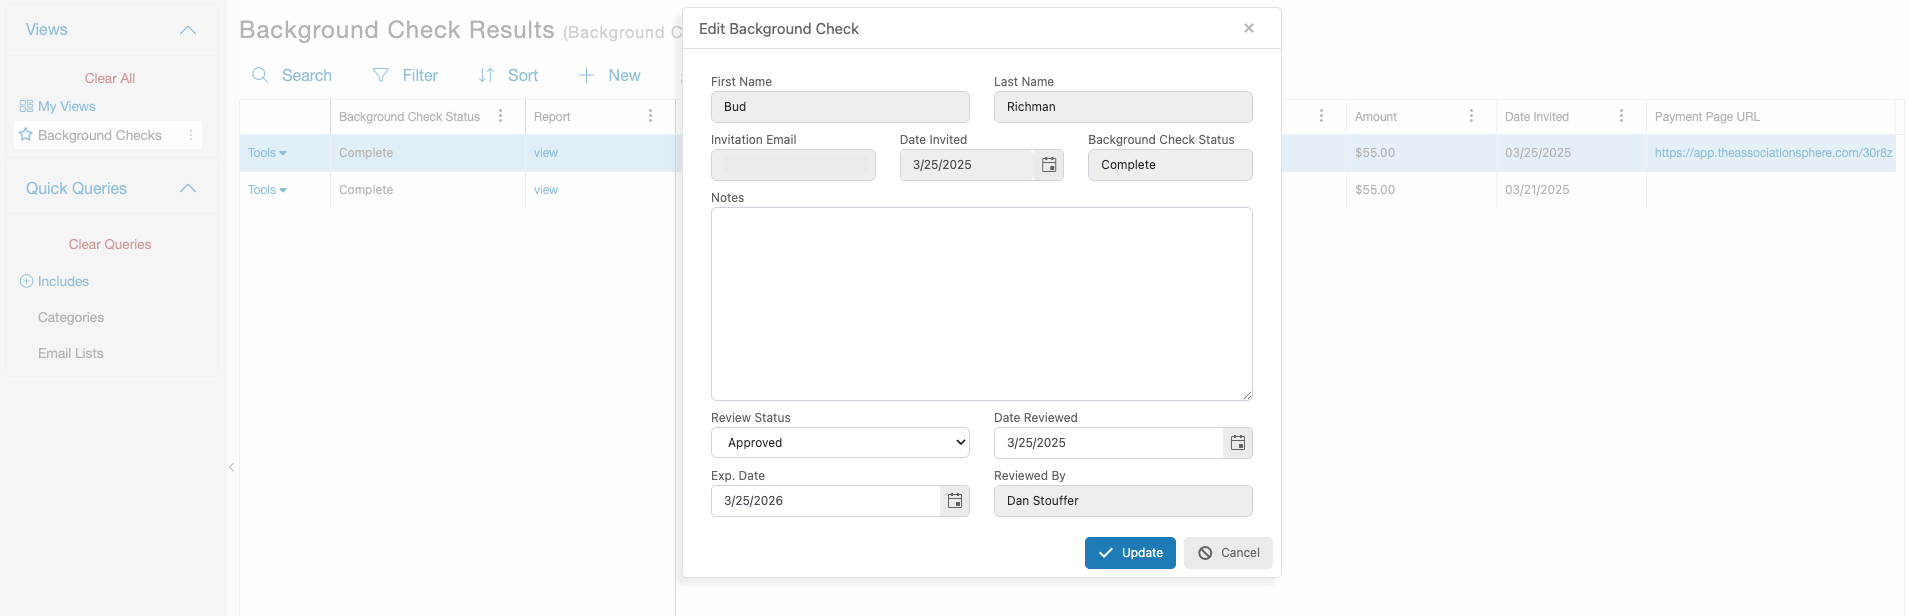
 You’ll also see an **Edit**option by expanding the**Tools**menu on the grid row. Clicking this opens a dialog where you can:
- Add notes
- Record your own **Review Status**, **Review Date**, and **Expiration Date**
- Click **Update** to save
> **Note:** A background check can be run on a constituent **as many times as needed**.
You’ll also see an **Edit**option by expanding the**Tools**menu on the grid row. Clicking this opens a dialog where you can:
- Add notes
- Record your own **Review Status**, **Review Date**, and **Expiration Date**
- Click **Update** to save
> **Note:** A background check can be run on a constituent **as many times as needed**.