# Table Assignments Overview
> Source: https://support.associationsphere.com/table-assignments-overview | Updated: 2024-10-11T21:13:28Z
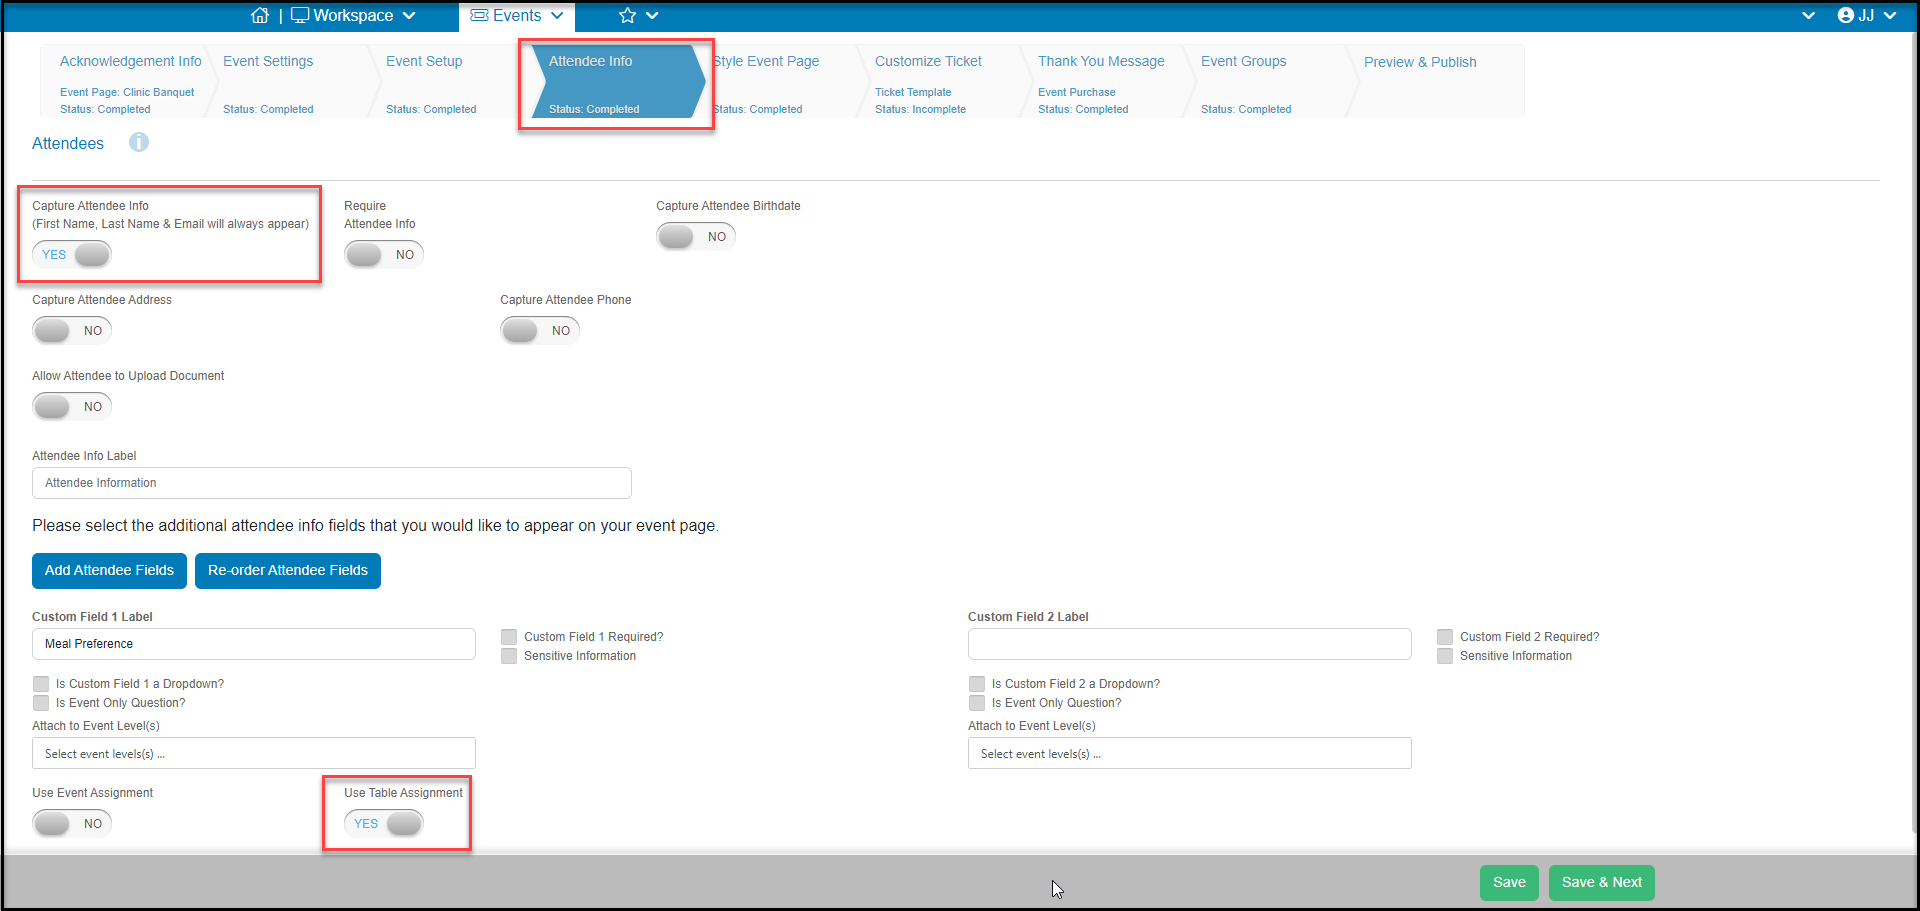
The table assignments feature allows you to create a table map of your venue and assign attendees to a table. The table assignments feature must be activated on the event page on the Attendee Info tab.
- Mark the toggle **Capture Attendee Info** to **YES**.
- Mark the toggle**Use Table Assignment**to **YES**.
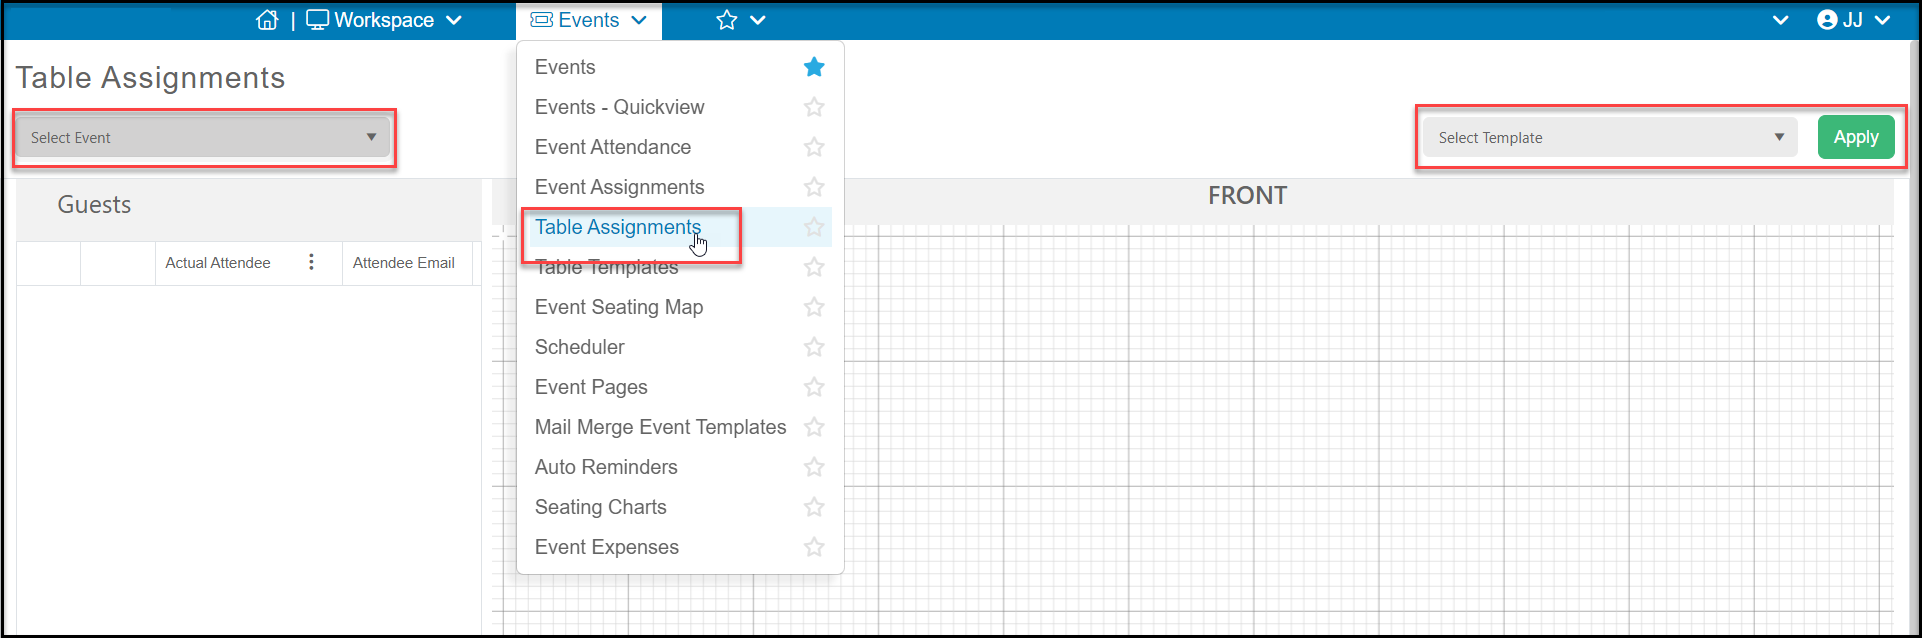
 Once you have this activated, you will be able to see your event on the Events Module > Table Assignments page. On the left side of the page you will select your event from the **Select Event** dropdown. With the event selected, if you would like to use a table template you have created, you can select it from the dropdown menu under Select Template on the right side of the page. Click **Apply** to upload the template. You can learn more about table templates here:
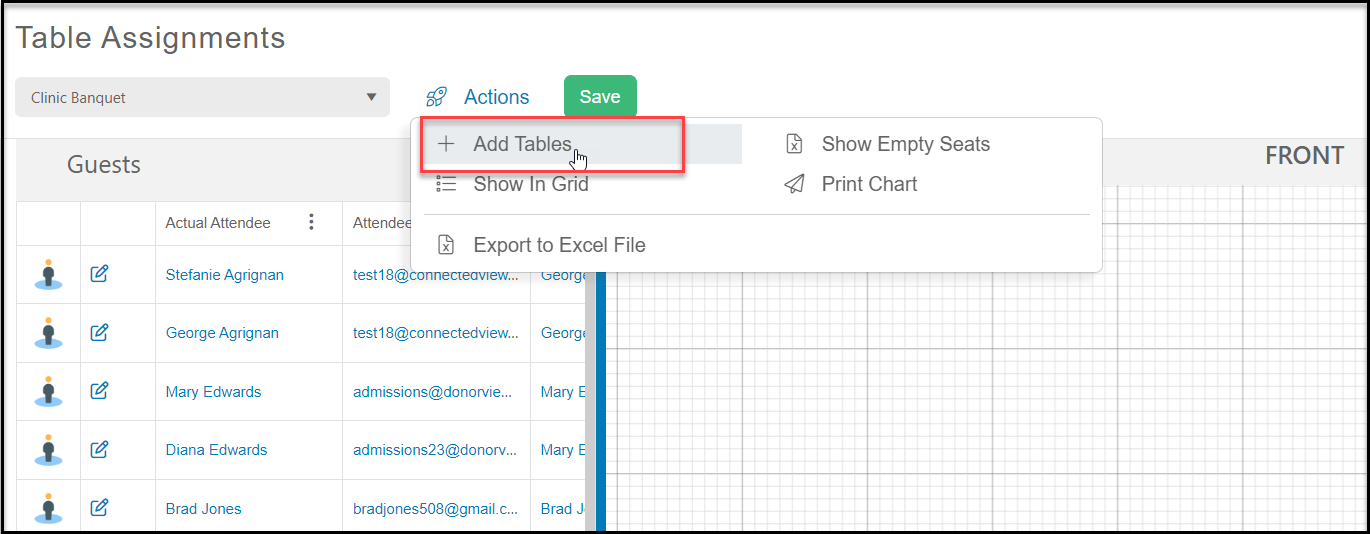
 With the event selected, ff you have not selected a table template, you can start adding tables from scratch by hovering over the Actions menu and clicking on **+ Add Tables.**
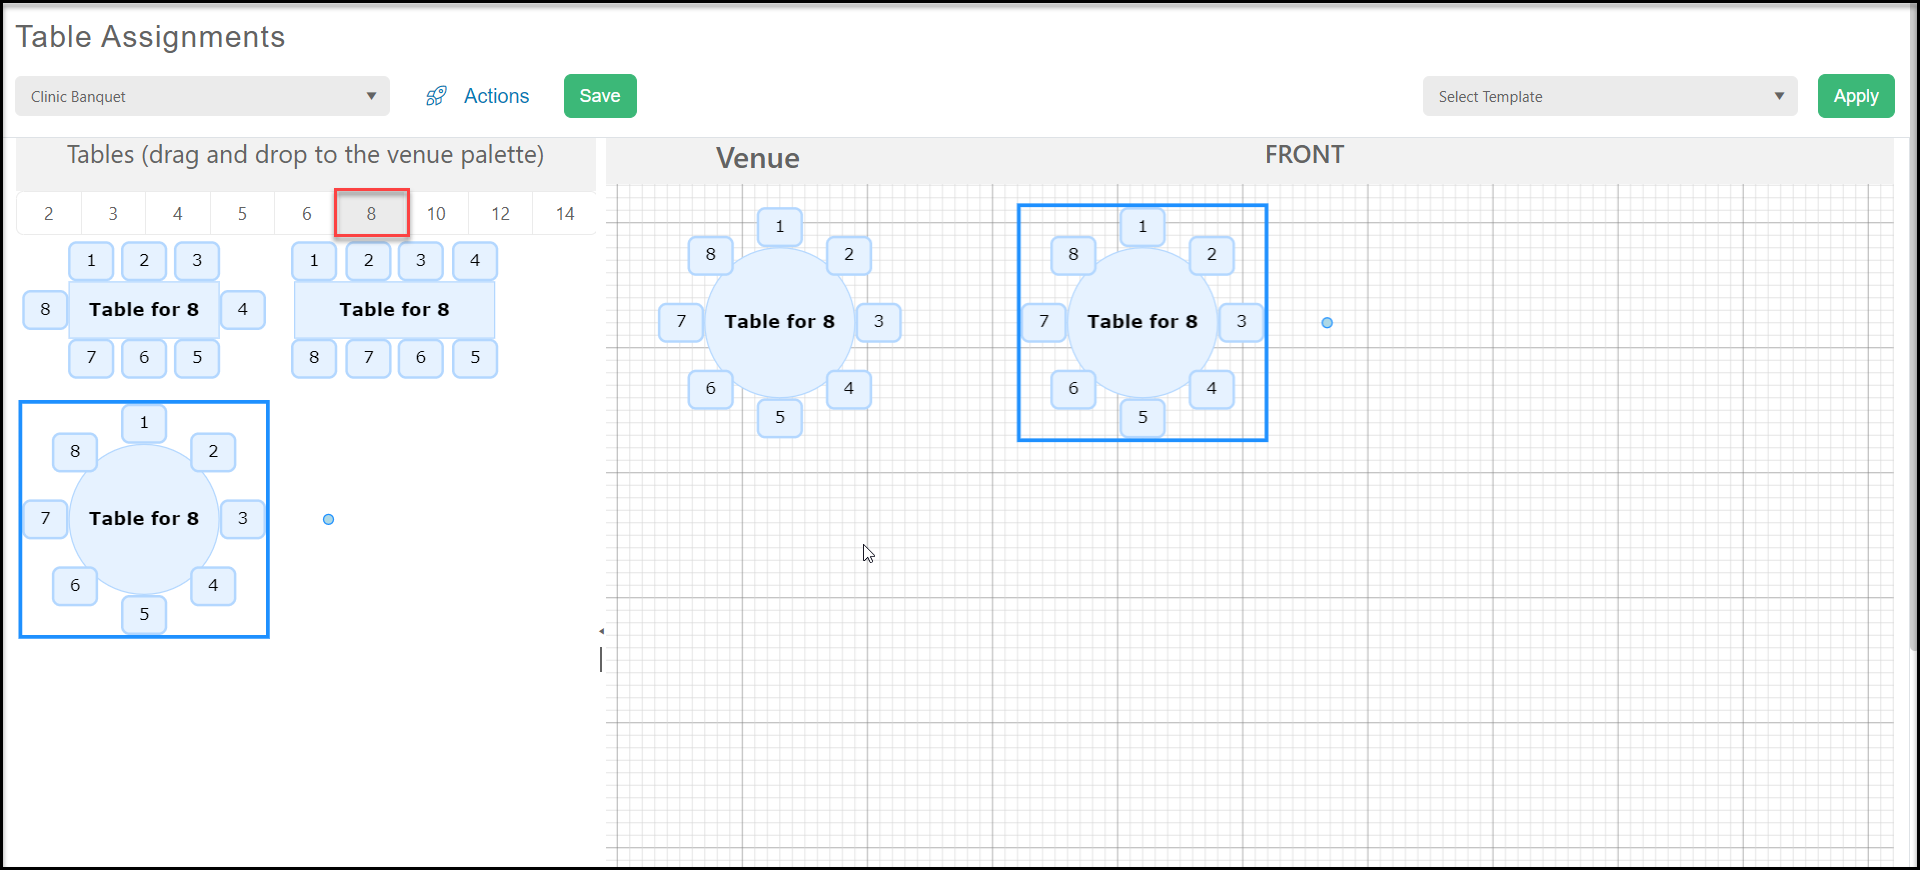
 Select the number of seats at each table and you will be able to choose the table shape and seating layout for the tables. Click on the desired table and drag and drop it onto the grid to the right. You can add a name to the table by clicking on the "Table for \*" label, then entering the name you wish for that table. Click anywhere else on the grid to save it.
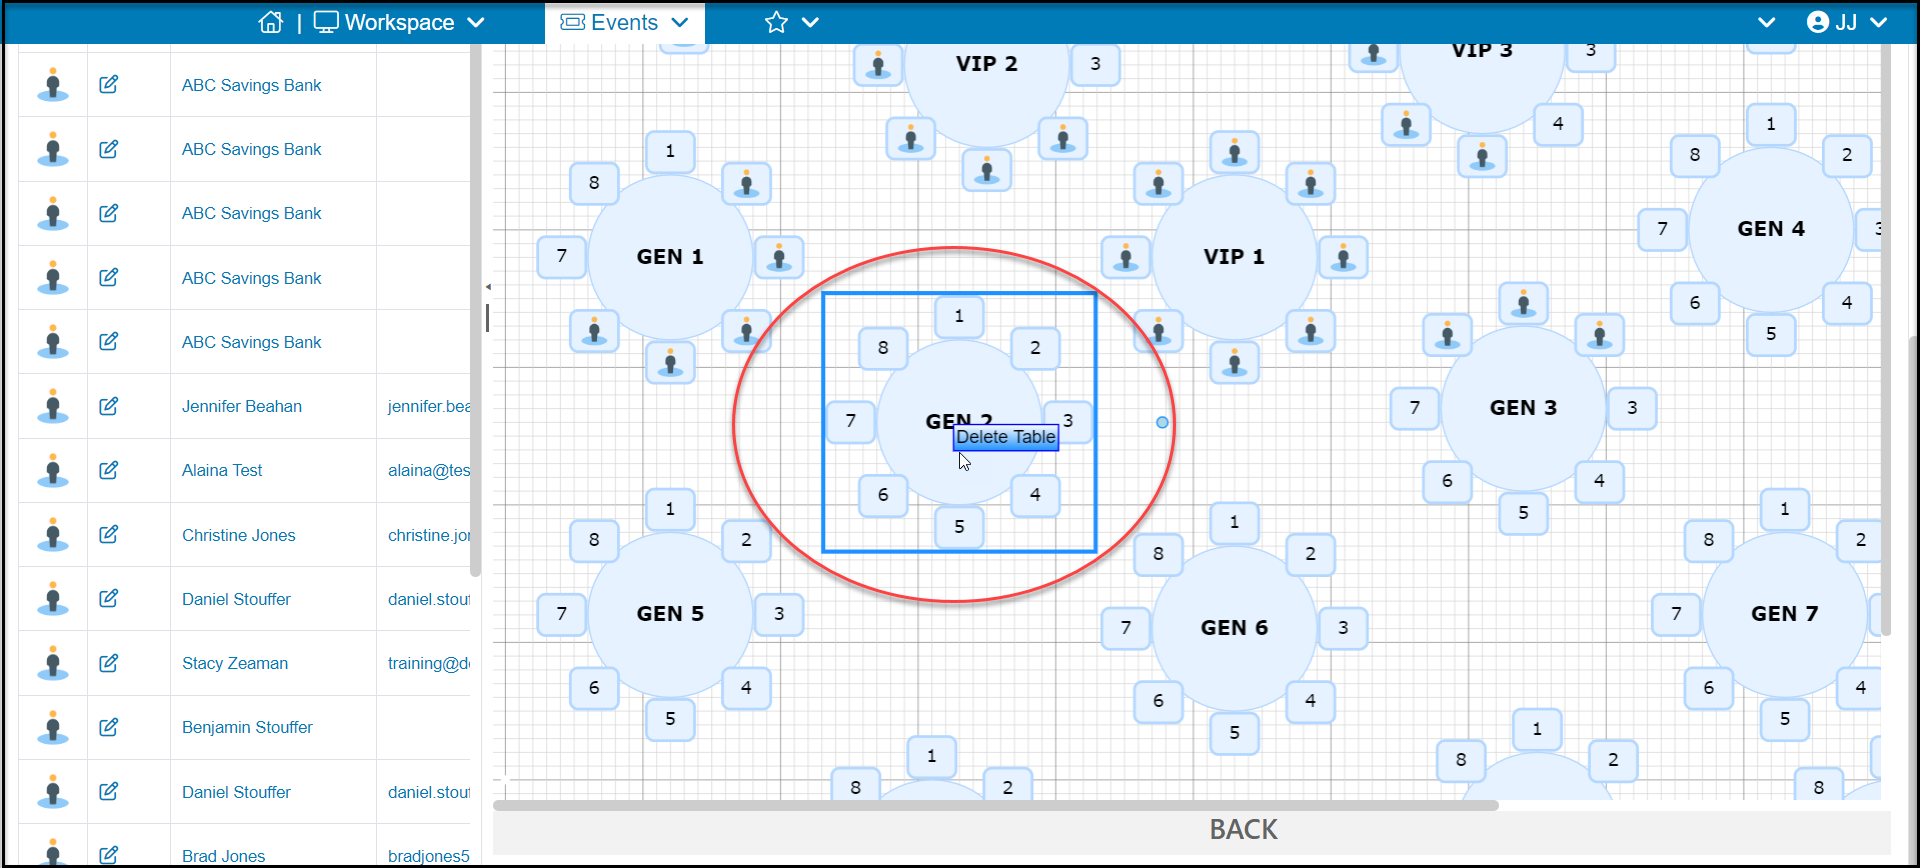
 You can also delete a tab by right clicking on the table. Click on **Delete Table** to delete it from the chart layout. Be sure to click on **Save** to update the chart.
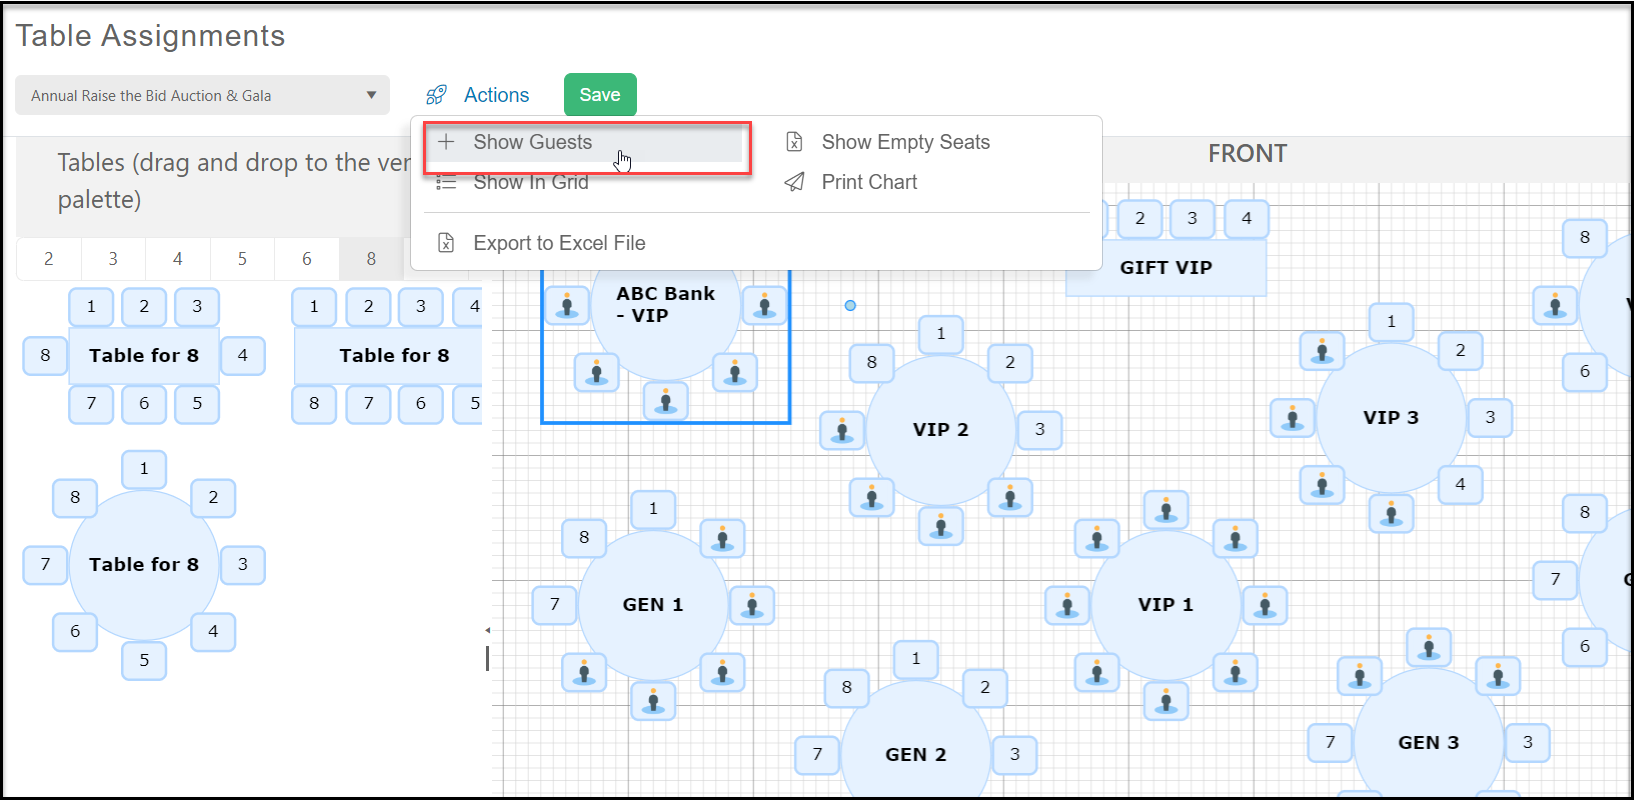
 With a few tables added to your layout, you can then switch to the attendee list by hovering over the Actions menu and clicking on **+ Show Guests.**
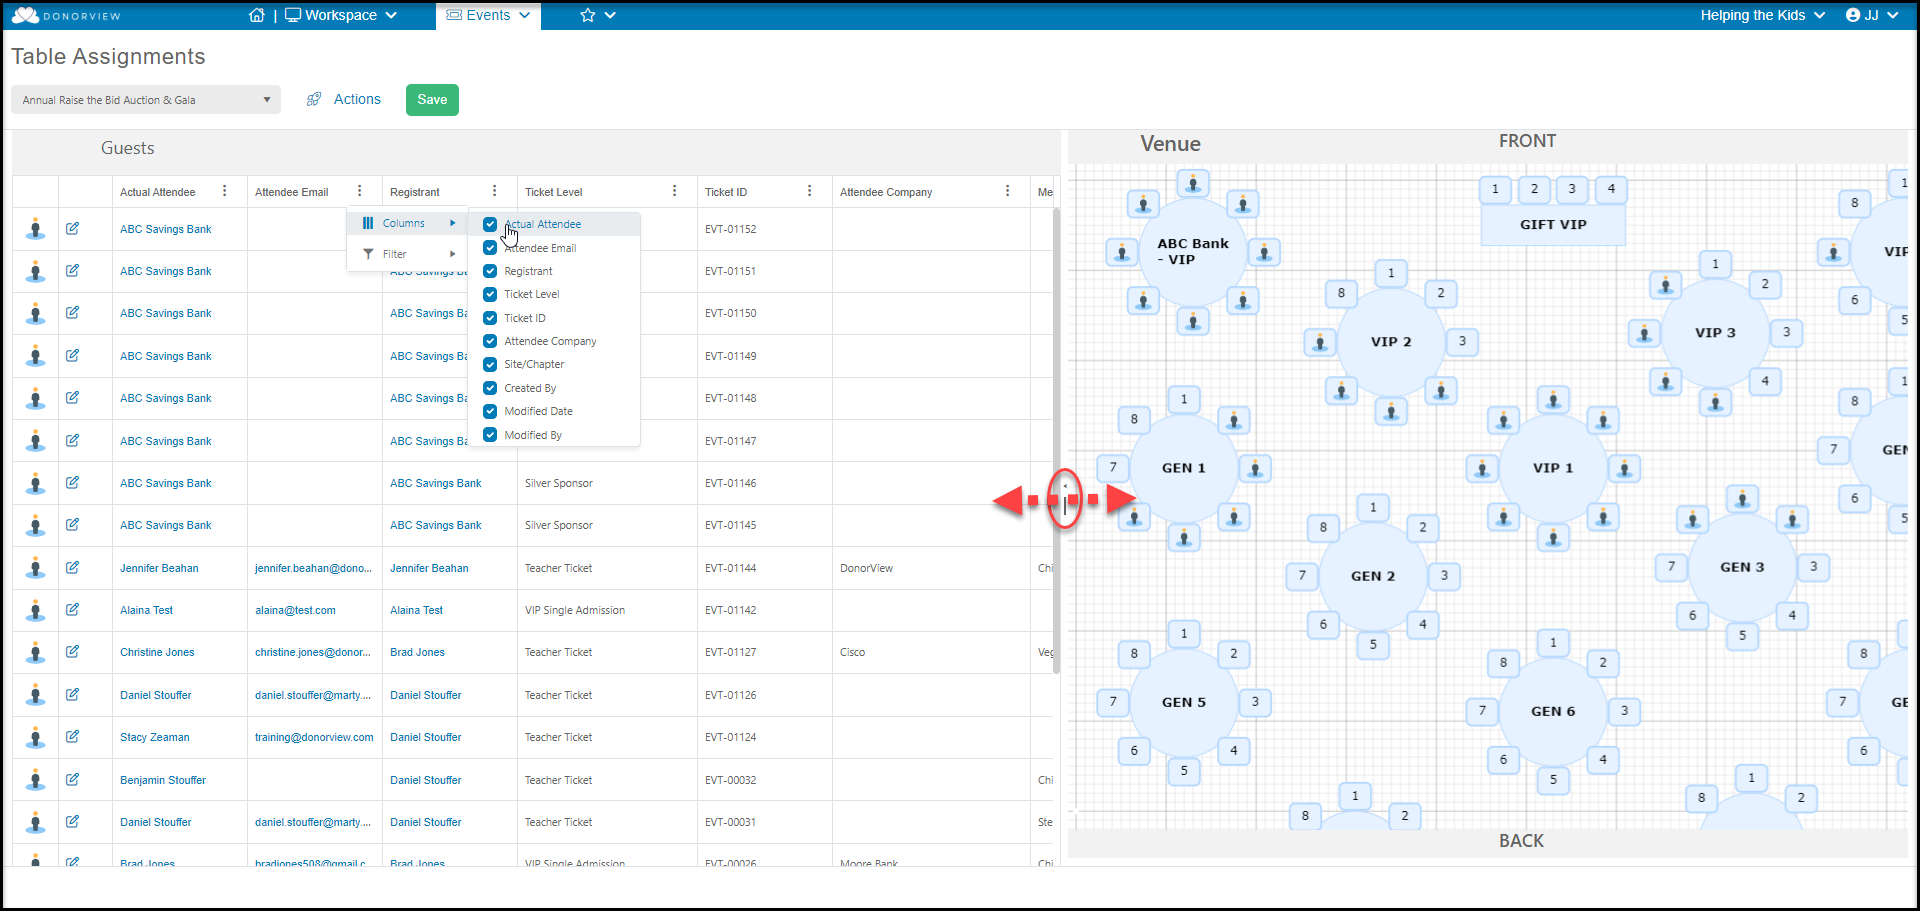
 Once you have started selling tickets for your event, you will see the list of attendees on the left side.
- You can use the center slide bar to see more information about the attendees.
- You can use the column settings (three dots) onany column to turn on/off columns and add filters as desired.
- There is also an edit icon on the left side of each row if you need to edit any attendee information.
Once you have started selling tickets for your event, you will see the list of attendees on the left side.
- You can use the center slide bar to see more information about the attendees.
- You can use the column settings (three dots) onany column to turn on/off columns and add filters as desired.
- There is also an edit icon on the left side of each row if you need to edit any attendee information.
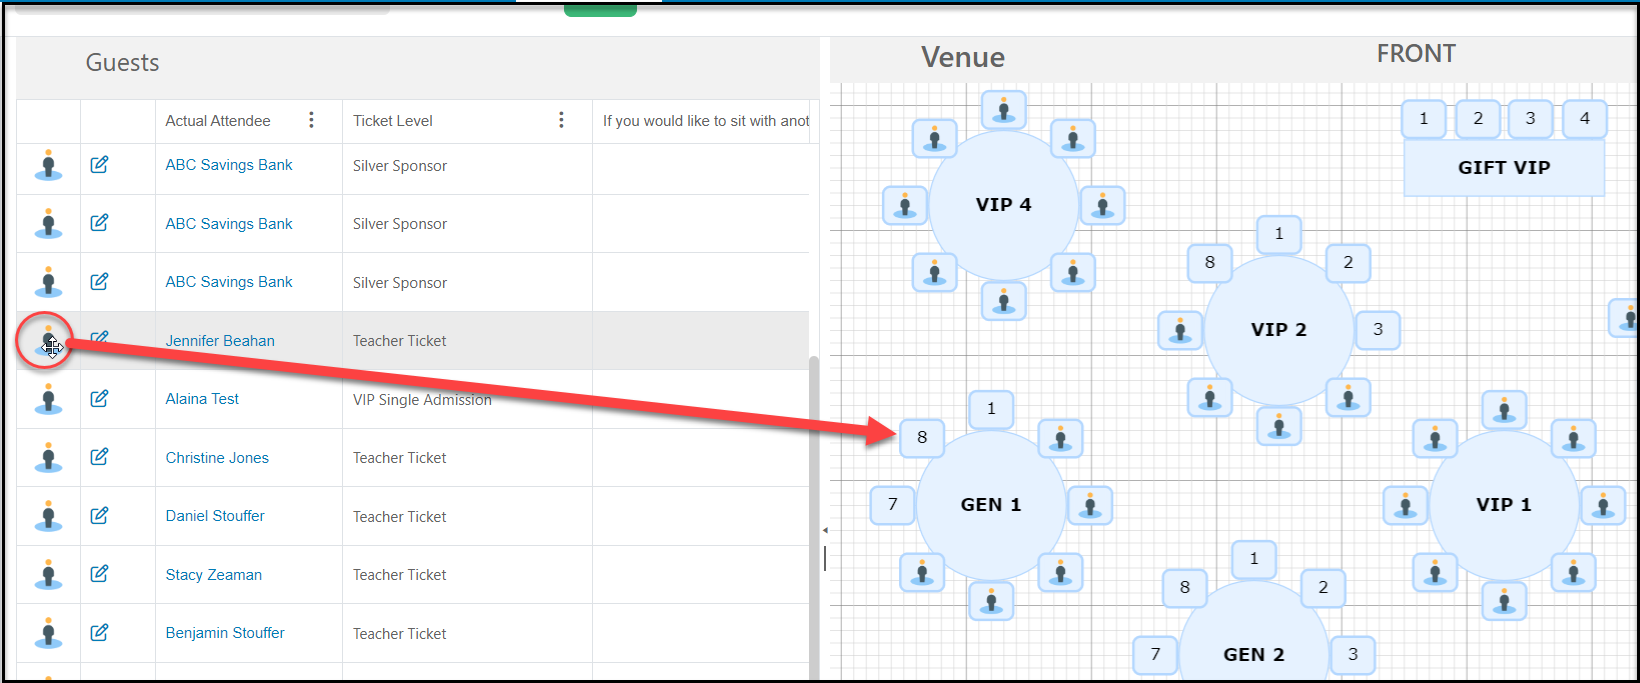
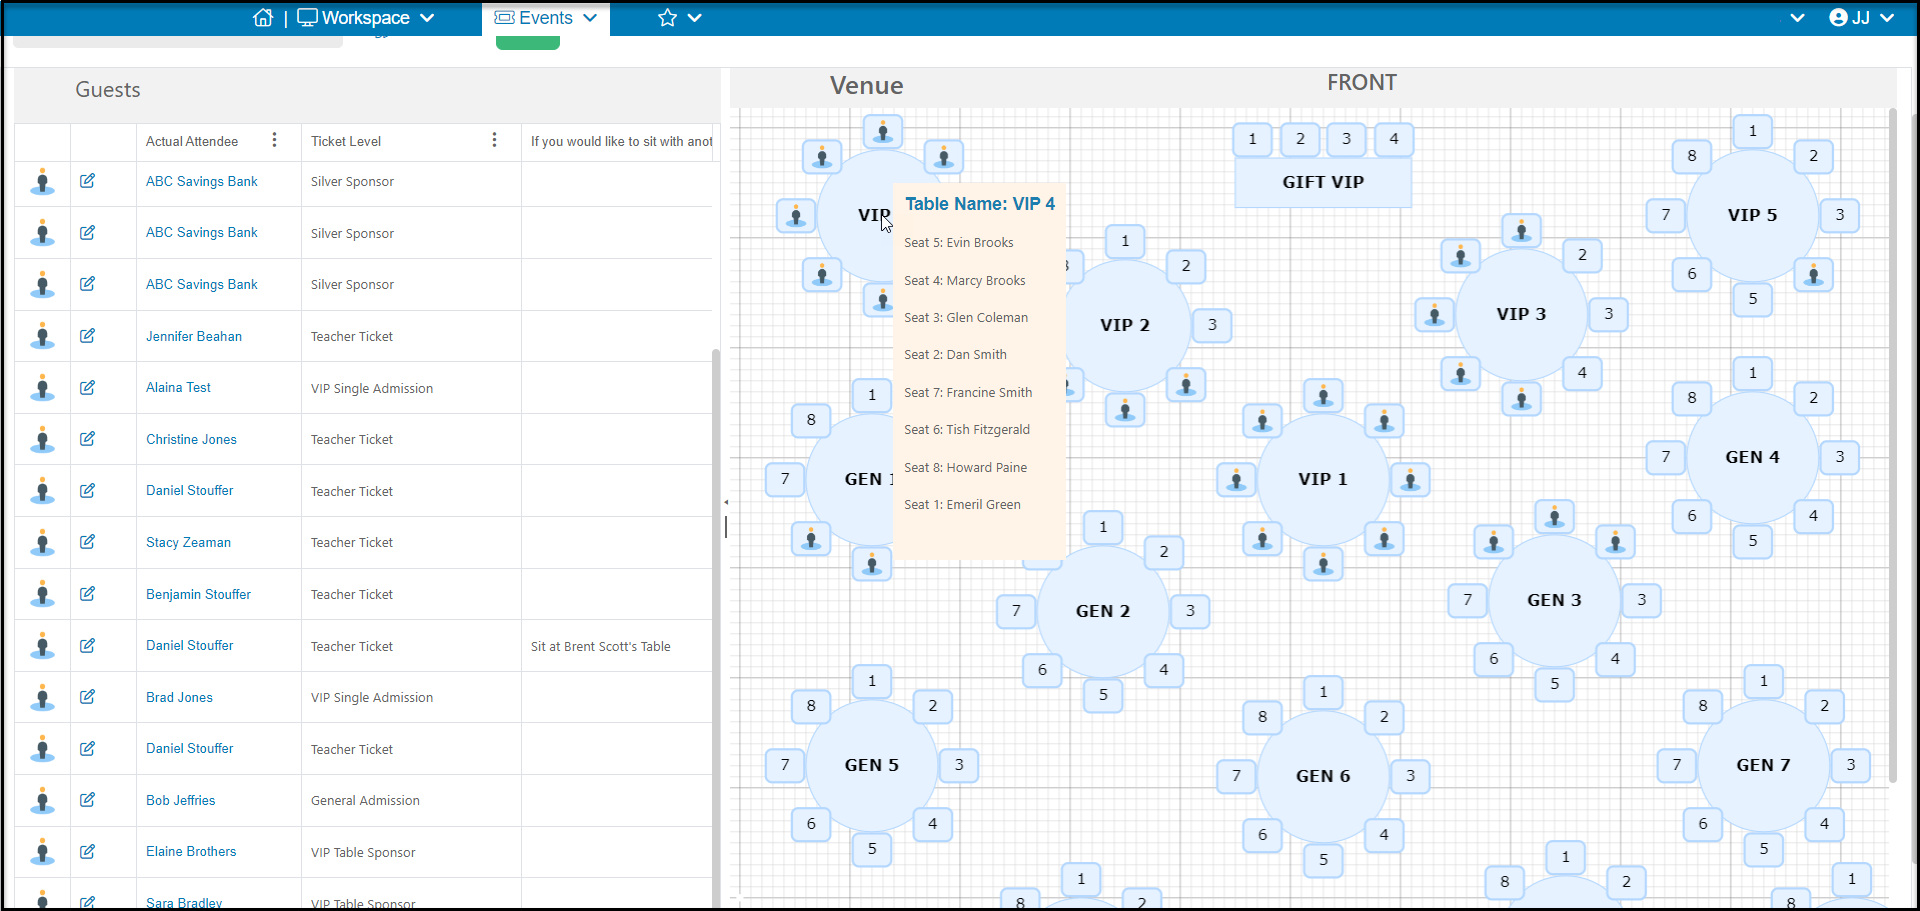
 To seat an attendee, click on the person icon of the left side of the row and drag and drop it into the seat at the desired table. Once seated, they will not longer show on the left grid.
 You can hover over any table or seat to see who is seated there. You can also continue to move attendees by dragging and dropping them into their seats.
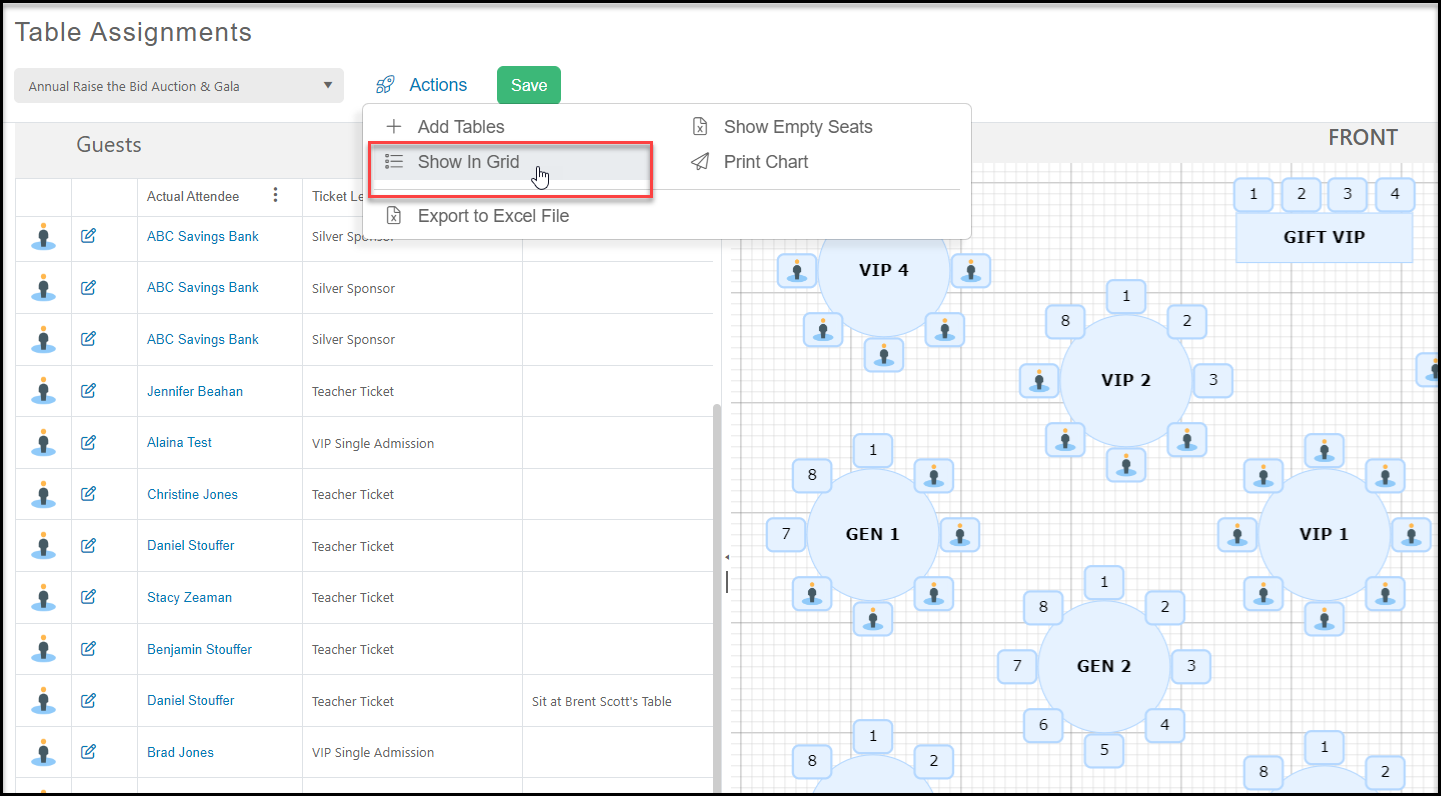
 You can switch from the chart view to a grid view by hovering over the Actions menu and clicking on **Show in Grid.**
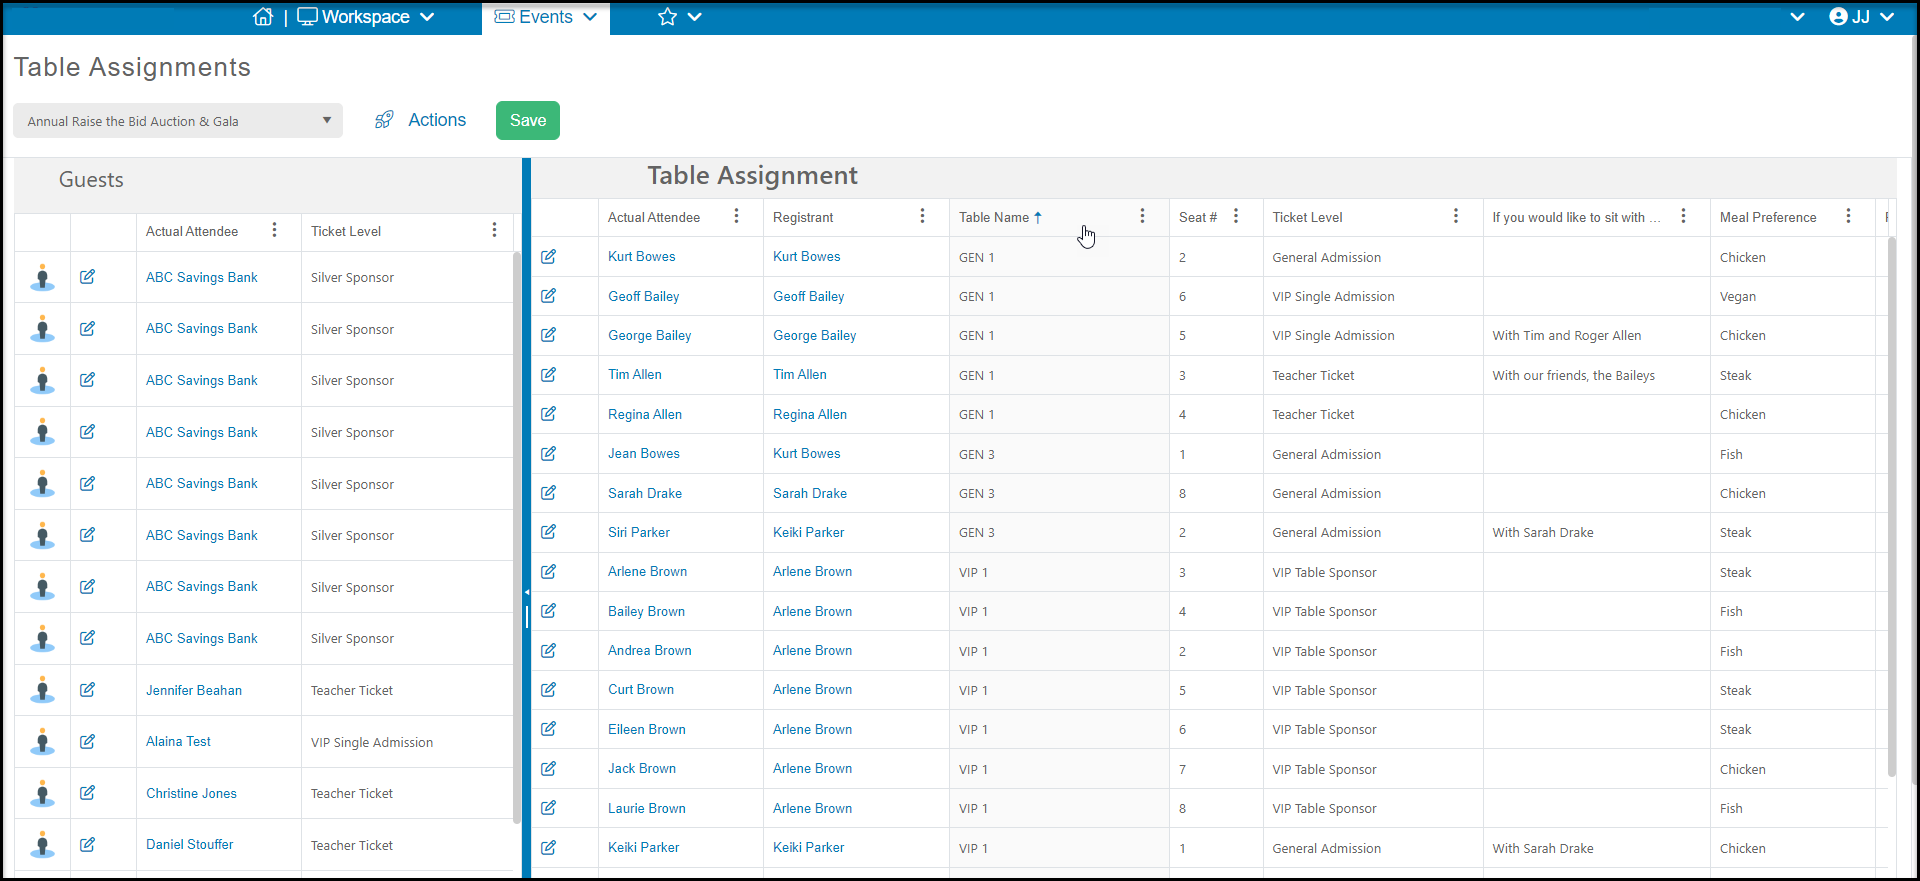
 The right side of the window will show attendees who have been seated already under Table Assignments. This grid also has Column Settings and can be filtered and sorted as desired. The left side will show any guests who have not yet been assigned to a seat.
 With the Actions menu you can **Export** the Table Assignments to Excel and you can **Print the Chart**. Note that the chart prints in a svg file and it only includes the table layout, not the names of the attendees.