# What is the Email Marketing Auto Responders?
> Source: https://support.associationsphere.com/what-is-the-email-marketing-auto-responders | Updated: 2026-09-08T02:58:46Z
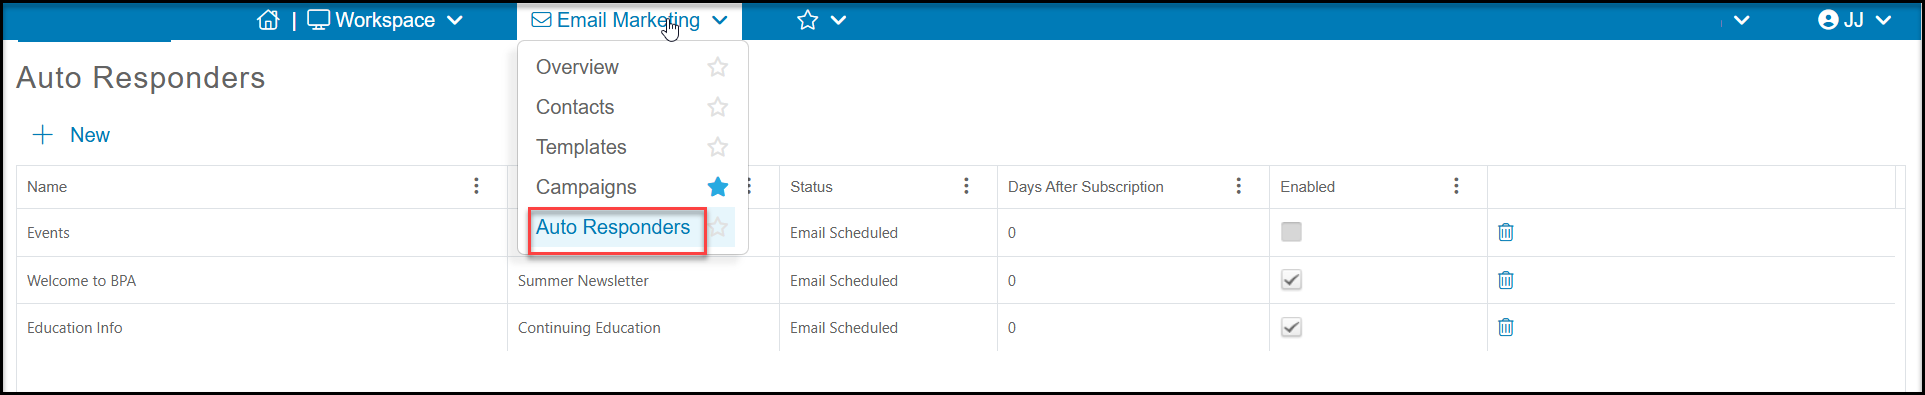
The Email Marketing Auto Responders feature allows you to set up an automated email marketing campaign for new subscribers based on which email list categories they subscribe to. You can learn more about creating email subscription opportunities in this article "How do I invite people to subscribe to my to email lists?"
When someone subscribes, you can set up automatic emails to be sent via the Auto Responders feature in the Email Marketing module.
 There are four steps to setting up an auto responder including:
1. Auto Responder Info - Establishing the name and who the email will be from
2. Settings - Choosing which email list category subscribers will receive this message
3. Attach Template - Selecting and editing a template to send
4. Schedule - Choosing how many days after subscription the message will be sent
**Creating & Edit Auto Responders**
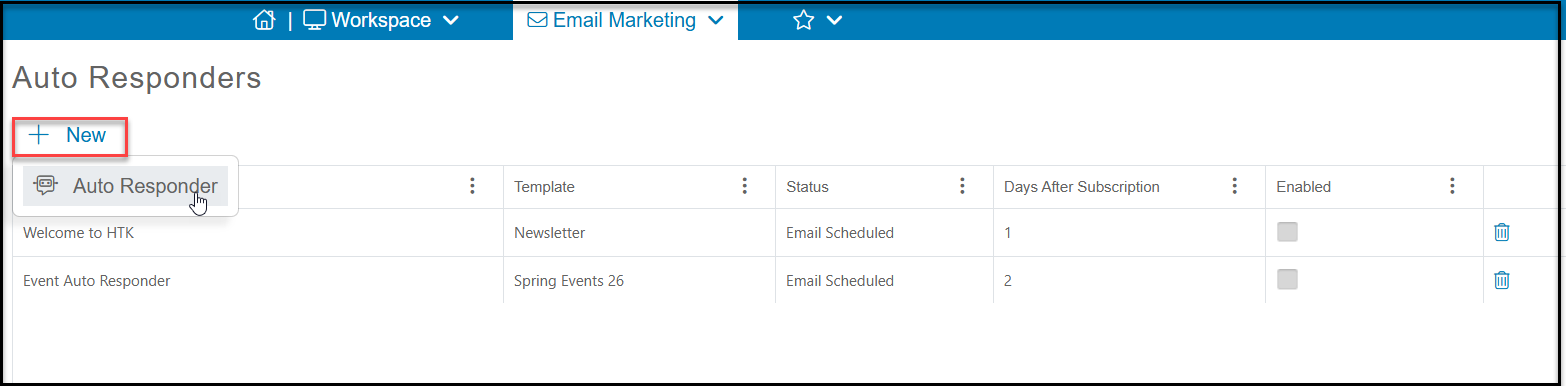
To create a new auto responder, click on **+New** then**Auto Responder**. You can also edit an existing one by clicking on that row, then clicking **View/Edit, Auto Responder** to open the campaign wizard.
There are four steps to setting up an auto responder including:
1. Auto Responder Info - Establishing the name and who the email will be from
2. Settings - Choosing which email list category subscribers will receive this message
3. Attach Template - Selecting and editing a template to send
4. Schedule - Choosing how many days after subscription the message will be sent
**Creating & Edit Auto Responders**
To create a new auto responder, click on **+New** then**Auto Responder**. You can also edit an existing one by clicking on that row, then clicking **View/Edit, Auto Responder** to open the campaign wizard.
 **Auto Responder Info Tab**
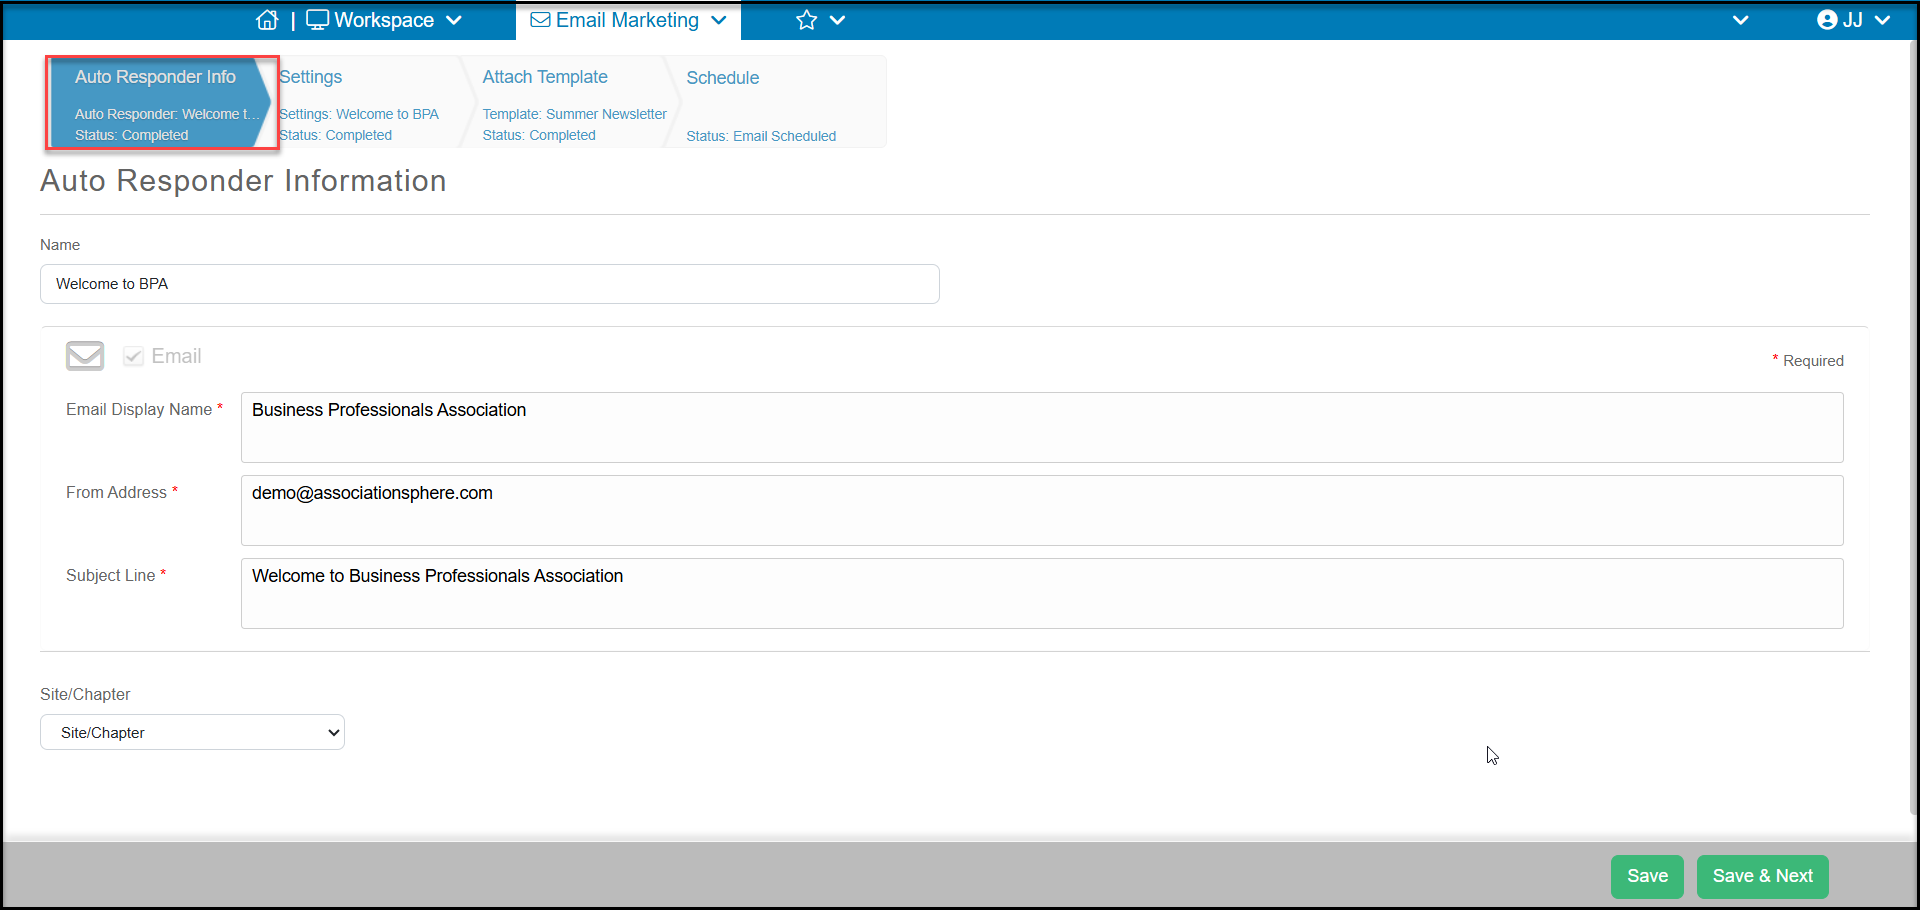
The auto responders are created similar to other email marketing campaigns. It starts with the Auto Responder Info tab where you will give your auto responder a **Name,** the enter in the email sender information in**Email Display Name** and email address in **From Address.**You can also enter your custom **Subject Line.**
Click **Save & Next** to go to the next step.
**Auto Responder Info Tab**
The auto responders are created similar to other email marketing campaigns. It starts with the Auto Responder Info tab where you will give your auto responder a **Name,** the enter in the email sender information in**Email Display Name** and email address in **From Address.**You can also enter your custom **Subject Line.**
Click **Save & Next** to go to the next step.
 **Settings Tab**
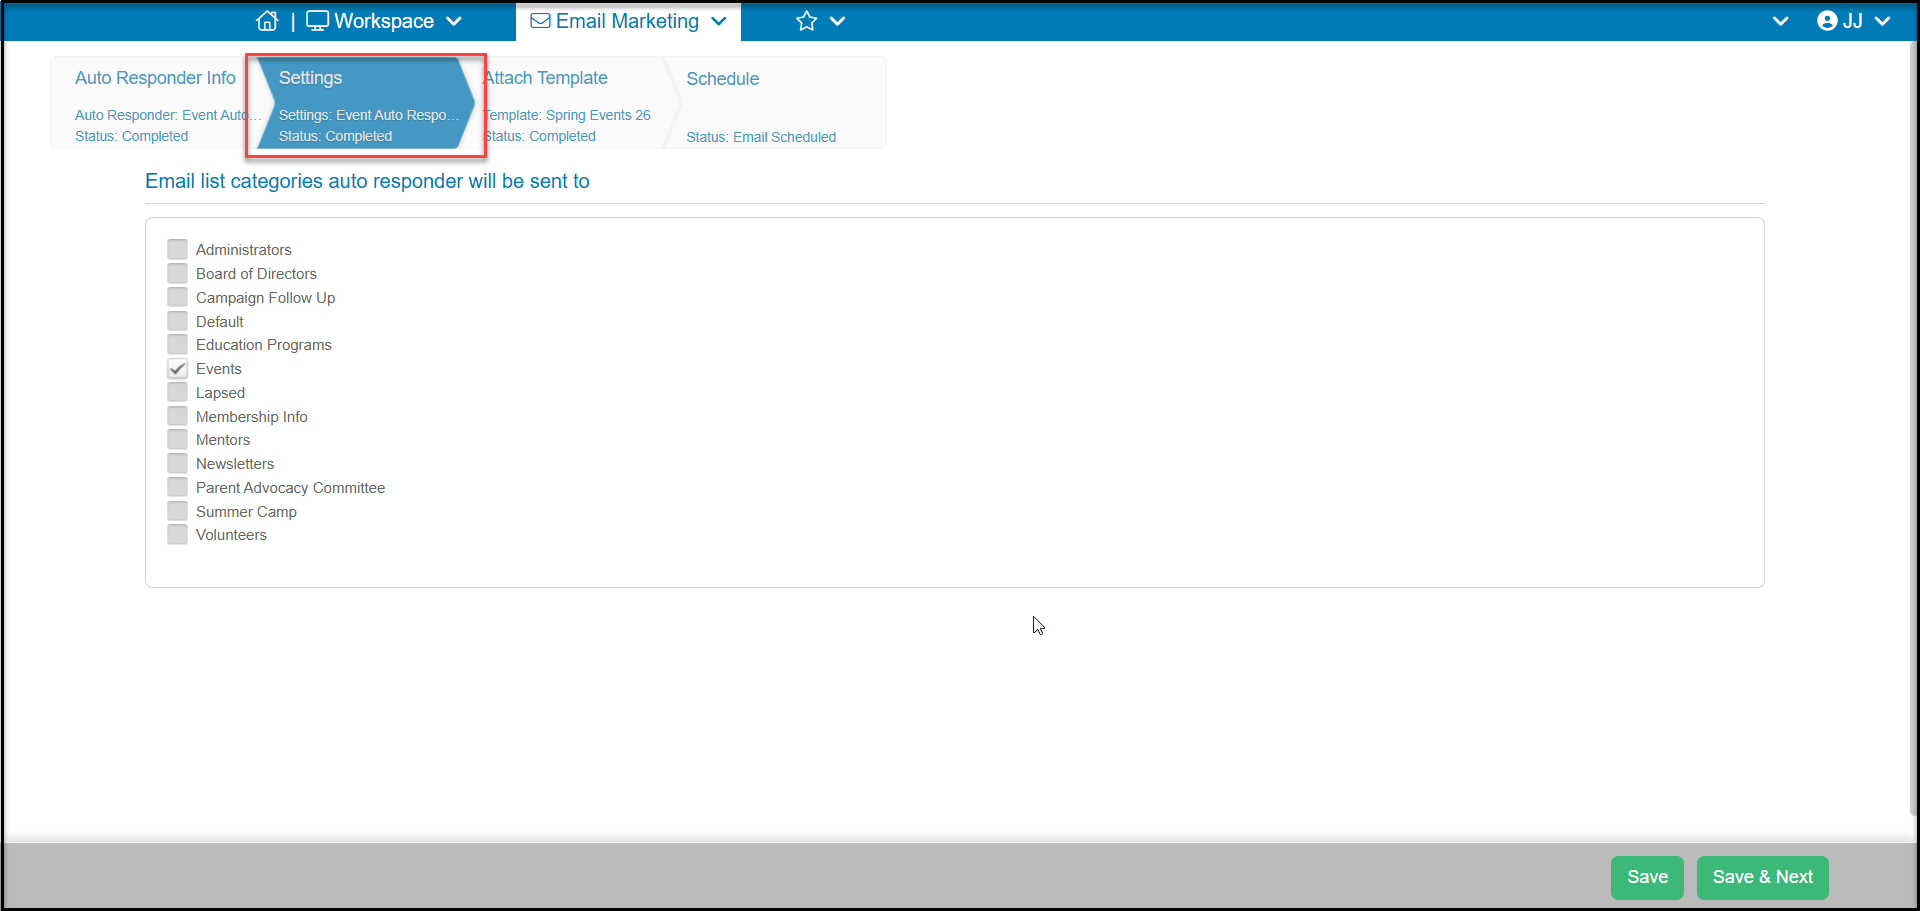
On the Settings tab you will select which new subscribers to which Email List Categories will receive this message. You can select them all or just specific categories. In our example below, we are creating a message for new subscribers to our Events list category.
Click **Save & Next**to go to the Attach Template tab.
**Settings Tab**
On the Settings tab you will select which new subscribers to which Email List Categories will receive this message. You can select them all or just specific categories. In our example below, we are creating a message for new subscribers to our Events list category.
Click **Save & Next**to go to the Attach Template tab.
 **Attach Template Tab**
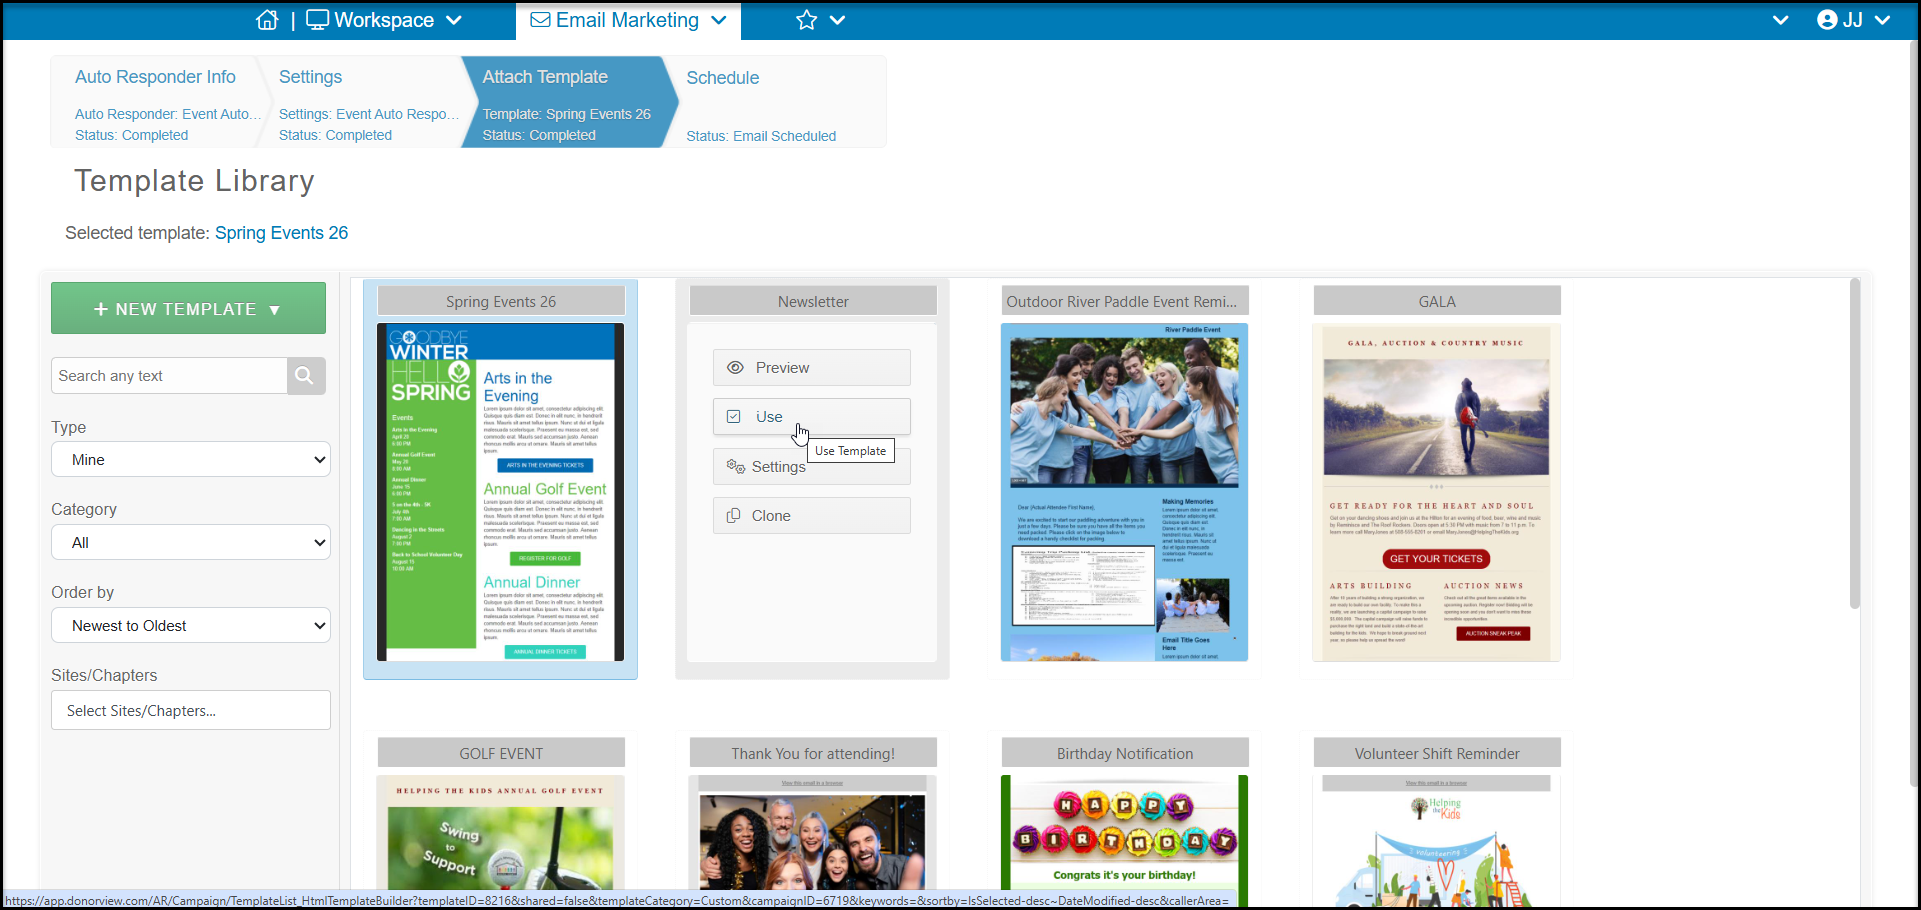
The Attach Template tab will open your email template library. You can hover over a template and click**Use**to open it and modify as desired, or you can use the **+New Template**feature to create a new message from scratch. You can learn more about editing templates in this article "How do I create and edit an email template?"
**Attach Template Tab**
The Attach Template tab will open your email template library. You can hover over a template and click**Use**to open it and modify as desired, or you can use the **+New Template**feature to create a new message from scratch. You can learn more about editing templates in this article "How do I create and edit an email template?"
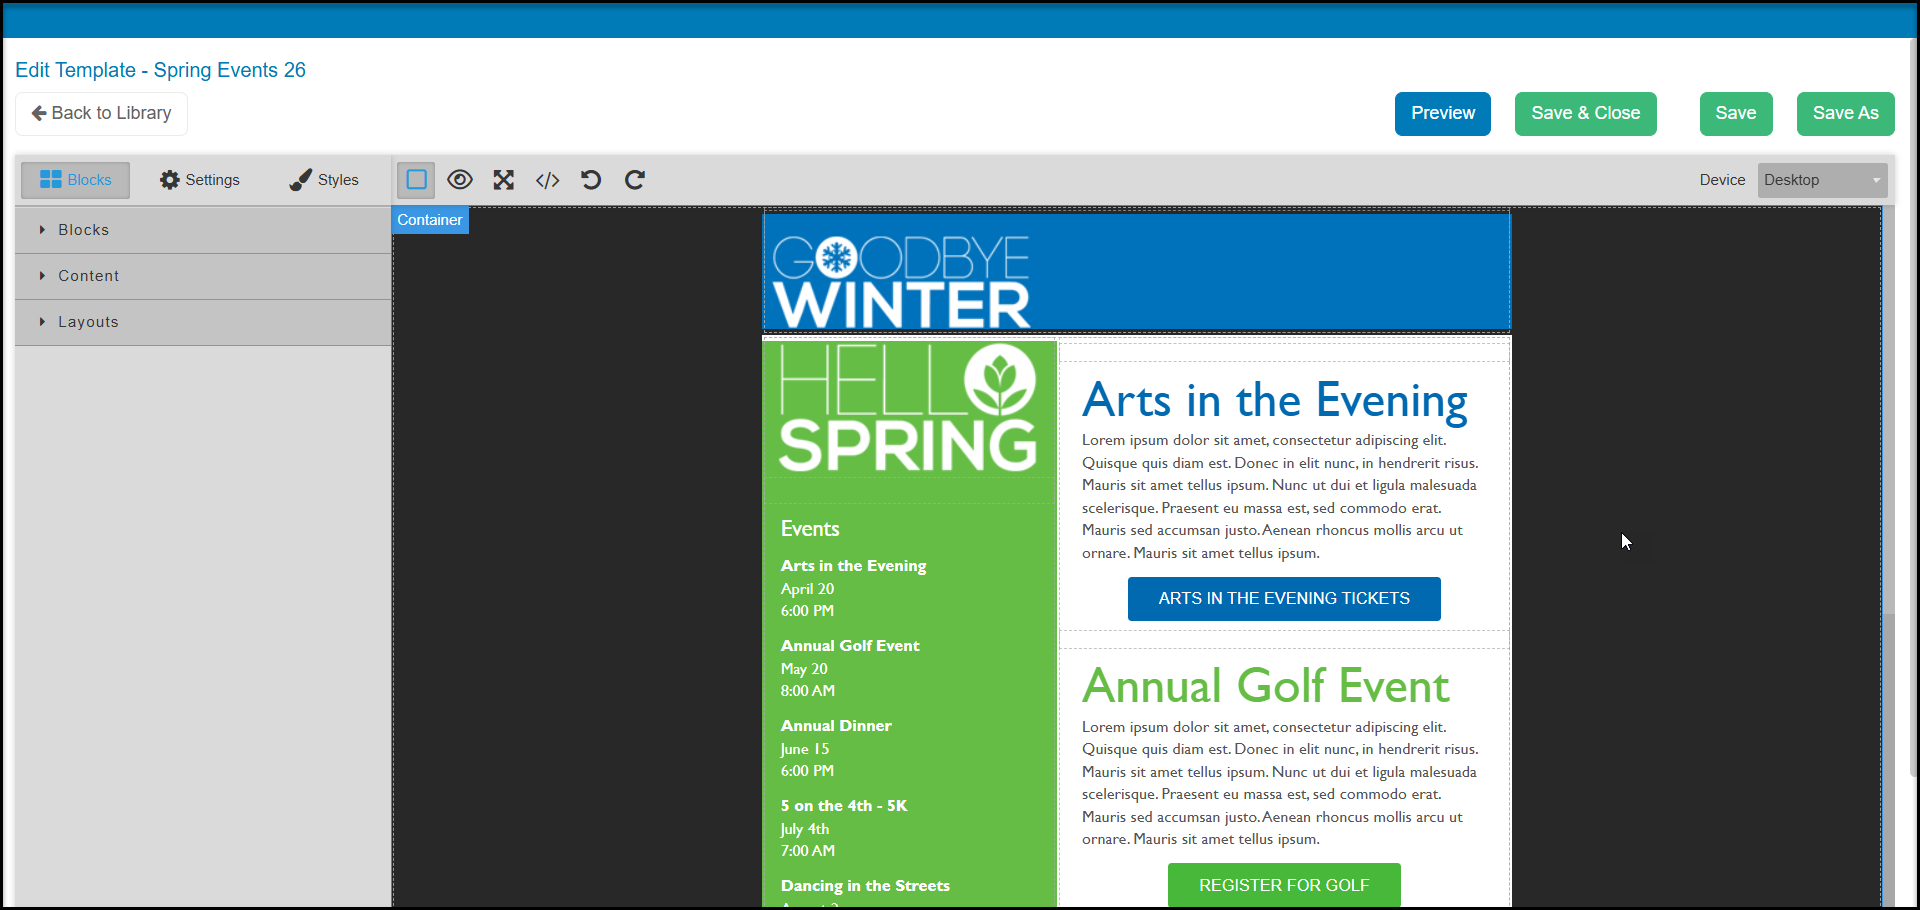
 In our example we are creating an email with a list of upcoming events and links to register for our new Events list category subscribers. You will need to update your auto responders as necessary, for example when an event passes or a new event needs to be added to your message.
Note that merge fields are not available for personalization in these templates.
Click **Save & Close** when you are finished with your edits. This will take you to the last step, Schedule.
In our example we are creating an email with a list of upcoming events and links to register for our new Events list category subscribers. You will need to update your auto responders as necessary, for example when an event passes or a new event needs to be added to your message.
Note that merge fields are not available for personalization in these templates.
Click **Save & Close** when you are finished with your edits. This will take you to the last step, Schedule.
 **Schedule Tab**
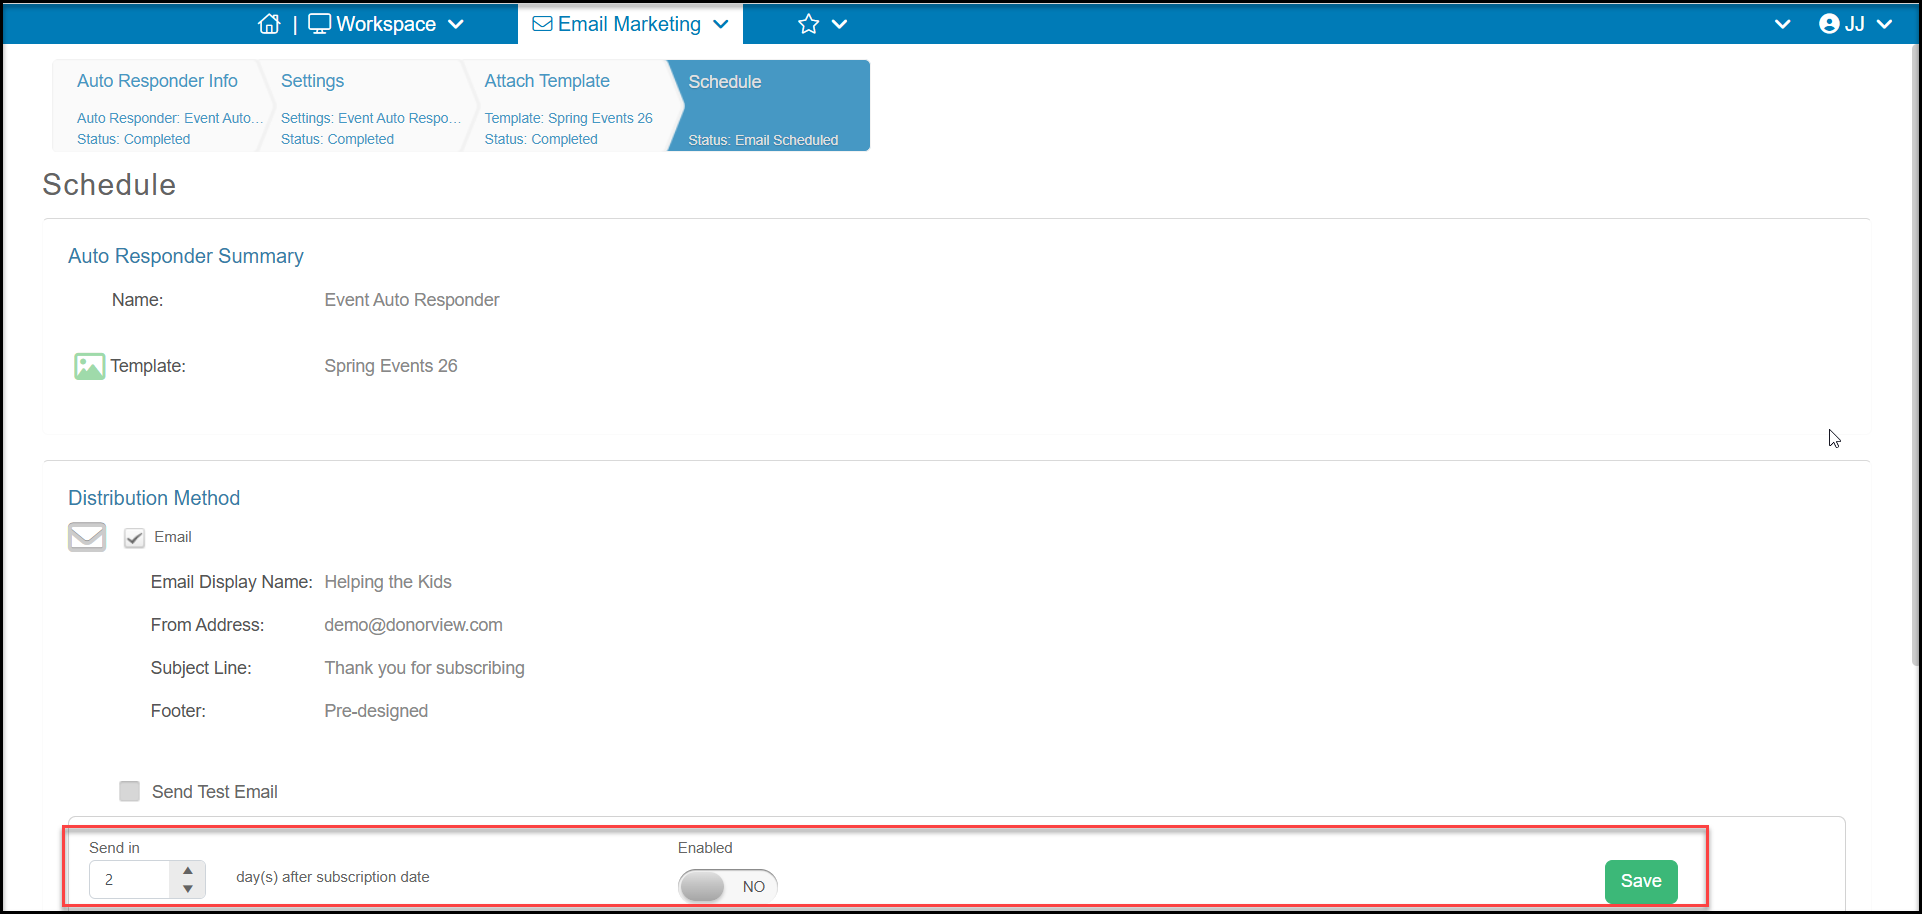
In the last step you will set up the schedule for sending this email to new subscribers. If you would like to send a test, check the box next to **Send Test Email** and select or add a test recipient and send your test.
Enter the number of **days after subscription date** that you wish to send the message. This number should be “1” or greater.
Mark **Enabled** to **YES** to set up the automation and click **Save**.
This message will now send to new subscribers based on the schedule you have set up.
**Schedule Tab**
In the last step you will set up the schedule for sending this email to new subscribers. If you would like to send a test, check the box next to **Send Test Email** and select or add a test recipient and send your test.
Enter the number of **days after subscription date** that you wish to send the message. This number should be “1” or greater.
Mark **Enabled** to **YES** to set up the automation and click **Save**.
This message will now send to new subscribers based on the schedule you have set up.