# What is the Online Payment Page and how do I create one?
> Source: https://support.associationsphere.com/what-is-the-online-payment-page-and-how-do-i-create-one | Updated: 2026-09-08T02:58:45Z
The Online Payment Page is the first step for creating invoices. There must be at least one Online Payment Page built in order to manually or automatically create a invoice.
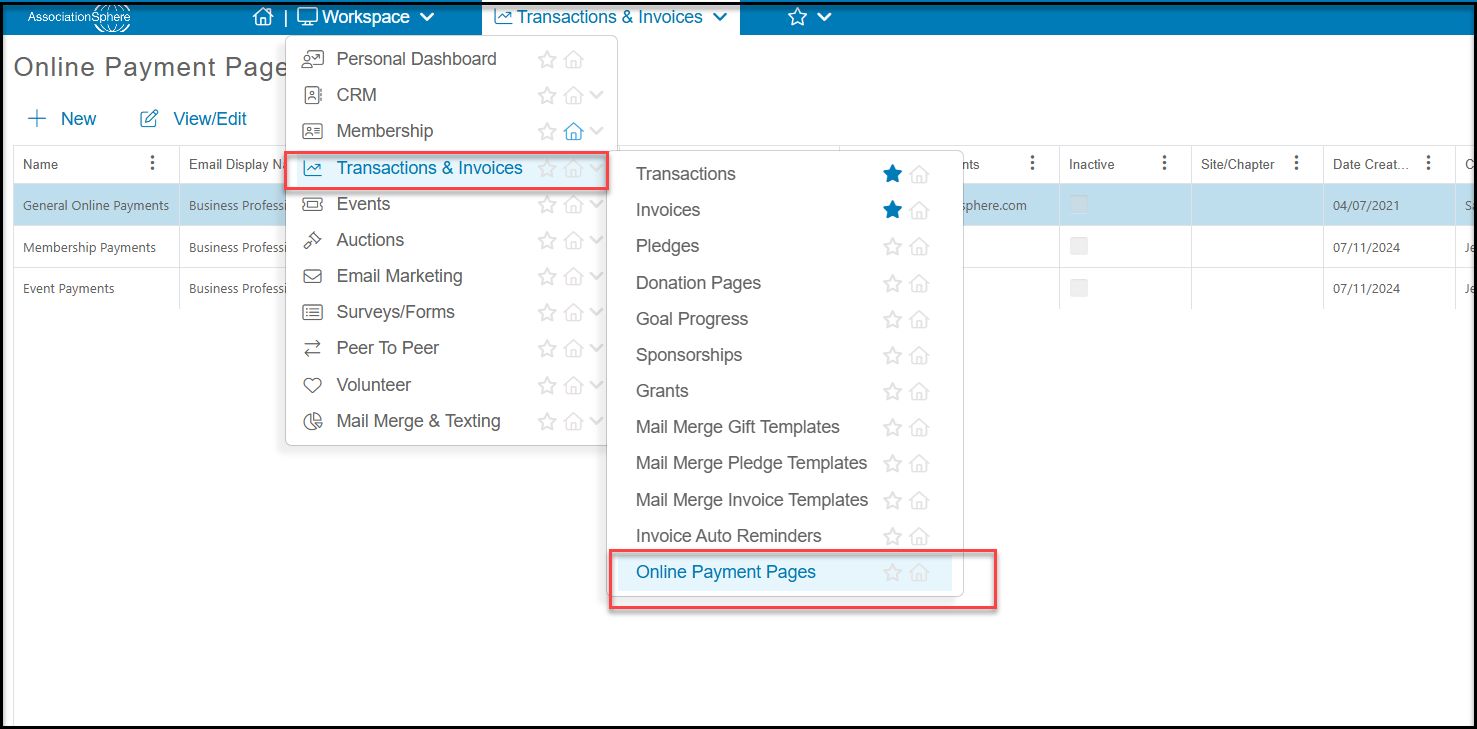
To create or edit an Online Payment Page, go to Workspaces > Transactions & Invoices > Invoices > Online Payment Pages.
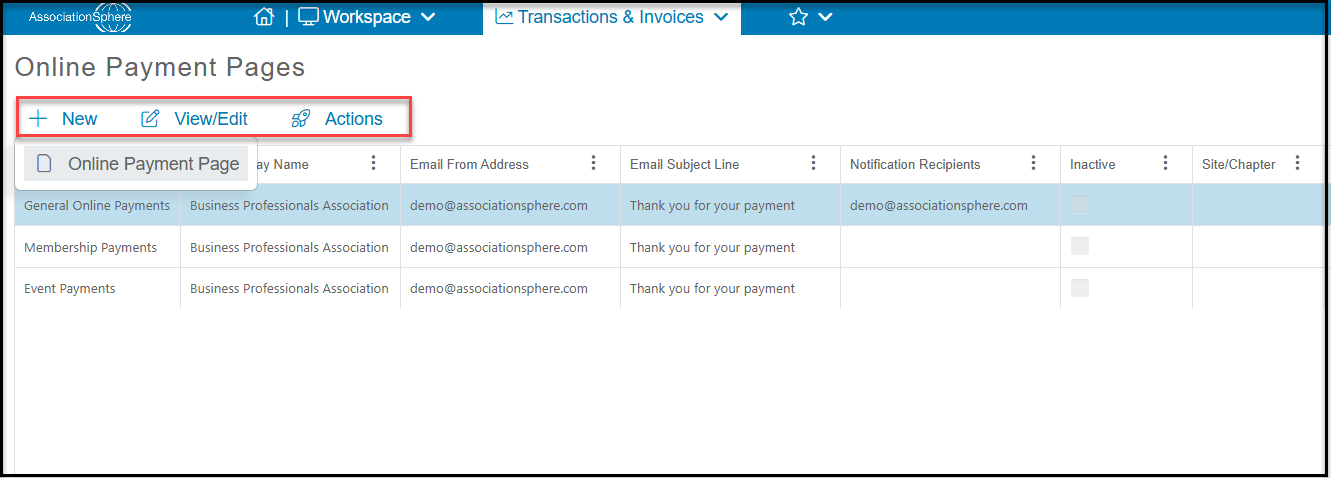
 Click on **+New** to create a new page. You can also click in the row of an existing page and click **View/Edit** to open or click on **Actions**, then **Copy Online Payment Page** to create a copy.
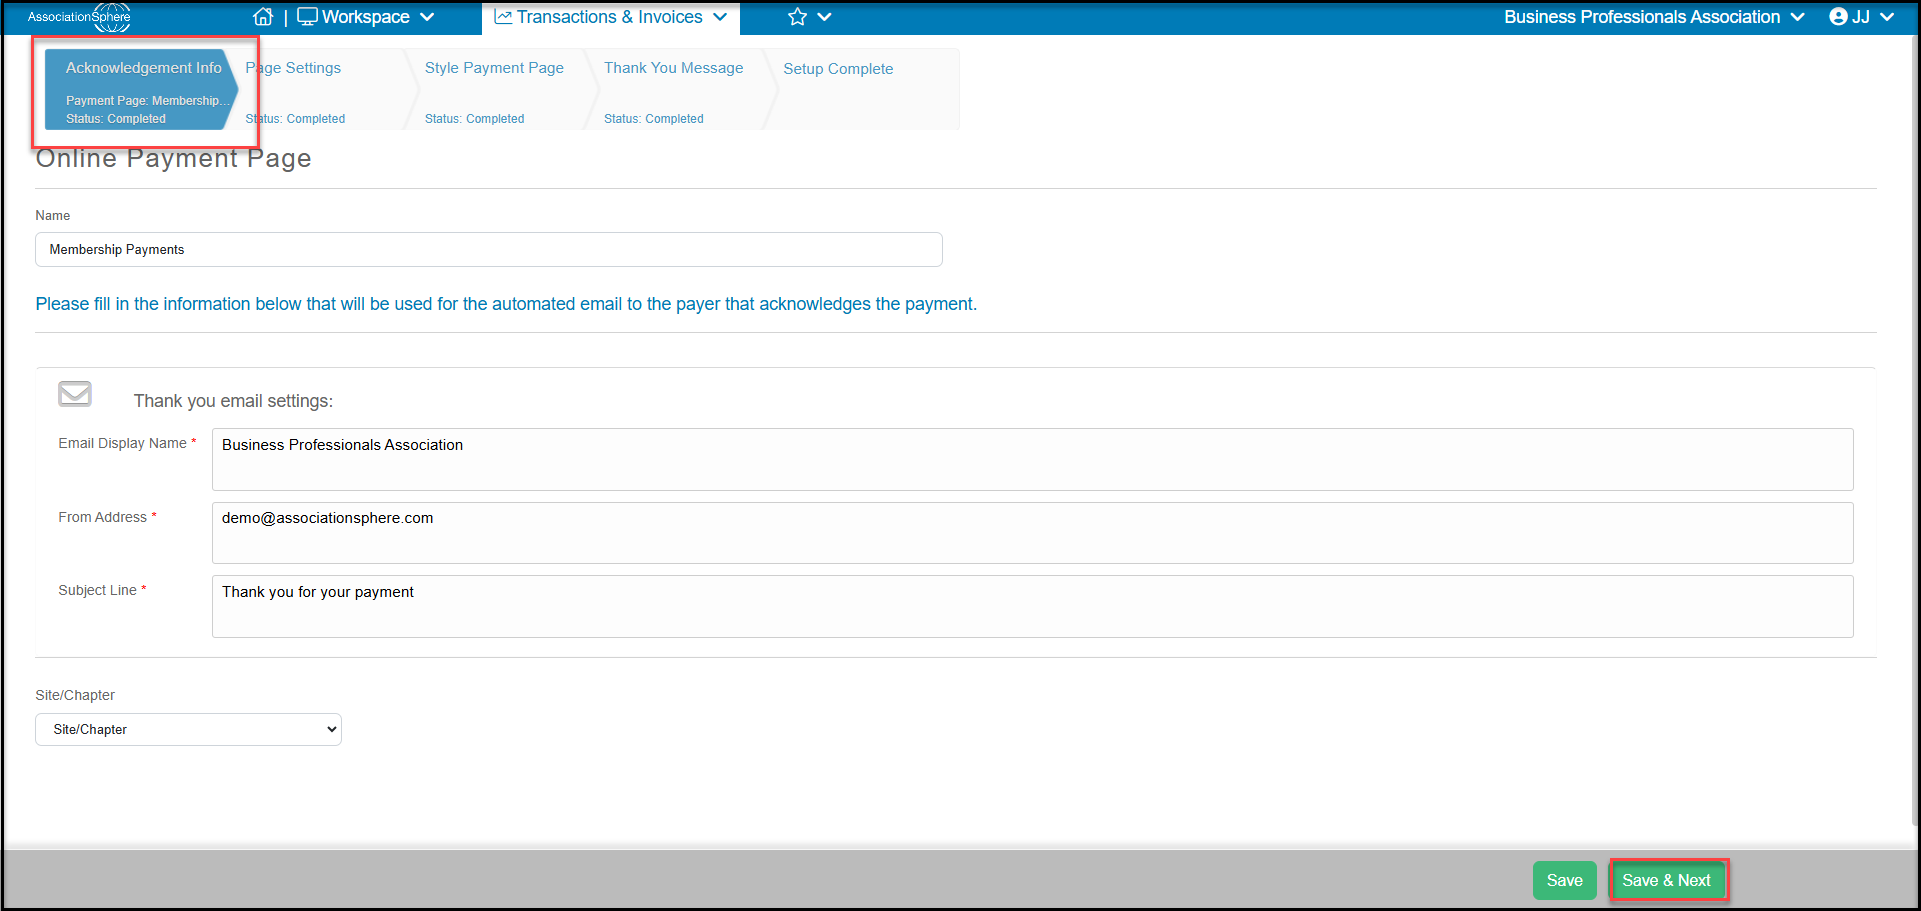
 Follow the set up wizard, starting at the Acknowledgement Info tab on the left. As you complete each page, click **Save** to save your work or **Save & Next**to proceed to the next page. Note that if you are working in an existing page, Save & Next will take you to the last page. You can always click on any of the tabs to go to that page.
From the Acknowledgement Info tab, name your online payment page and enter the information that will be shown for the automatic thank you emails that are sent to the constituent when a payment is made. Click **Save & Next**to proceed.
Follow the set up wizard, starting at the Acknowledgement Info tab on the left. As you complete each page, click **Save** to save your work or **Save & Next**to proceed to the next page. Note that if you are working in an existing page, Save & Next will take you to the last page. You can always click on any of the tabs to go to that page.
From the Acknowledgement Info tab, name your online payment page and enter the information that will be shown for the automatic thank you emails that are sent to the constituent when a payment is made. Click **Save & Next**to proceed.
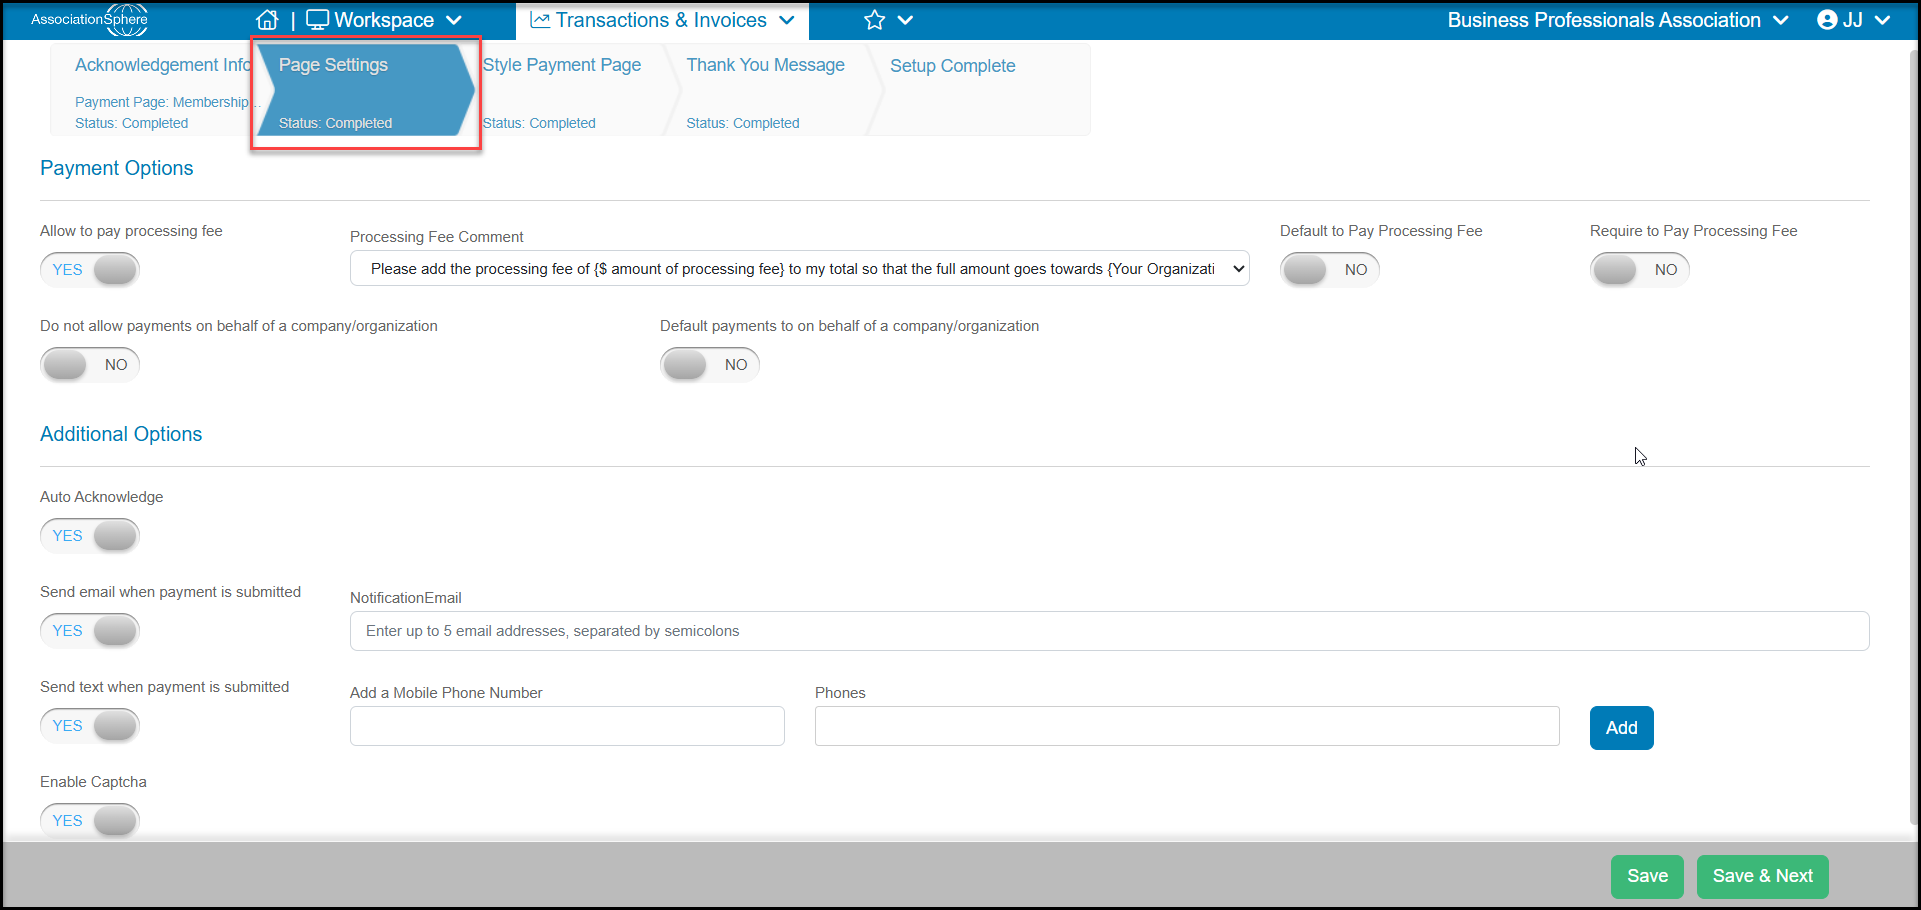
 Next, choose the page setting options.
- When **Allow to pay processing fee** is set to YES, you can also select the **Processing Fee Comment** and choose to **Default to Pay Processing Fee**or **Require to Pay Processing Fee**. Note that you should set up your processing fee options the same as you have on your membership or event page to ensure the proper selections are included for the invoice payment.
- The invoice will be automatically linked to the constituent for whom the invoice was created, so the toggles for **Do not allow payments on behalf of a company/organization**and **Default payment on behalf of a company/organization** are no longer applicable and should be left NO.
- When **Auto Acknowledge** is set to YES, it will automatically mark the transaction as Acknowledged on the Transactions grid.
- You have the option to set up notifications when credit card payments are made either with **Send email when payment is submitted** or **Send text when payment is submitted** (if you have text messaging activated) by setting them to YES and entering the email or phone numbers to notify.
- **Enable Captcha**is a box the constituent must check on the form to indicate they are not a robot. This is optional.
- Click **Save & Next** to proceed.
Next, choose the page setting options.
- When **Allow to pay processing fee** is set to YES, you can also select the **Processing Fee Comment** and choose to **Default to Pay Processing Fee**or **Require to Pay Processing Fee**. Note that you should set up your processing fee options the same as you have on your membership or event page to ensure the proper selections are included for the invoice payment.
- The invoice will be automatically linked to the constituent for whom the invoice was created, so the toggles for **Do not allow payments on behalf of a company/organization**and **Default payment on behalf of a company/organization** are no longer applicable and should be left NO.
- When **Auto Acknowledge** is set to YES, it will automatically mark the transaction as Acknowledged on the Transactions grid.
- You have the option to set up notifications when credit card payments are made either with **Send email when payment is submitted** or **Send text when payment is submitted** (if you have text messaging activated) by setting them to YES and entering the email or phone numbers to notify.
- **Enable Captcha**is a box the constituent must check on the form to indicate they are not a robot. This is optional.
- Click **Save & Next** to proceed.
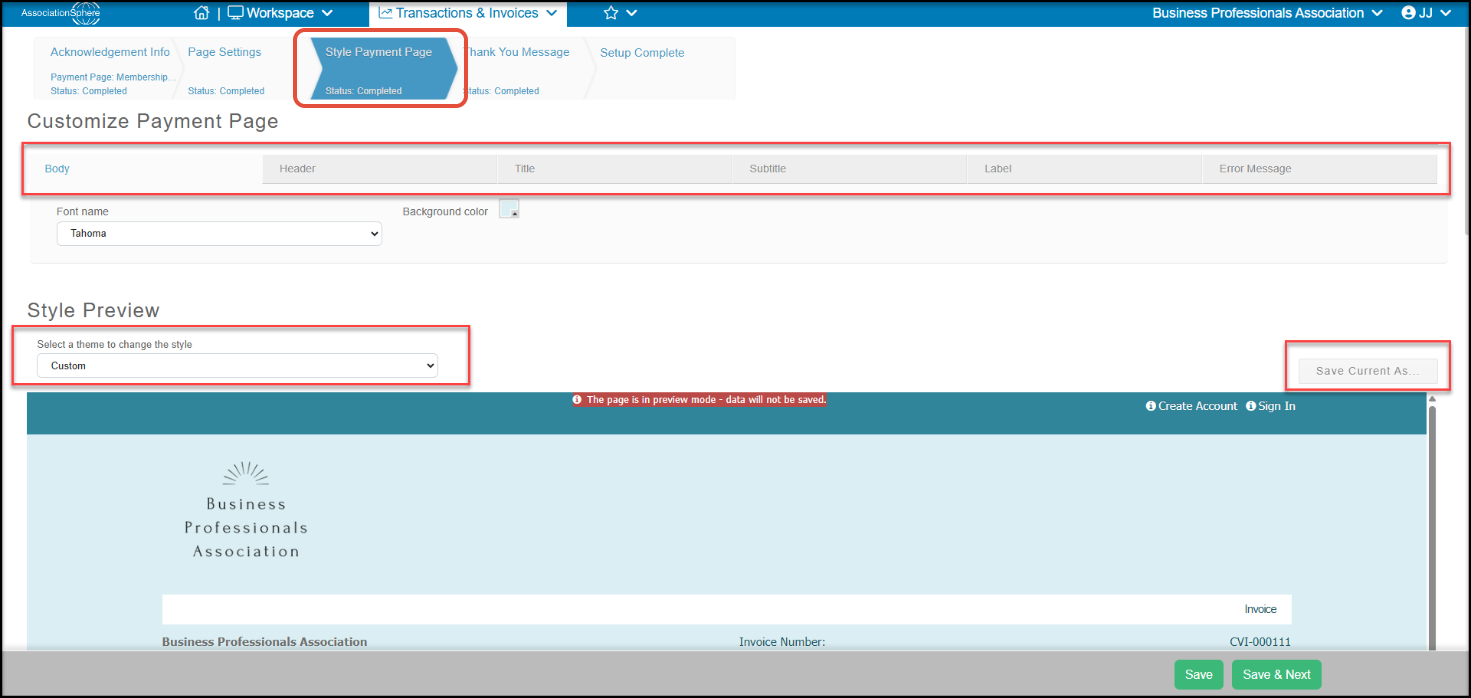
 The color themes can be customized on the Style Payment Page tab. You can modify the colors, fonts, and font sizes using the Body, Header, Title, Subtitle, Label, and Error Message tab. You can also save the custom these for use on any page using the "**Save Current As**" button on the right side of the screen above the preview. Click **Save & Next** to proceed.
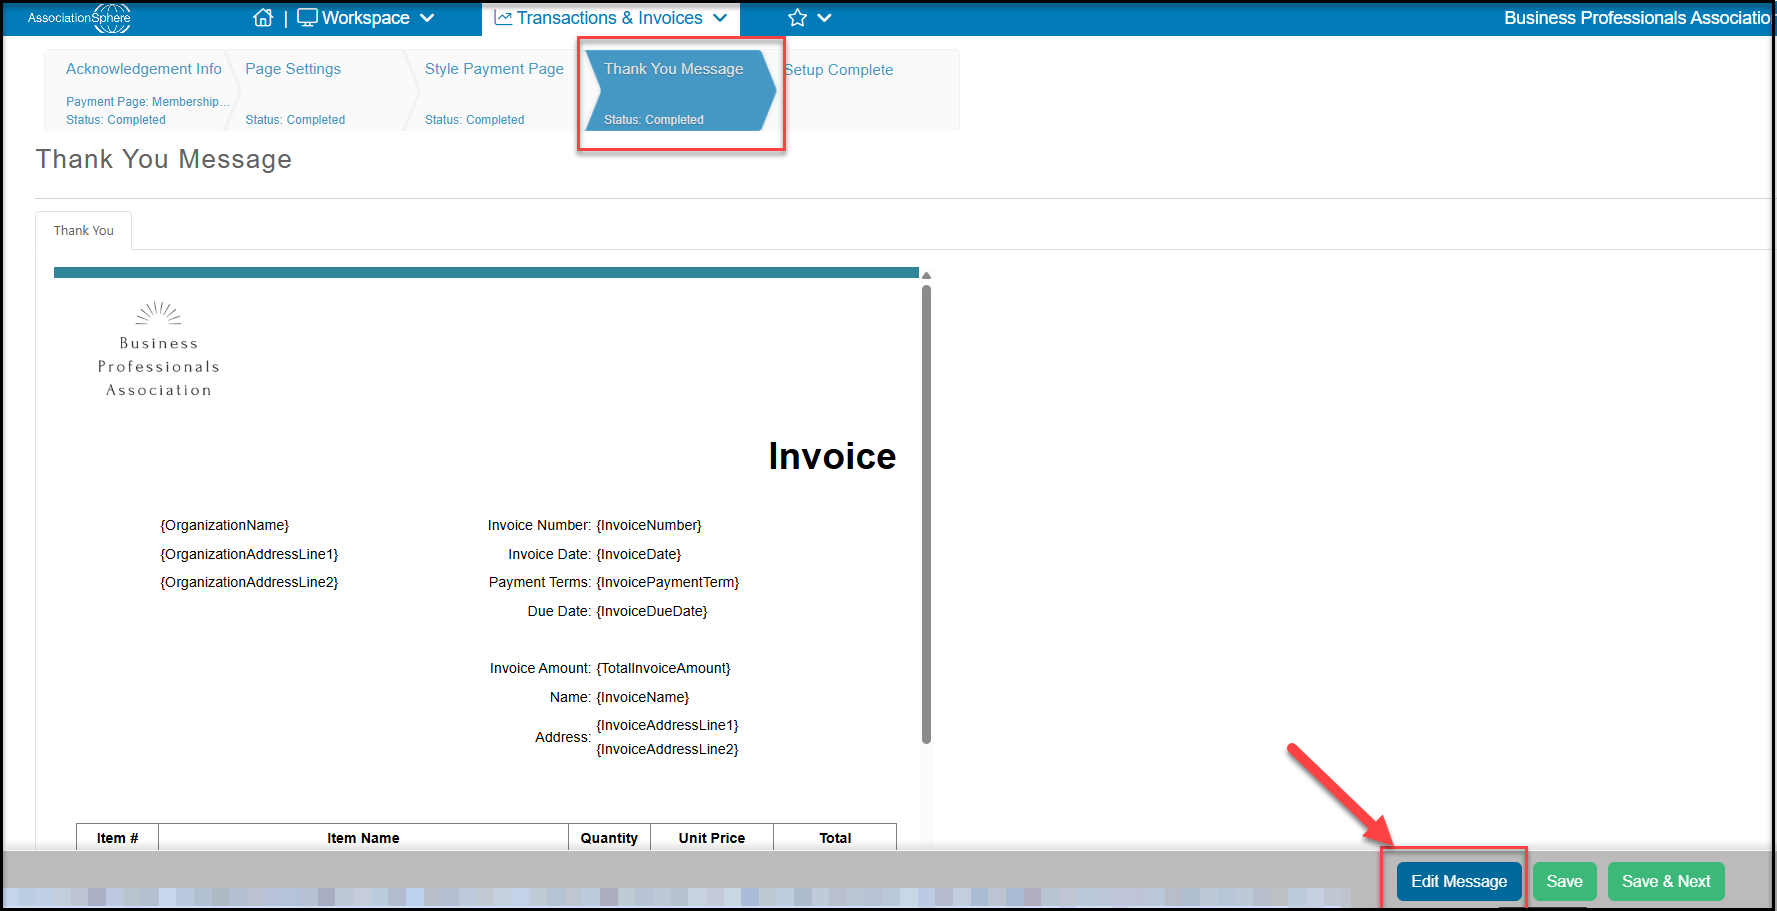
 The Thank You Message generates a copy of the invoice that matches the branding in your style page. To edit the message, click the blue **Edit Message** button at the bottom of the page.
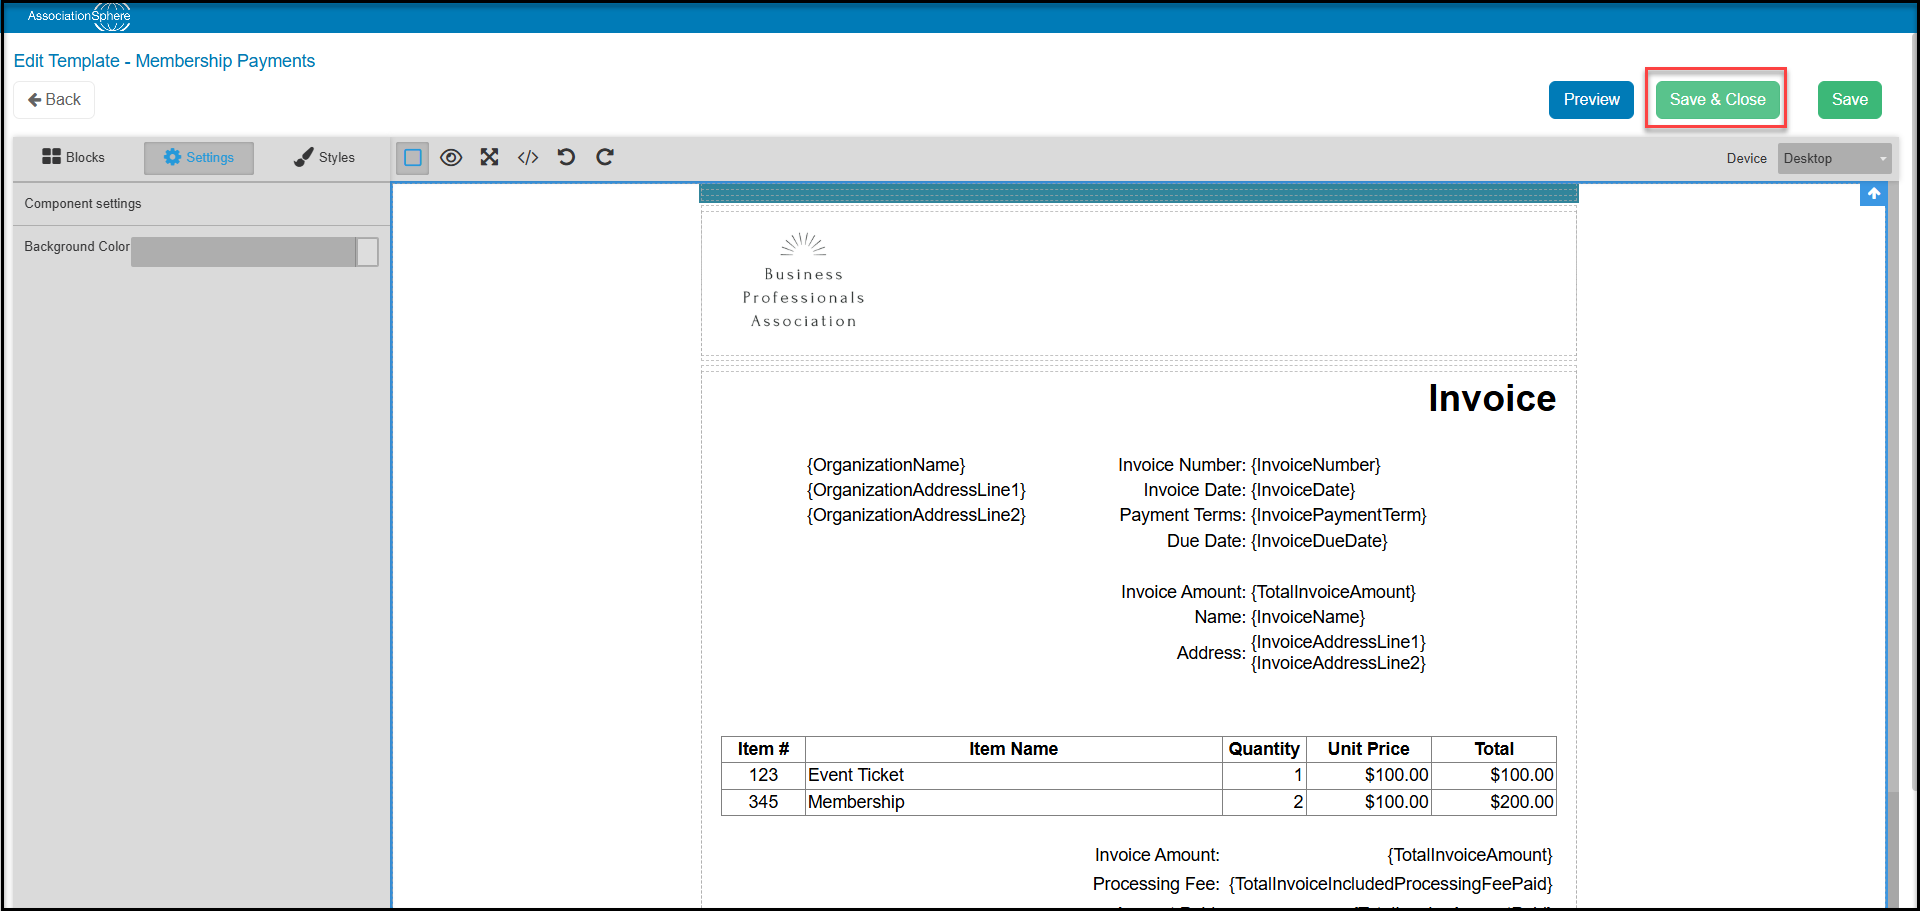
 You can edit the automatic email in the same type of editor as the Email Marketing Templates.**It is important not to delete the standard layout as this information is all critical for the receipt, particularly if partial payments are allowed.** You can customize the colors and fonts using the Settings tab on the left for each block/section. You can also insert blocks or content above or below the invoice information to add whatever additional information may be required.
Once you have finished any edits, click **Save & Close,** then **Save & Next** to complete the setup of your Online Payment Page.
You can edit the automatic email in the same type of editor as the Email Marketing Templates.**It is important not to delete the standard layout as this information is all critical for the receipt, particularly if partial payments are allowed.** You can customize the colors and fonts using the Settings tab on the left for each block/section. You can also insert blocks or content above or below the invoice information to add whatever additional information may be required.
Once you have finished any edits, click **Save & Close,** then **Save & Next** to complete the setup of your Online Payment Page.
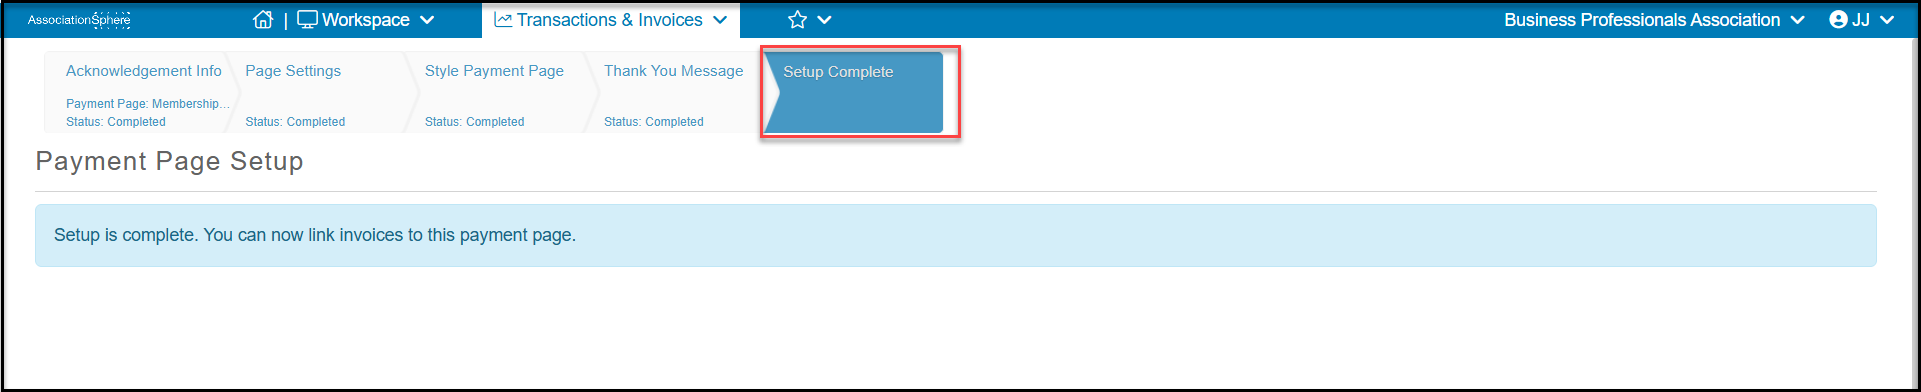
 The page is now available for creating invoices and to select on Membership and Event pages for Pay Later options which automatically generate an invoice.
 To learn more about linking invoices to membership or event transactions, see these articles:
How can I create an invoice for a membership?
How can I create an invoice for an event transaction?
To learn more about creating manual invoices, see this article: How do I create an invoice manually?
To learn more about linking invoices to membership or event transactions, see these articles:
How can I create an invoice for a membership?
How can I create an invoice for an event transaction?
To learn more about creating manual invoices, see this article: How do I create an invoice manually?