A grid view can be created two different ways, either directly through the grid or using the View Builder. This article will focus on building a new view directly on the grid.
On the grid you have a variety of options to manipulate the columns on grid and what data is shown. Just above the grid you have menu options such as Filter and Sort. By mousing over either of these menus you will be able to click “Add Filter” or “Add Sort” and then select the desired field and values associated to see specific data that meets that criteria. Through these menus you are also able to add multiple Filters or Sorts before applying them to the grid.
Filters and Sorts are applied in the order they are entered, so entering them in the correct order is important to get the correct information. You can make filters additive using "And" between the filters, so that the results will include only those that meet all the criteria. Or you can make the filters inclusive using "Or" between the filters. In the example below, you are searching for constituents in the state of Massachusetts or Connecticut.
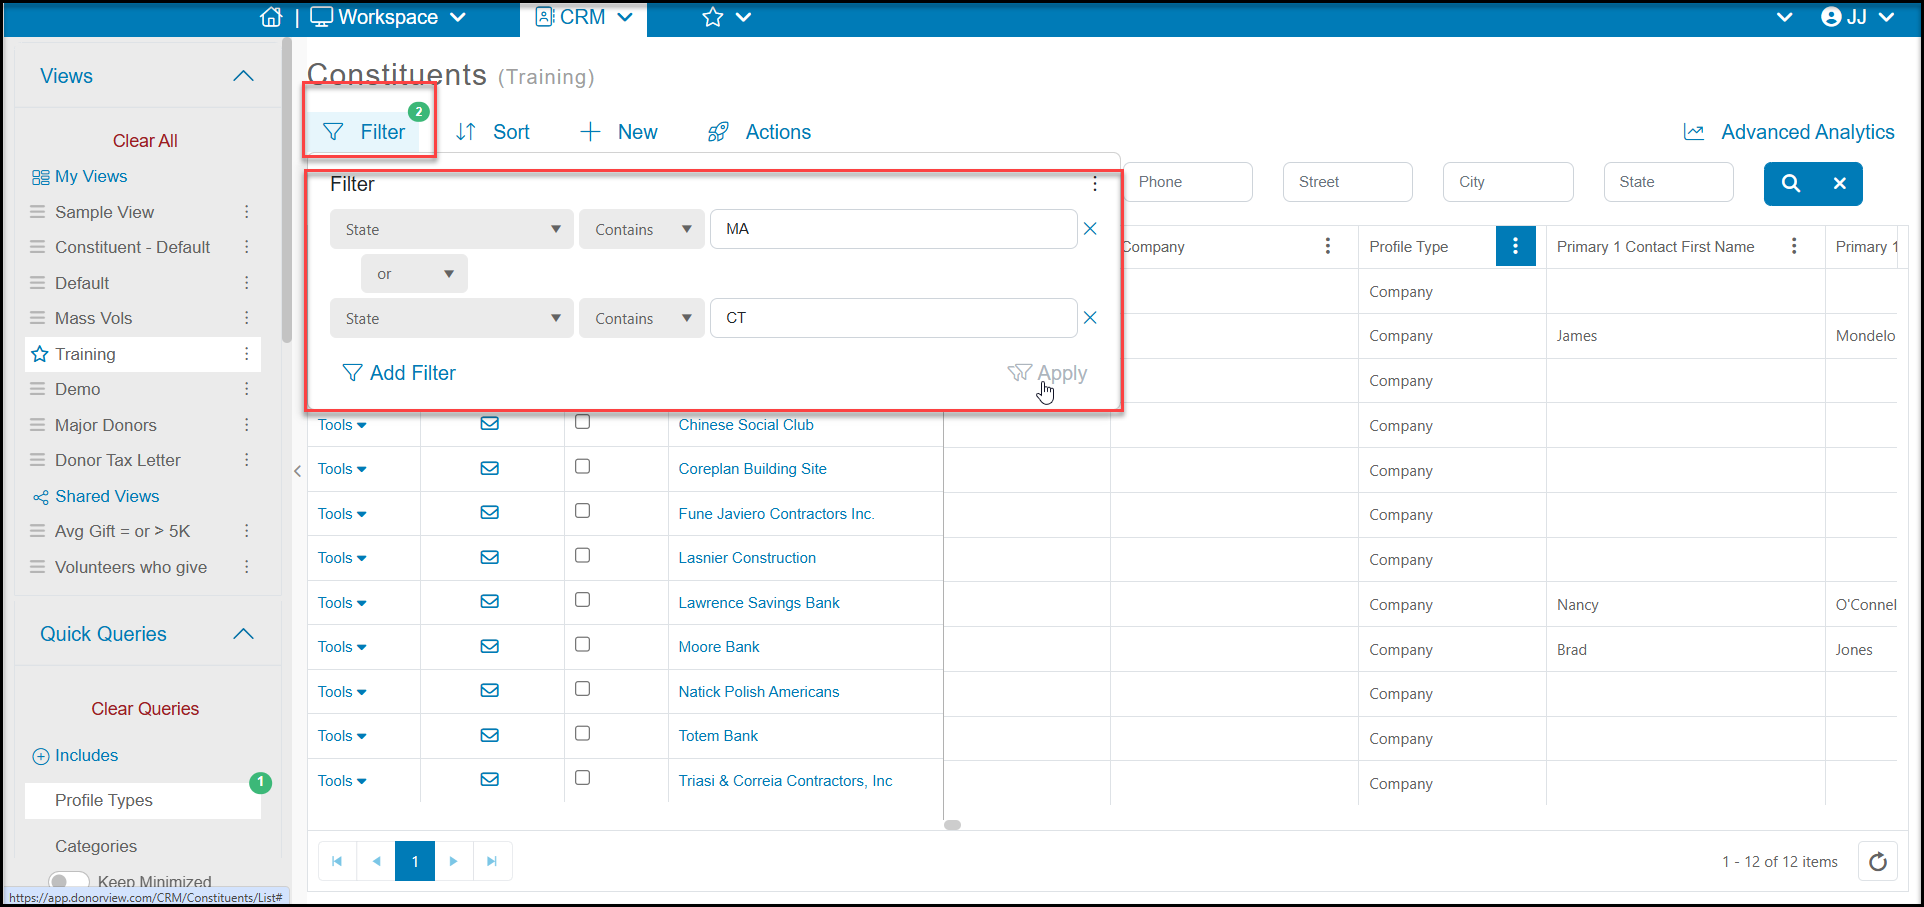
Each time a filter, sort or query is applied, a green circle will appear next to the function and a number showing how many selections were made for the action.

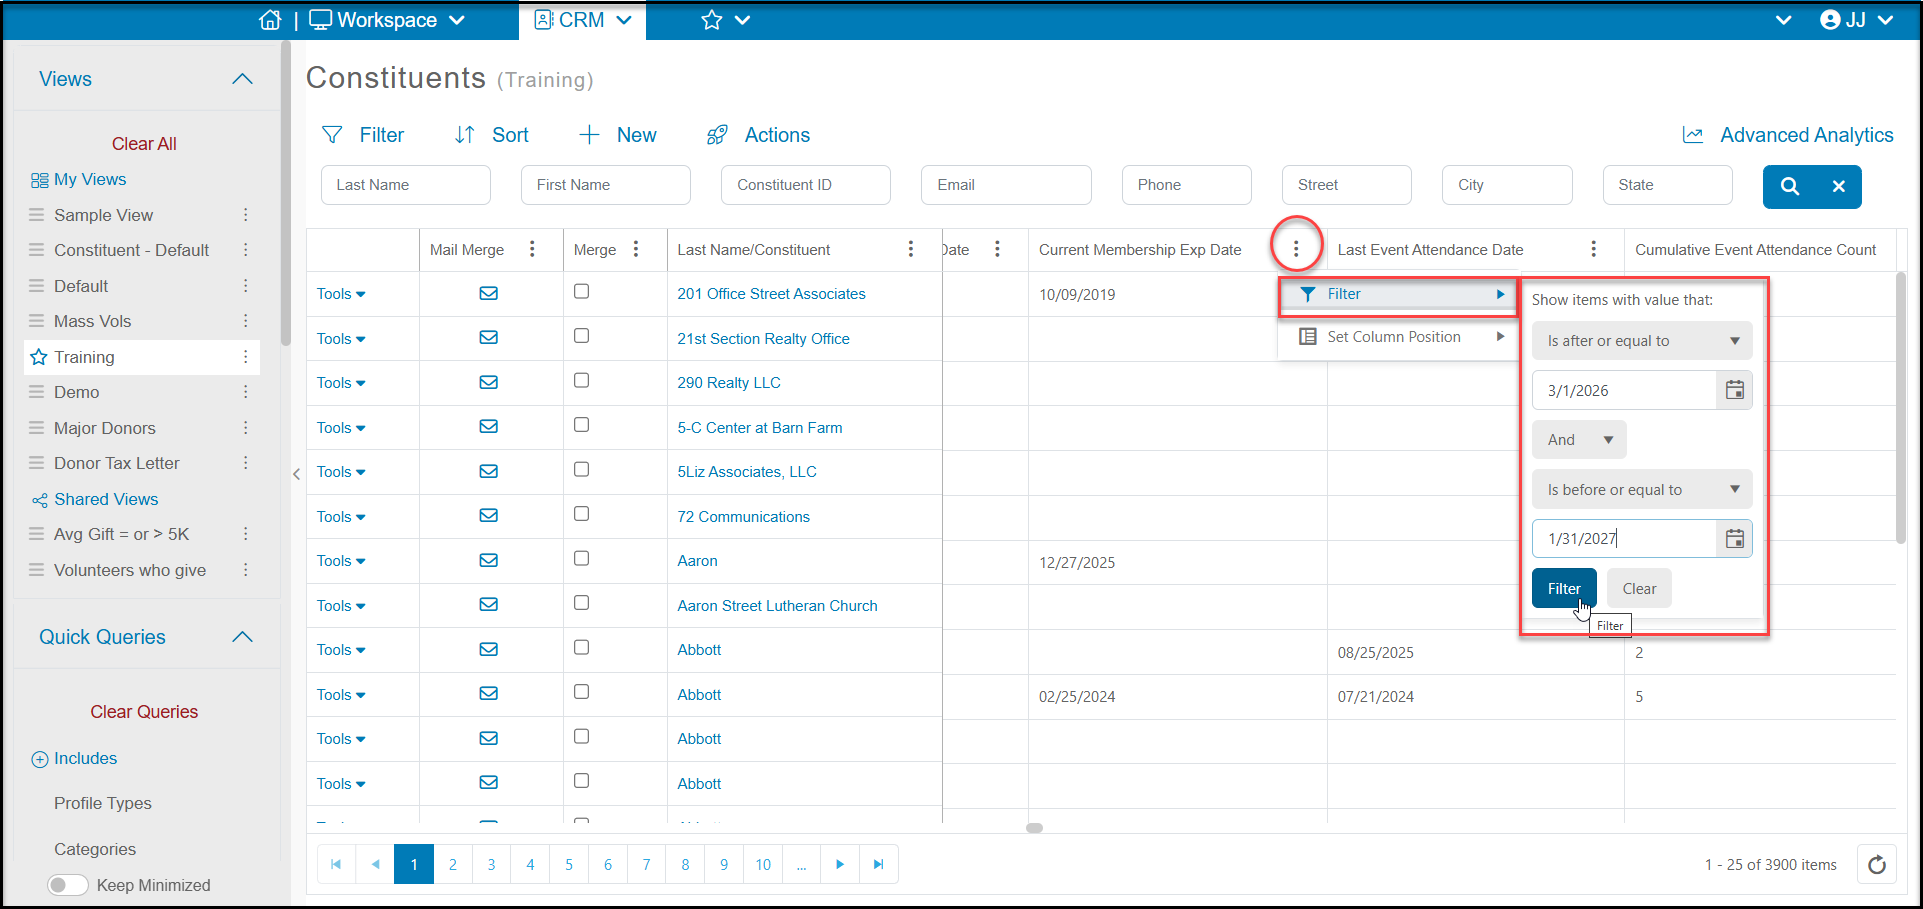
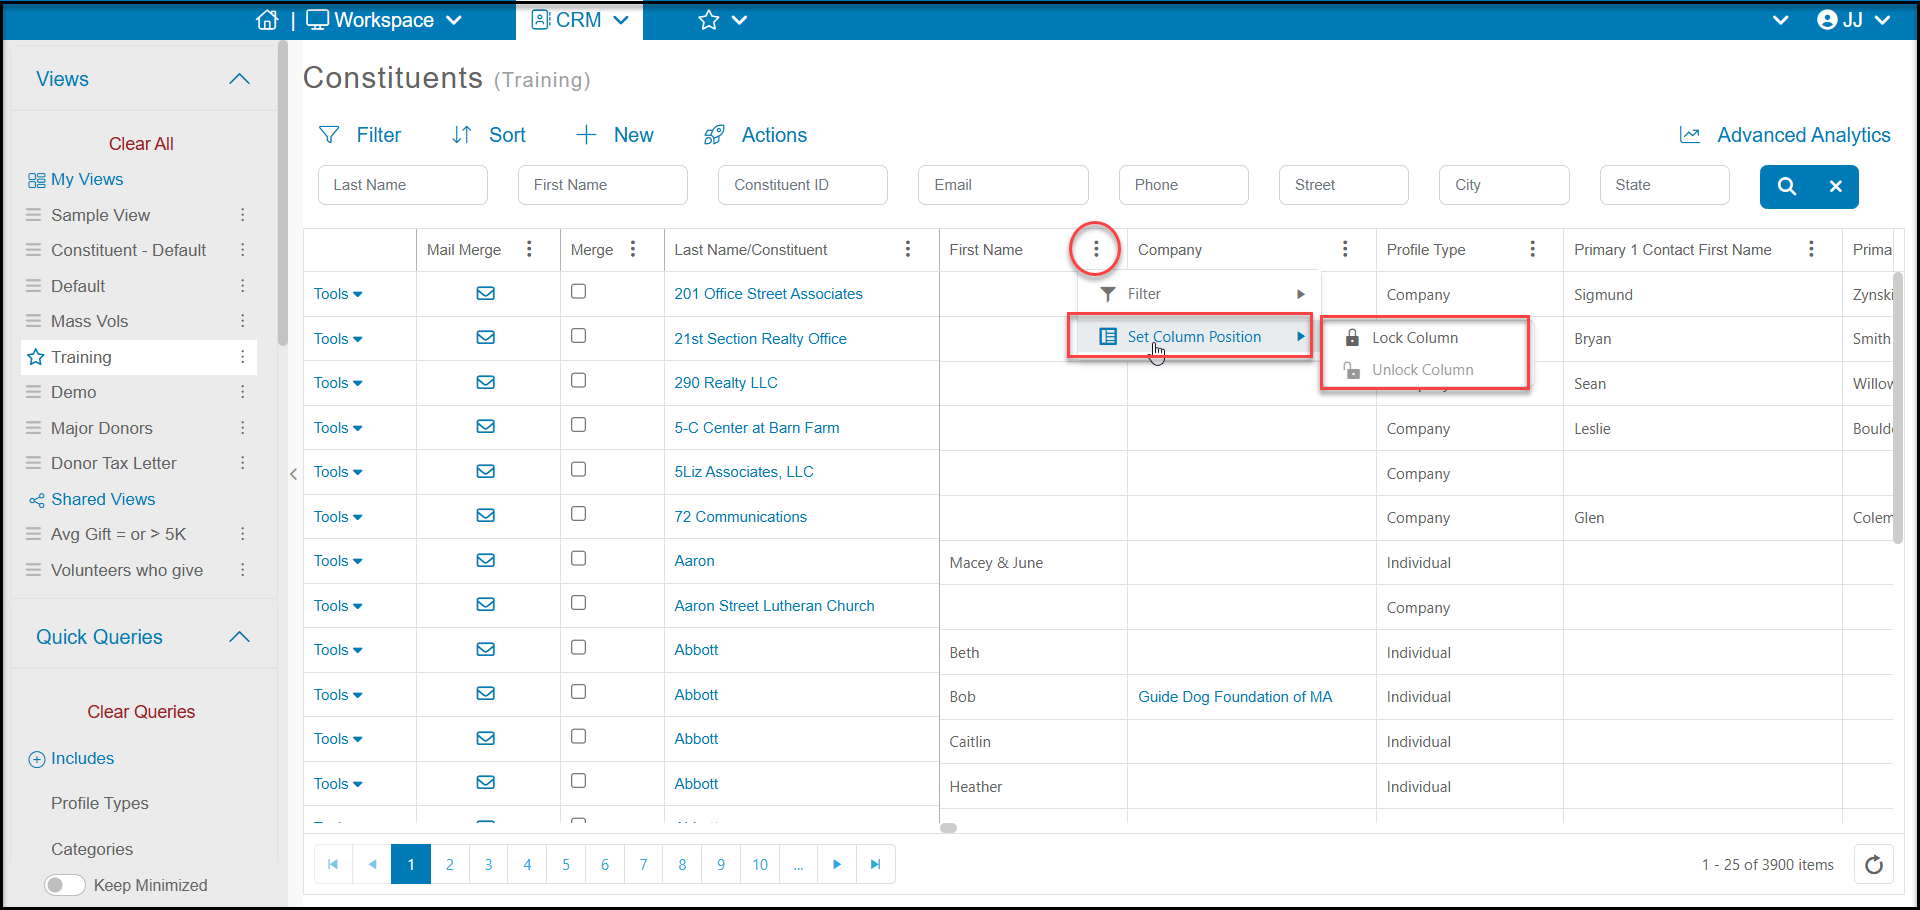
You can also used the Edit Column Settings to add filters or lock a column to the left side of the grid. You can access these options by clicking on the three dots that appear next to every column title on the grid.
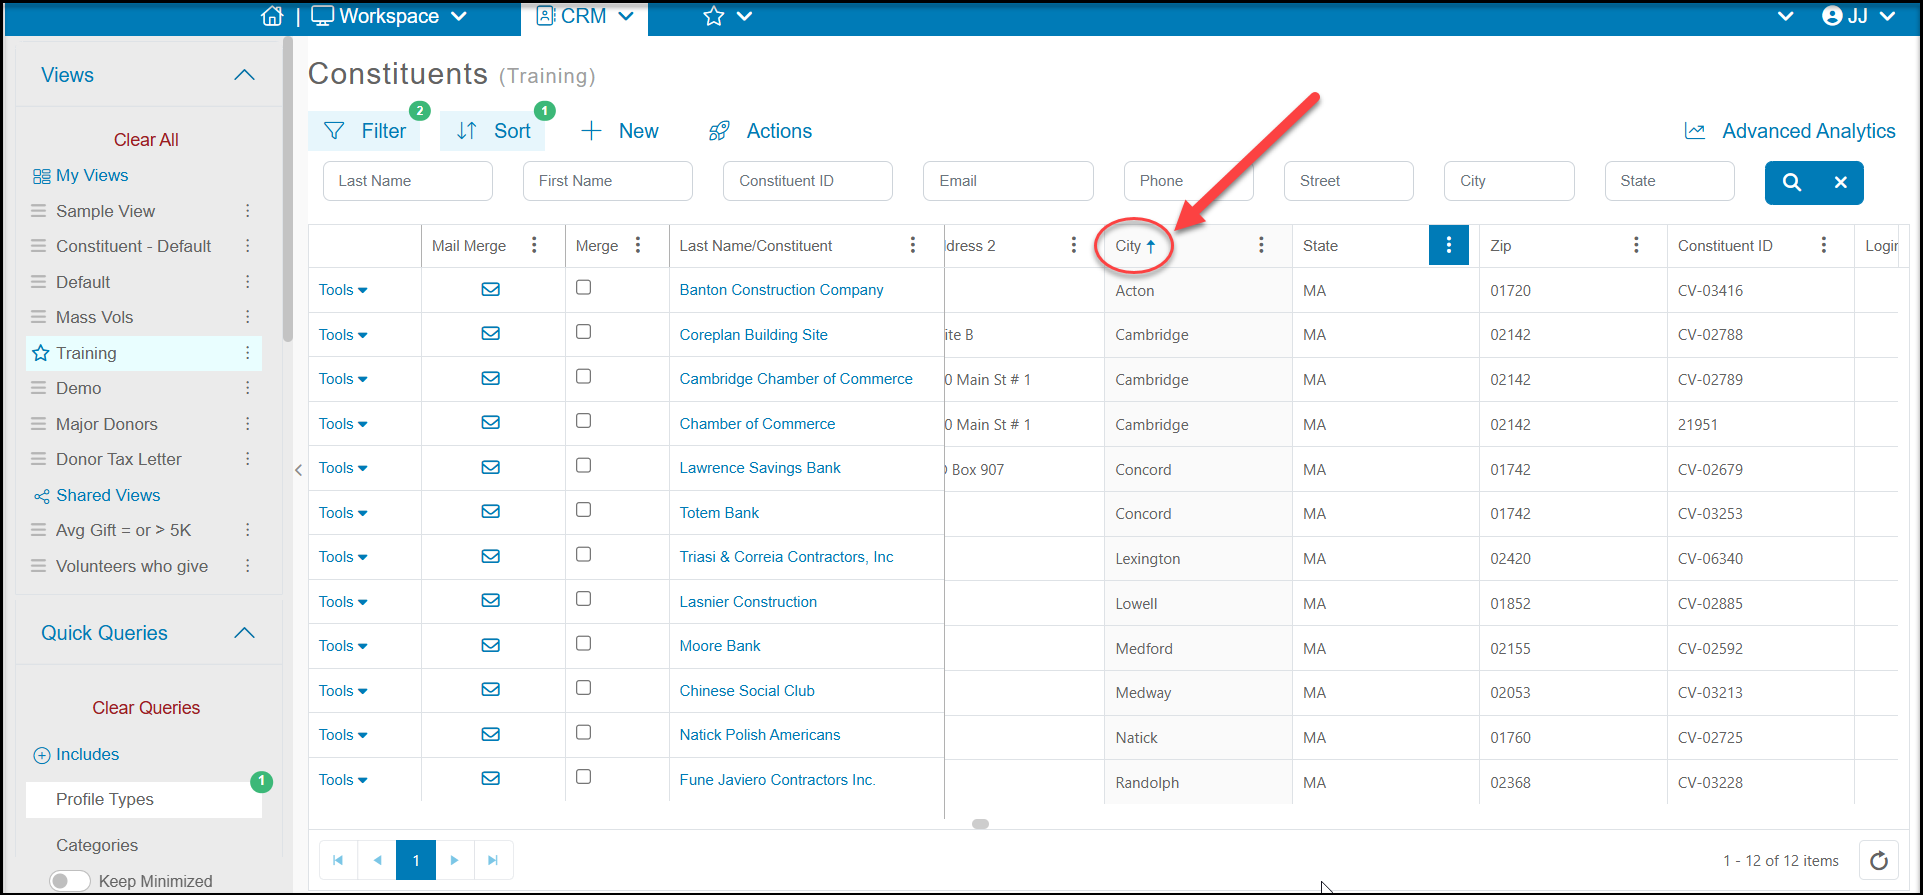
Clicking on the top of a column will also apply a sort to that column. One click applies the sort in ascending order, two clicks applies the sort in descending order, and a third click will clear the sort. Columns that are sorted will also show a small arrow next to the name and have a light gray highlight on that column.
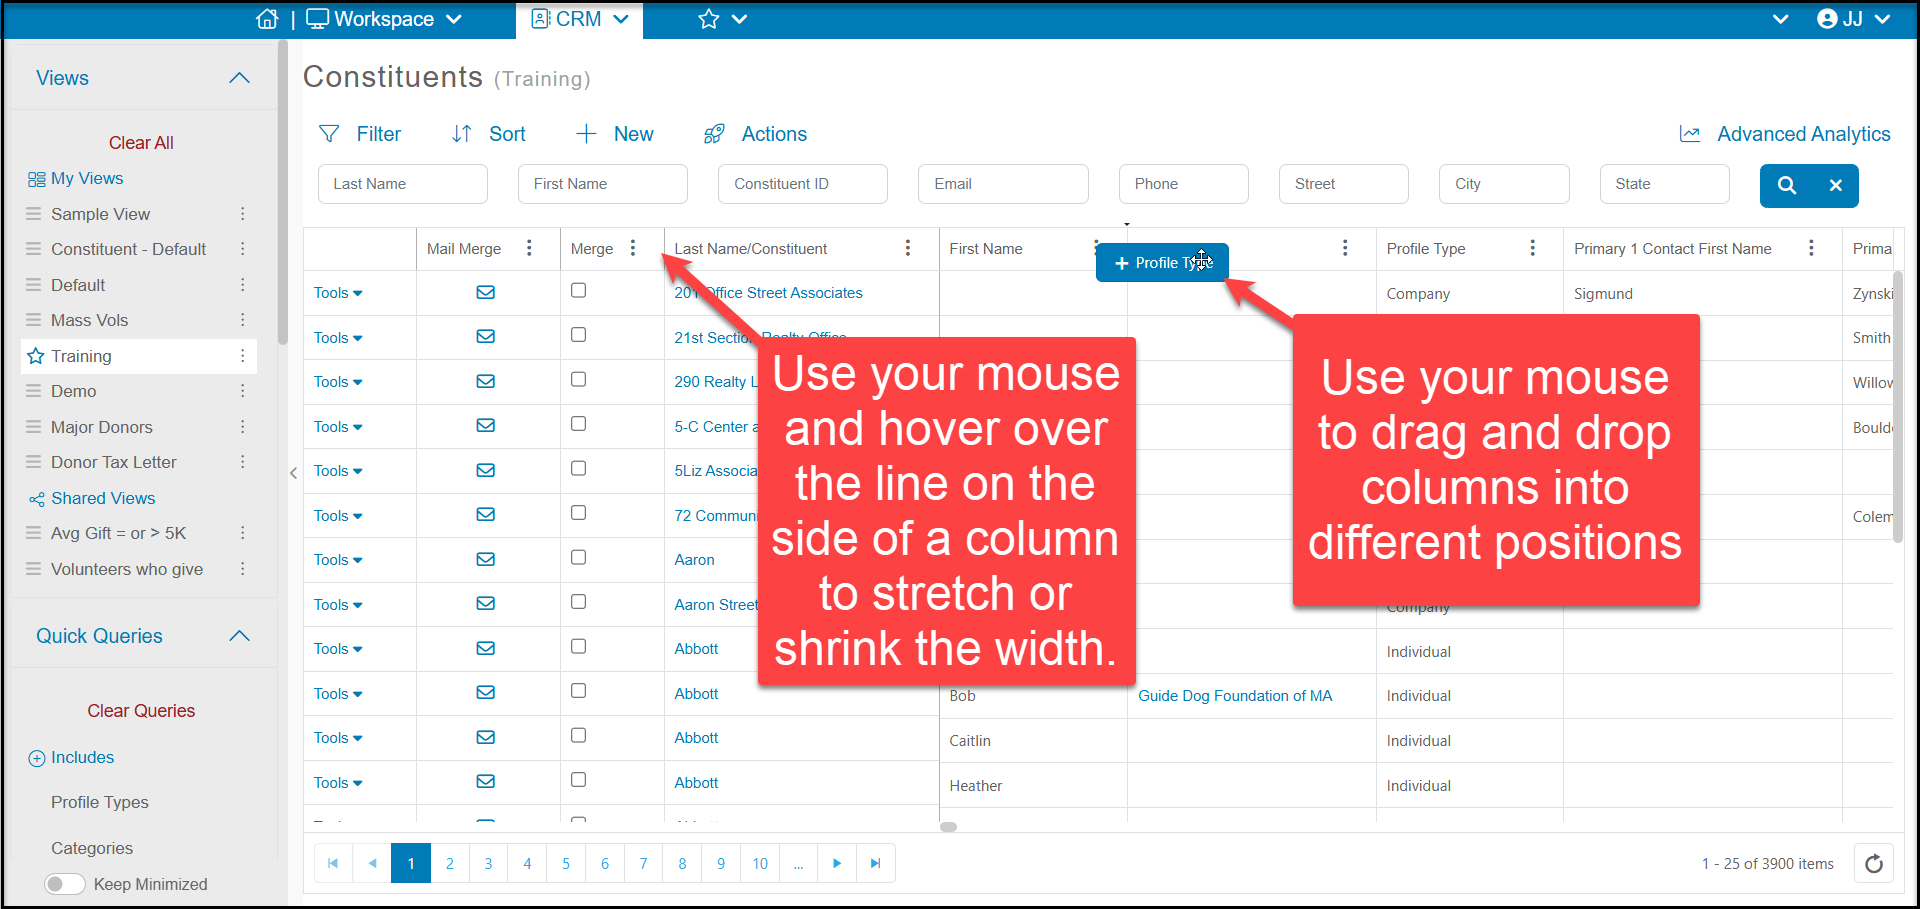
You can drag and drop the columns to a desired order and stretch and shrink the width of the columns using your mouse.
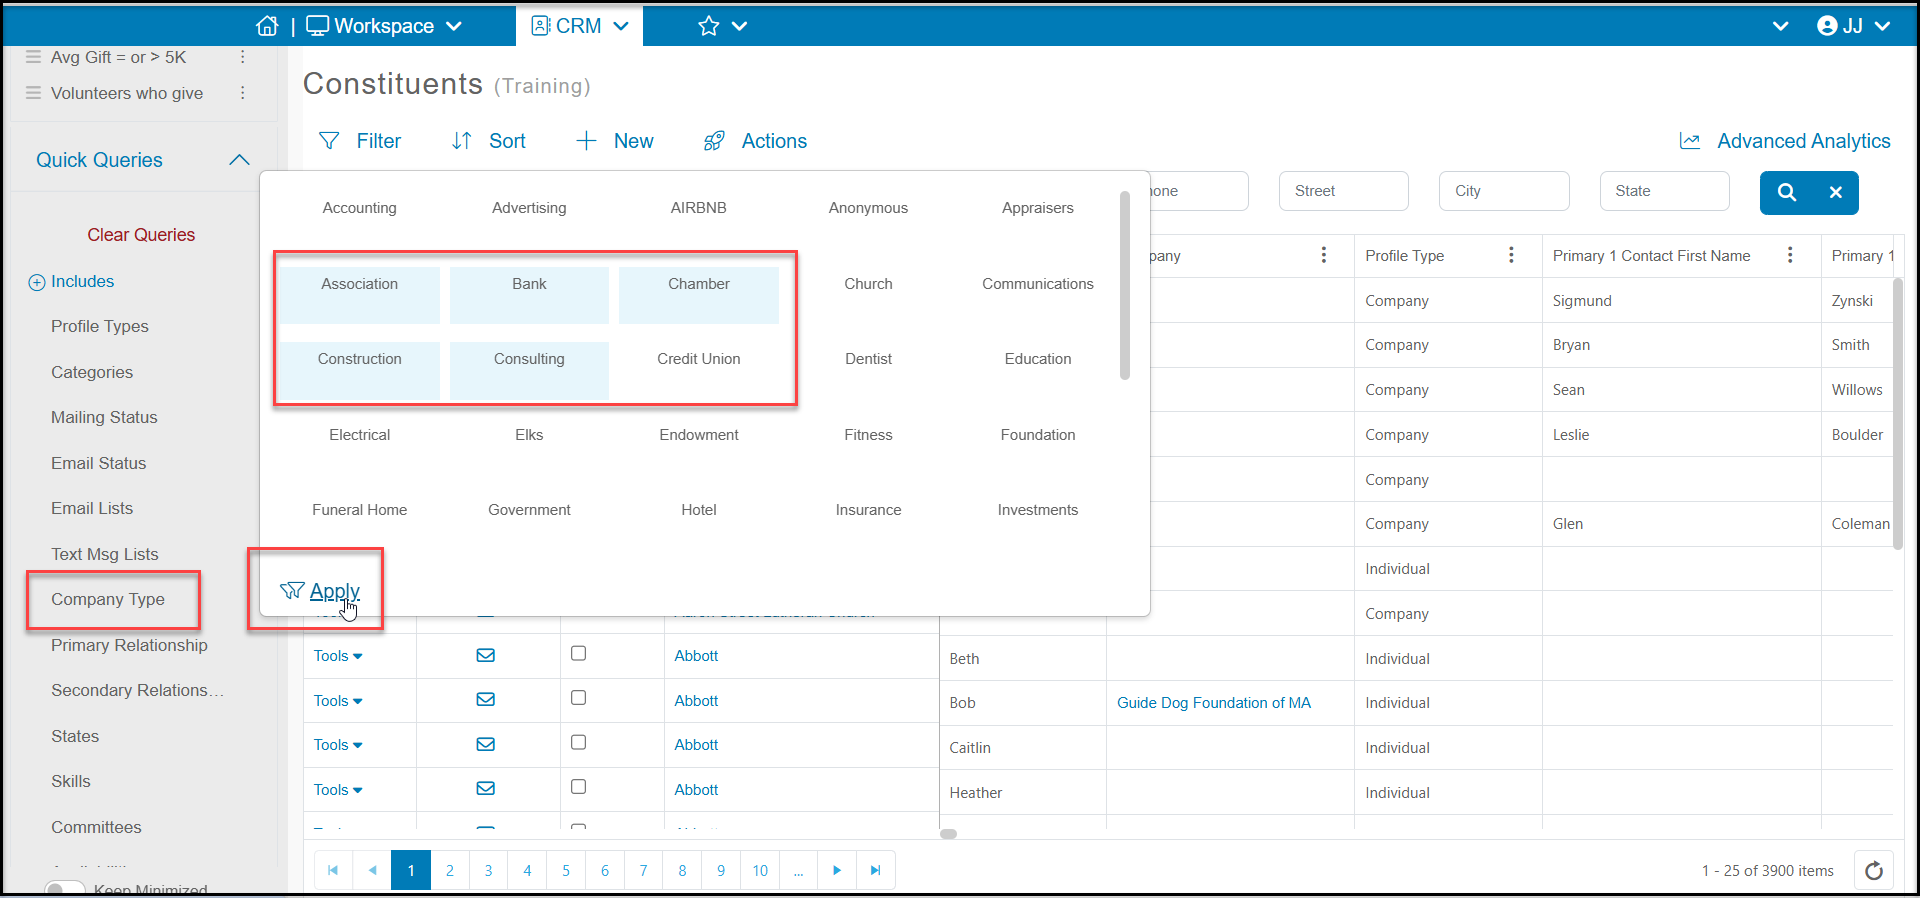
You can also apply filters from the Quick Queries sidebar. Quick Queries allow you to access multi-select fields like Categories and Email Lists, which do not have a column on the grid. They also allow you to make multiple selections at once. In the example below, constituents could be any of the selected Company Types to be included in the list so the view will show all company records assigned to a company type of Associations, Banks, Chambers, Construction or Consulting.
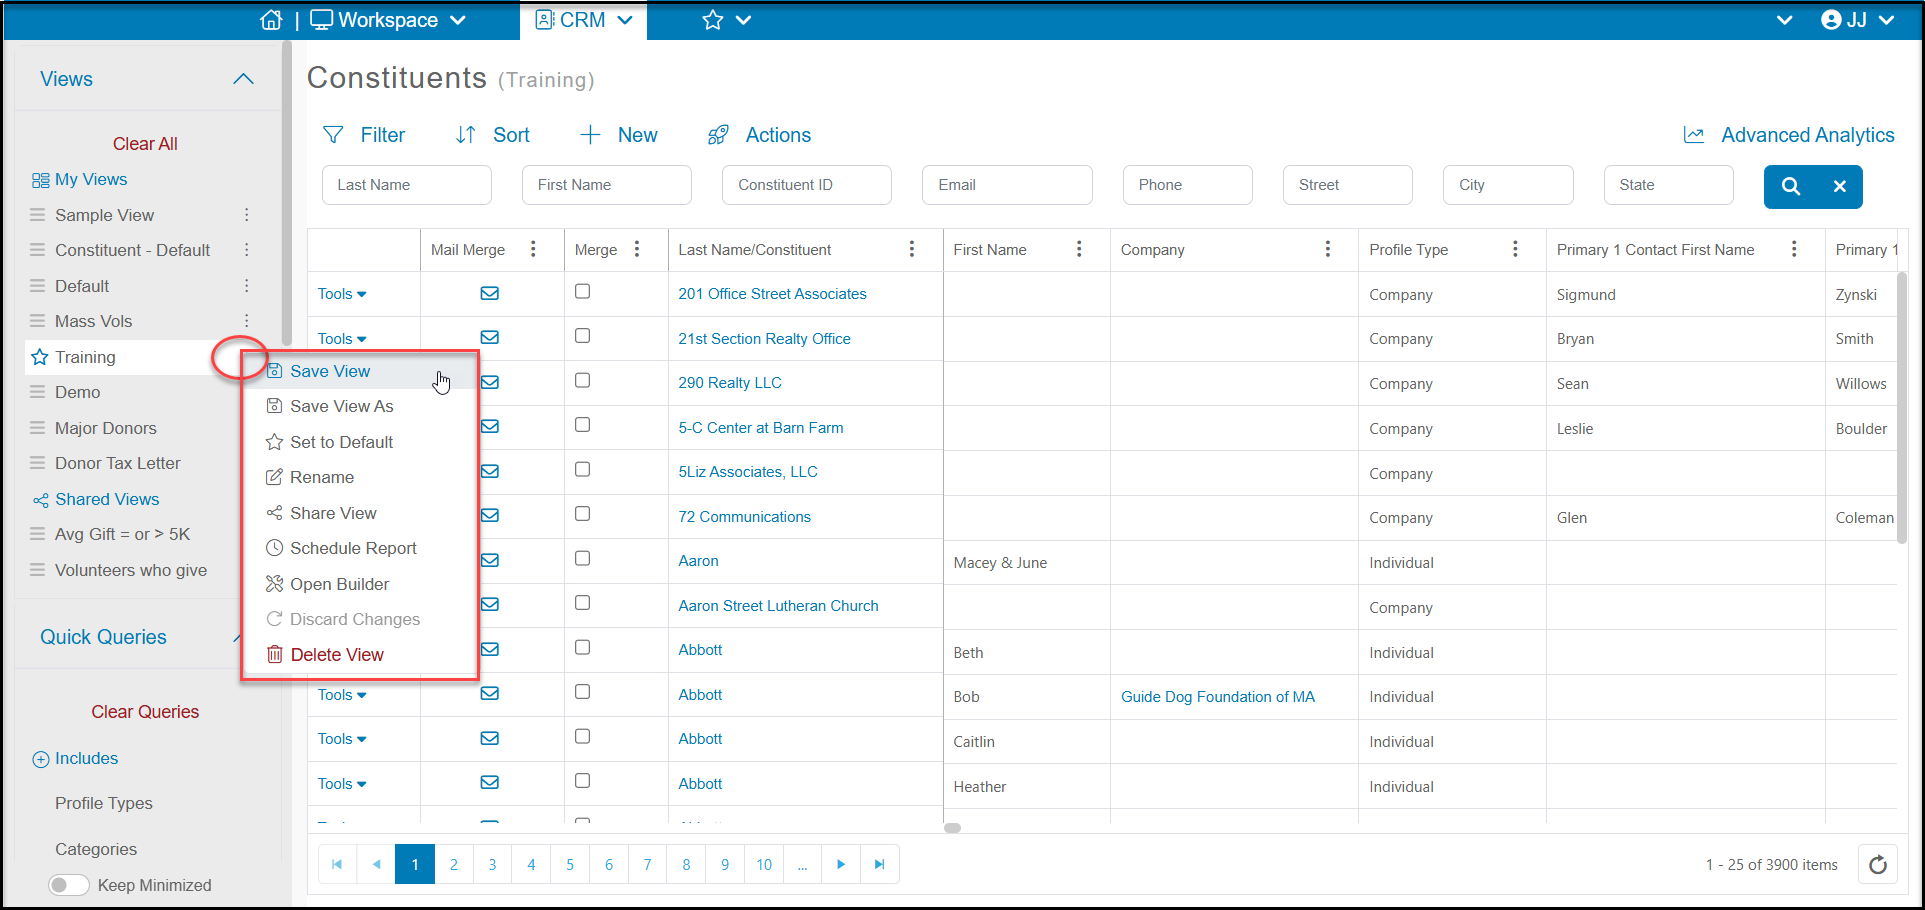
To save a view click on the three-dot menu next to the highlighted view shown under the sidebar View menu. In that menu select Save View As to create a brand-new view. Or, to apply those updated filters and sorts to an existing view you can click Save View to make those changes permanent. You can have as many views as you like and can select which view you prefer to be your default by selecting Set to Default.