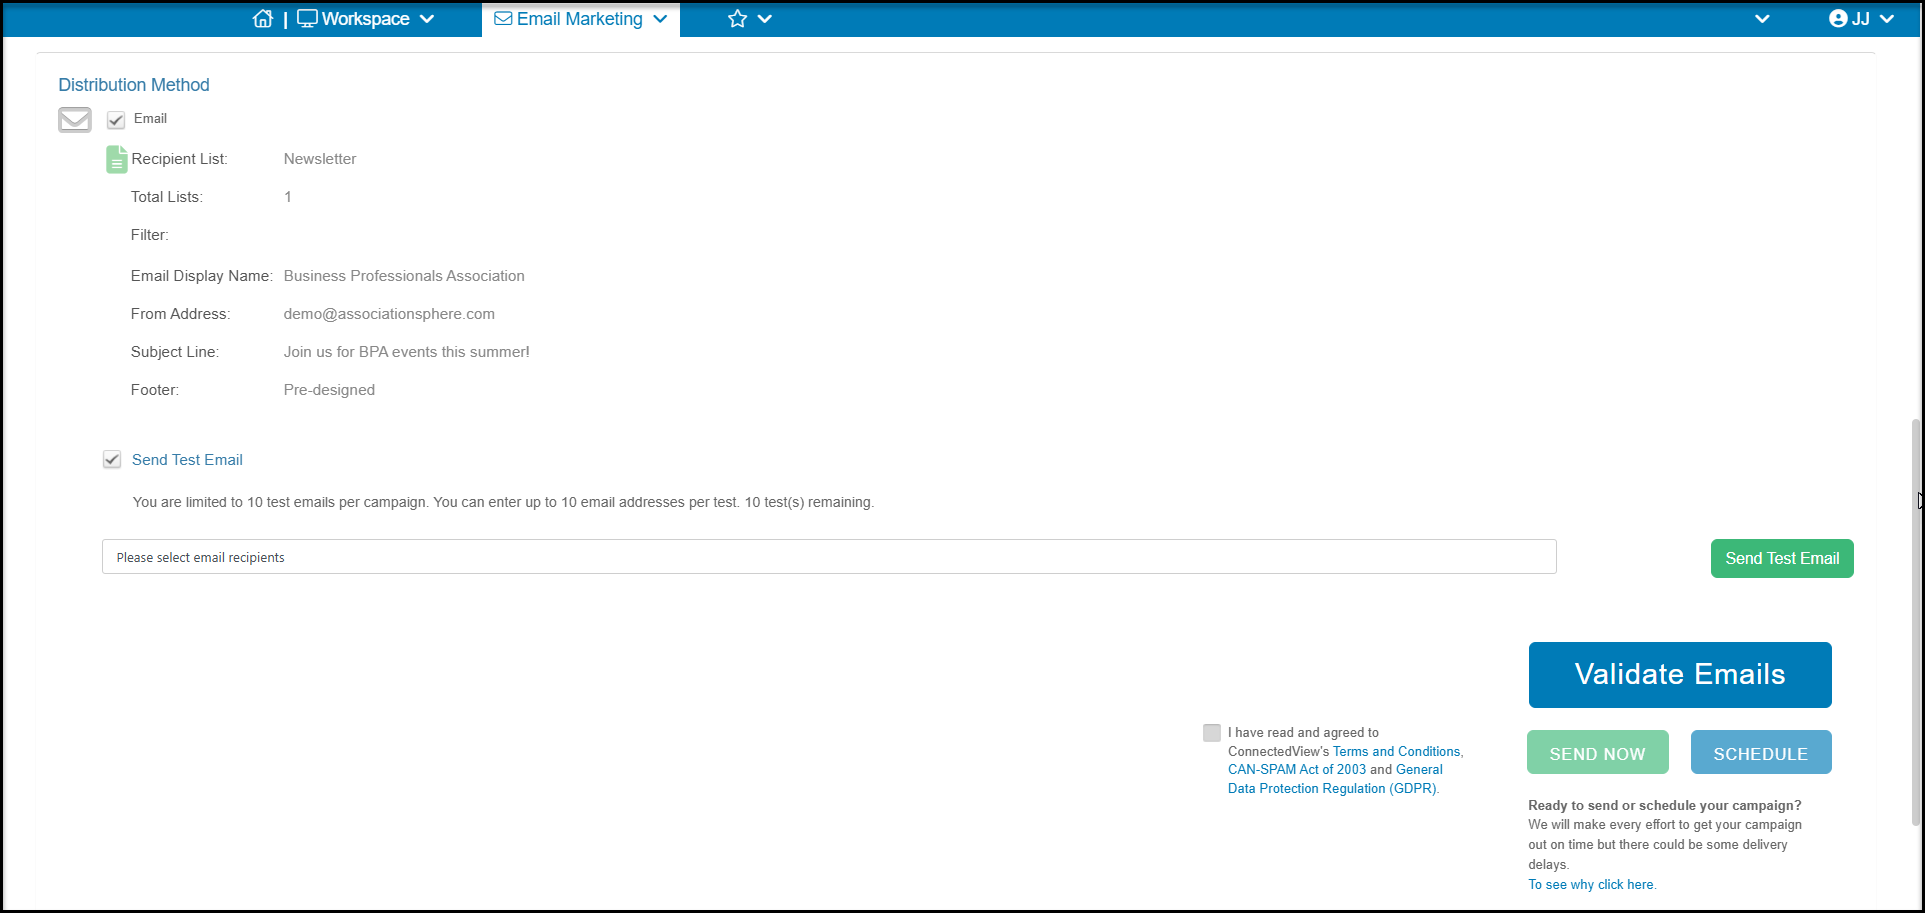
A campaign is an email sent to a list of contacts using one of the email marketing templates. With a campaign, you can send emails to make announcements, send newsletters, invite constituents to events, and send general messages.
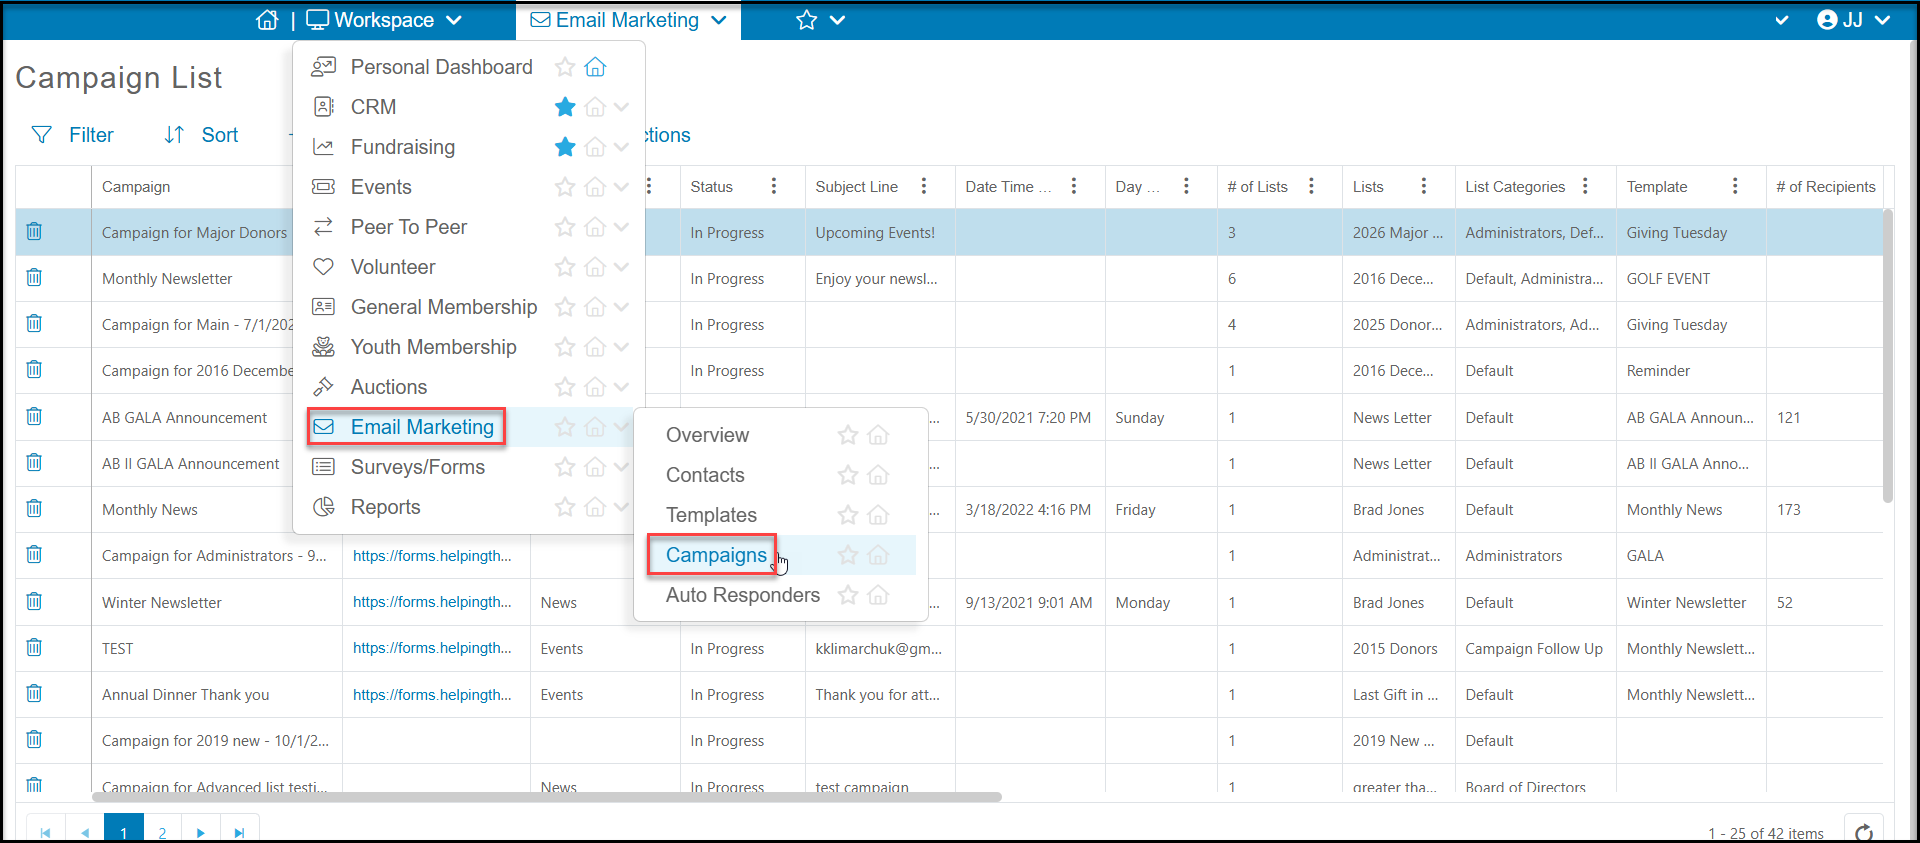
On the Campaigns page in the Email Marketing Module, you see a grid with a list of campaign names on each row along with data related to that campaign in the columns. If the status of your campaign is in progress, you can still make changes to the campaign. When a campaign has been emailed, you will also see statistics related to the number opened, unopened, unsubscribed and bounced on the grid.
You can create a new campaign by clicking on +New, then Campaign.
You can edit one that is In Progress by highlighting that row and clicking on View/Edit, then Campaign.
You can also use the Actions menu to Copy a campaign that you have selected.
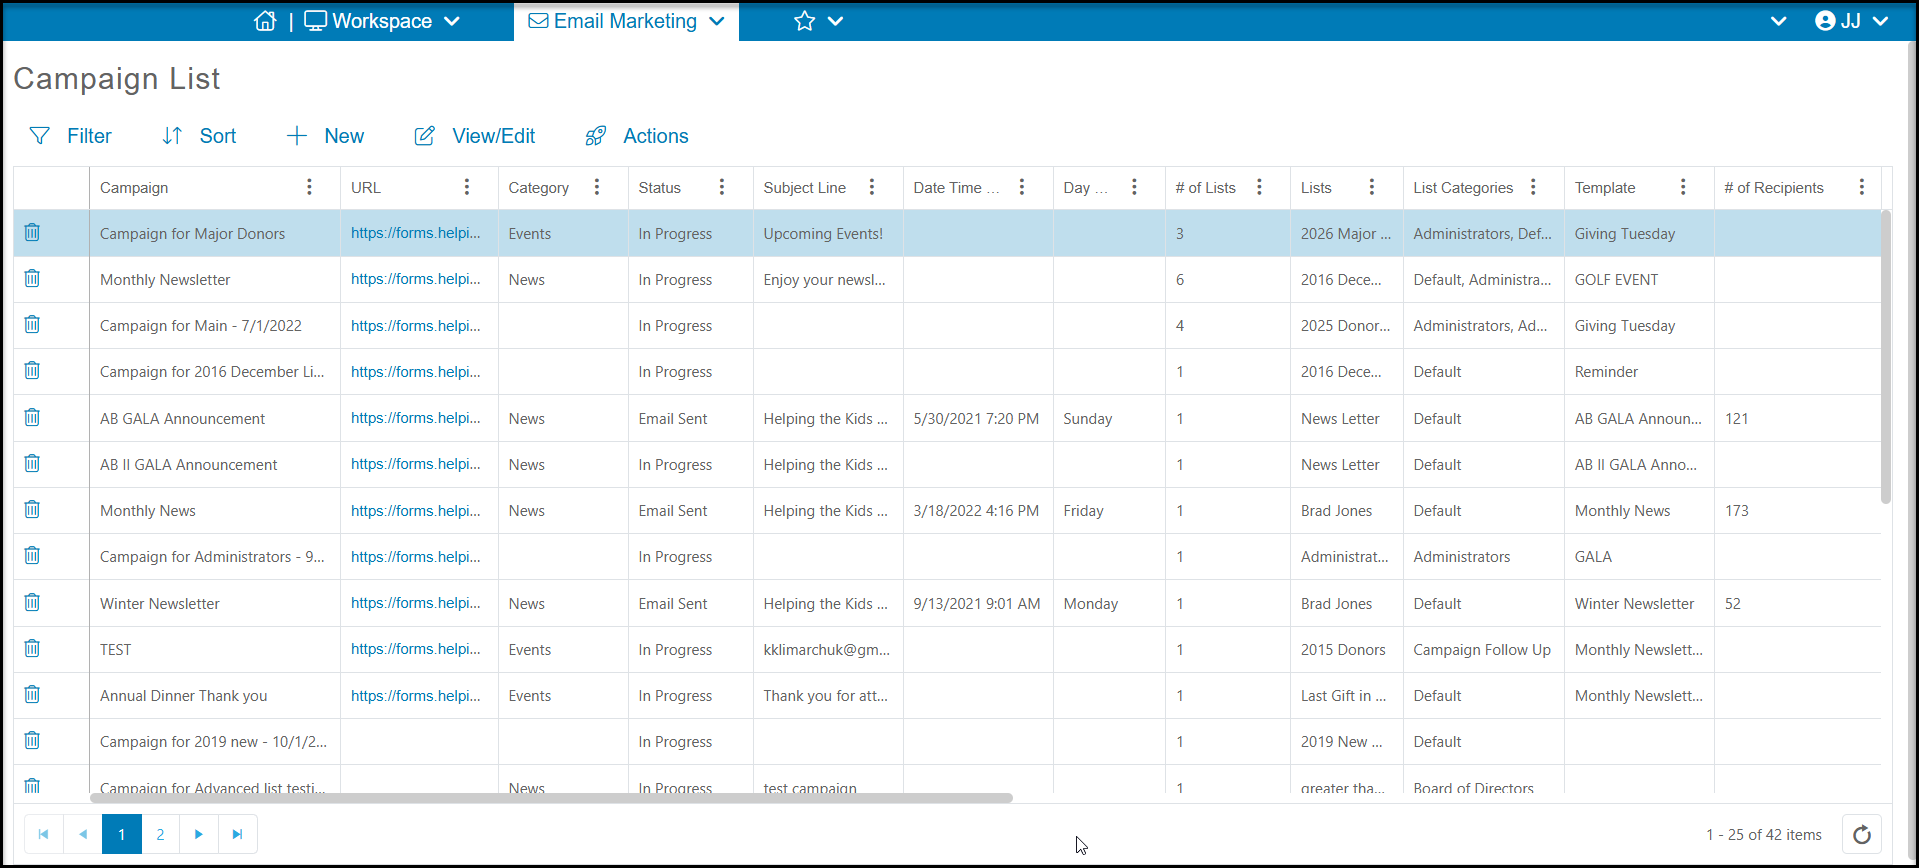
After emailing the campaign, you can also archive it. Archiving an email adds it to a file that you can share via a URL link or add to your website so that your constituents can see past campaigns.
Campaign Info Tab
The process of creating email campaigns is similar to other page builders. There are four steps required and one optional step (Email Preview) identified by the tabs at the top of the page.
The first step is Campaign Info, here you will insert the following:
- Name – Insert the name that will be displayed on the Campaigns grid for the title of this campaign.
- Campaign Category - Assign your campaign to a category. This dropdown list is editable with <New/Edit> at the top of the list.
- Email Display Name – Insert the name will that appear as the sender of the email when it is sent out.
- From Address – Insert the email address that will appear as the sender of the email when it is sent out.
- Subject Line – Insert the text that will be the subject line of that email.
- Click Save & Next to go to the next step.
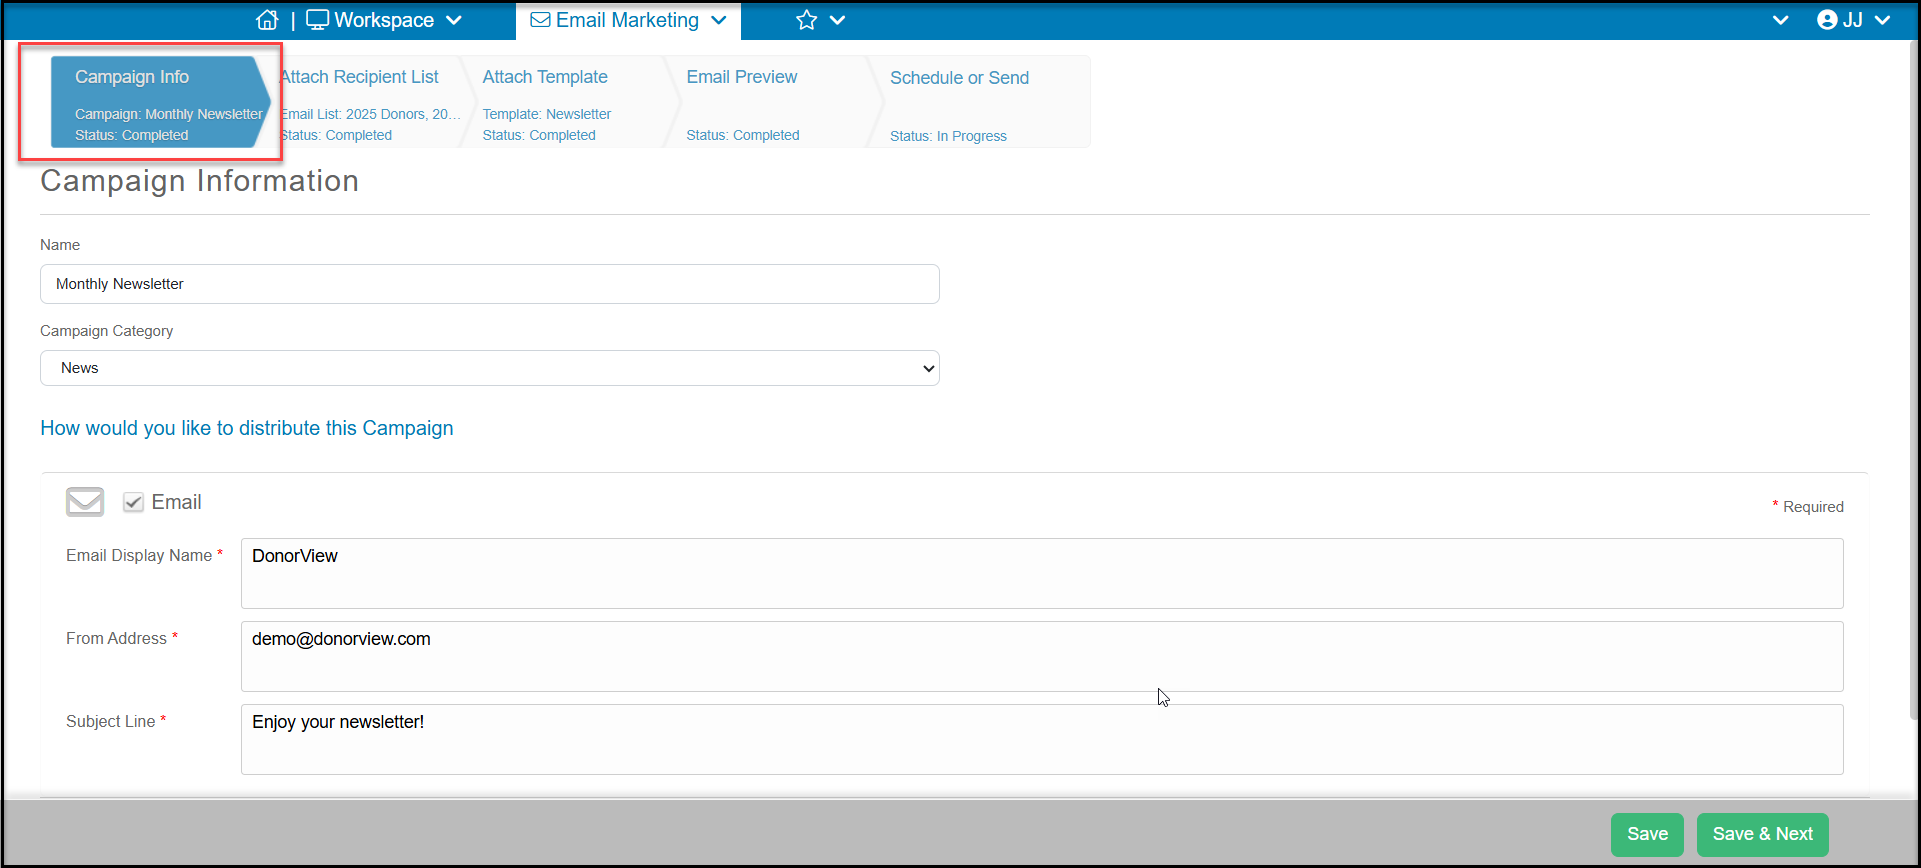
Attach Recipient List
The next tab is the Attach Recipient List where you can choose which email lists will be sent this message. You can select multiple lists and the software will dedupe the list for you.
You have all the same functionality you have on the Contacts page and can add recipients, edit lists, and edit constituent information as needed. You can learn more about managing your email lists and contacts in this article "How can I manage my email lists?"
Click Confirm Selected List to proceed to the next tab.
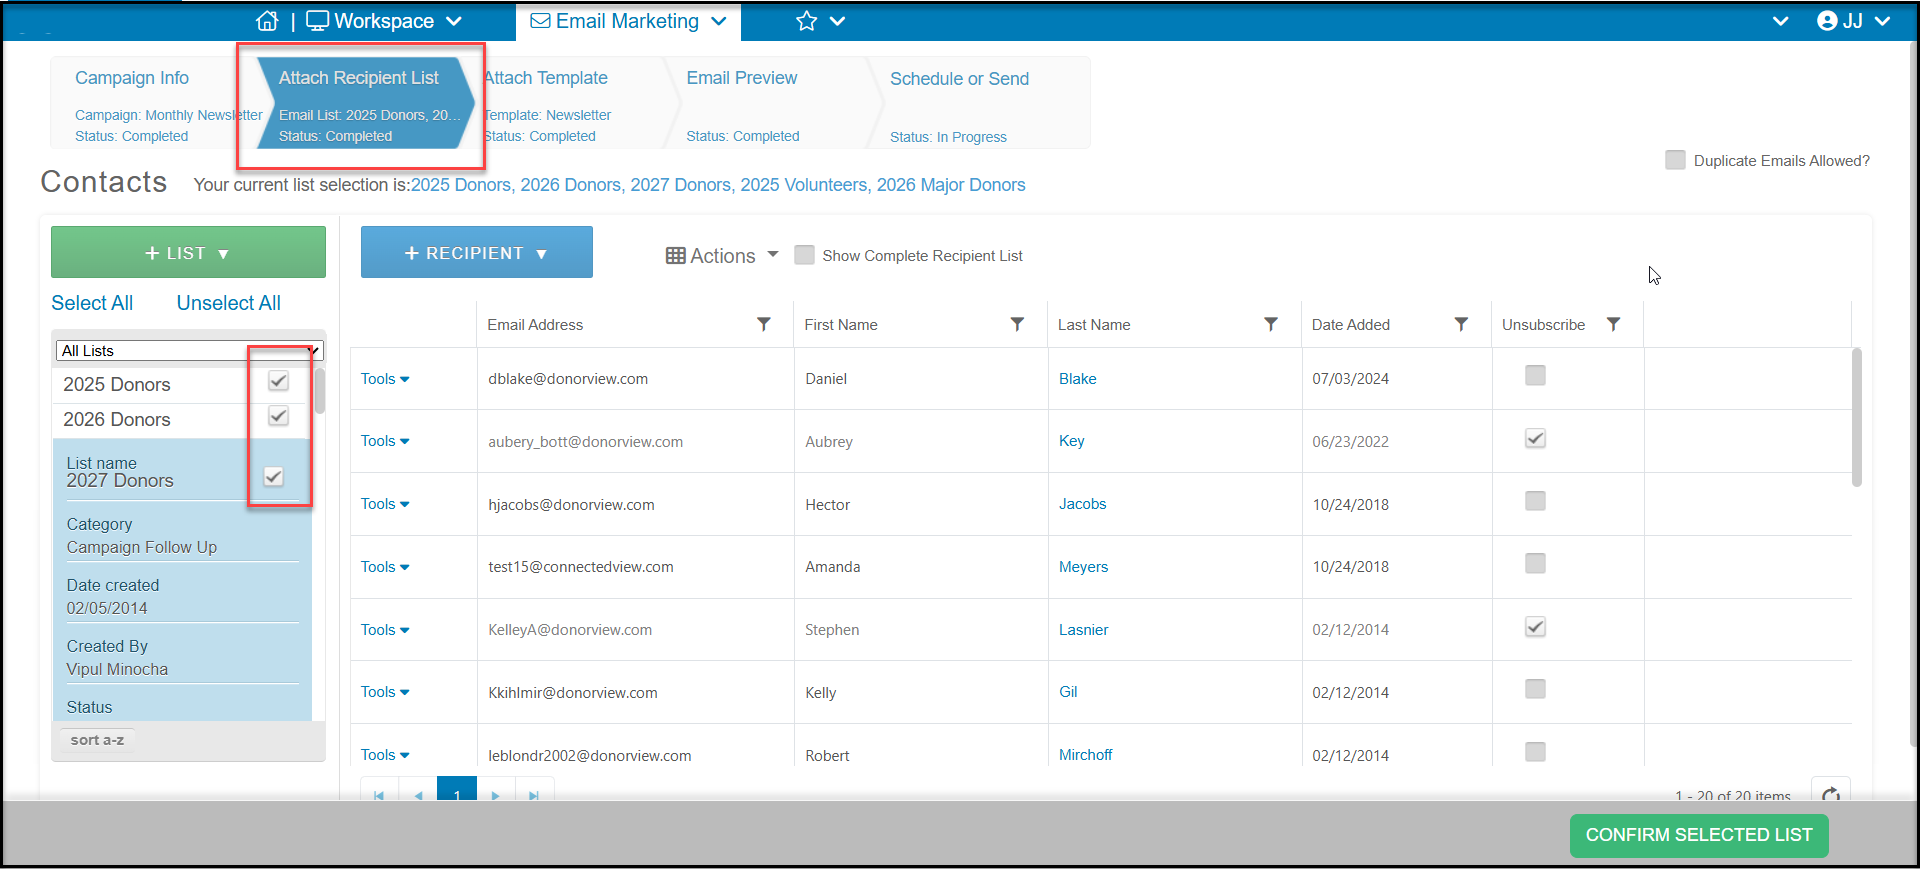
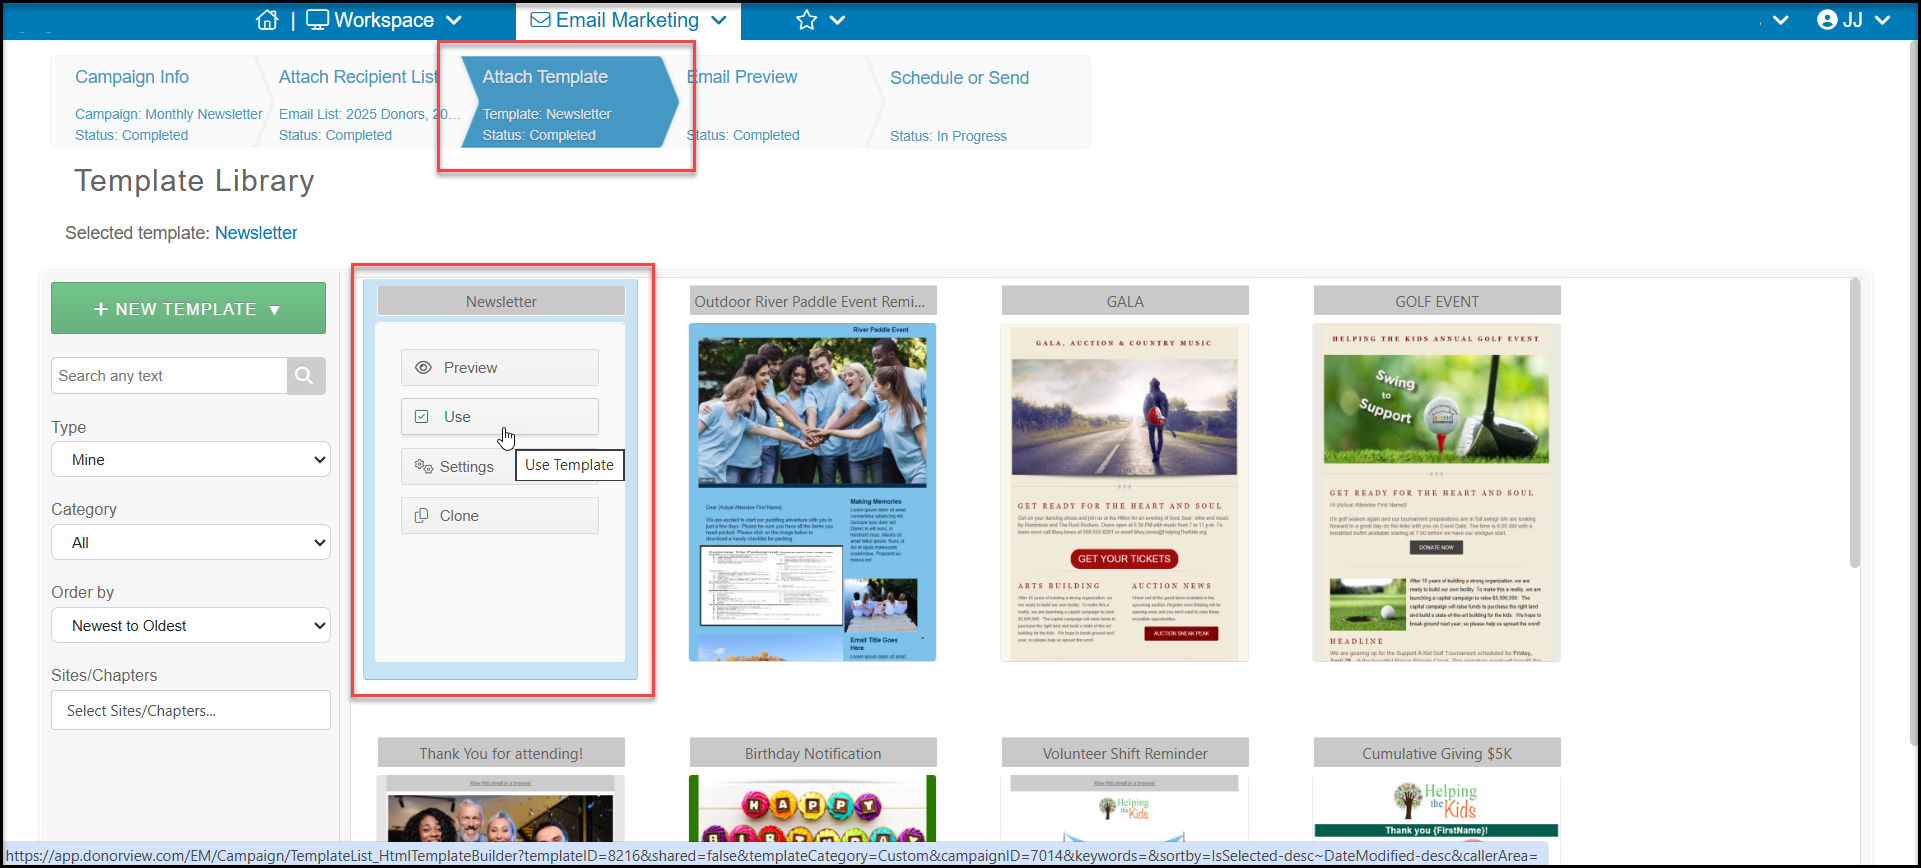
Attach Template Tab
The next step is selecting the email marketing template you wish to send. In the Attach Template tab you can select a template to use by hovering over the template and clicking Use. You also have all the same functionality for creating new templates as you would in the Templates page. For details on how to edit your templates, watch this video "Email Template Editor" or this article "How do I create and edit an email template?"
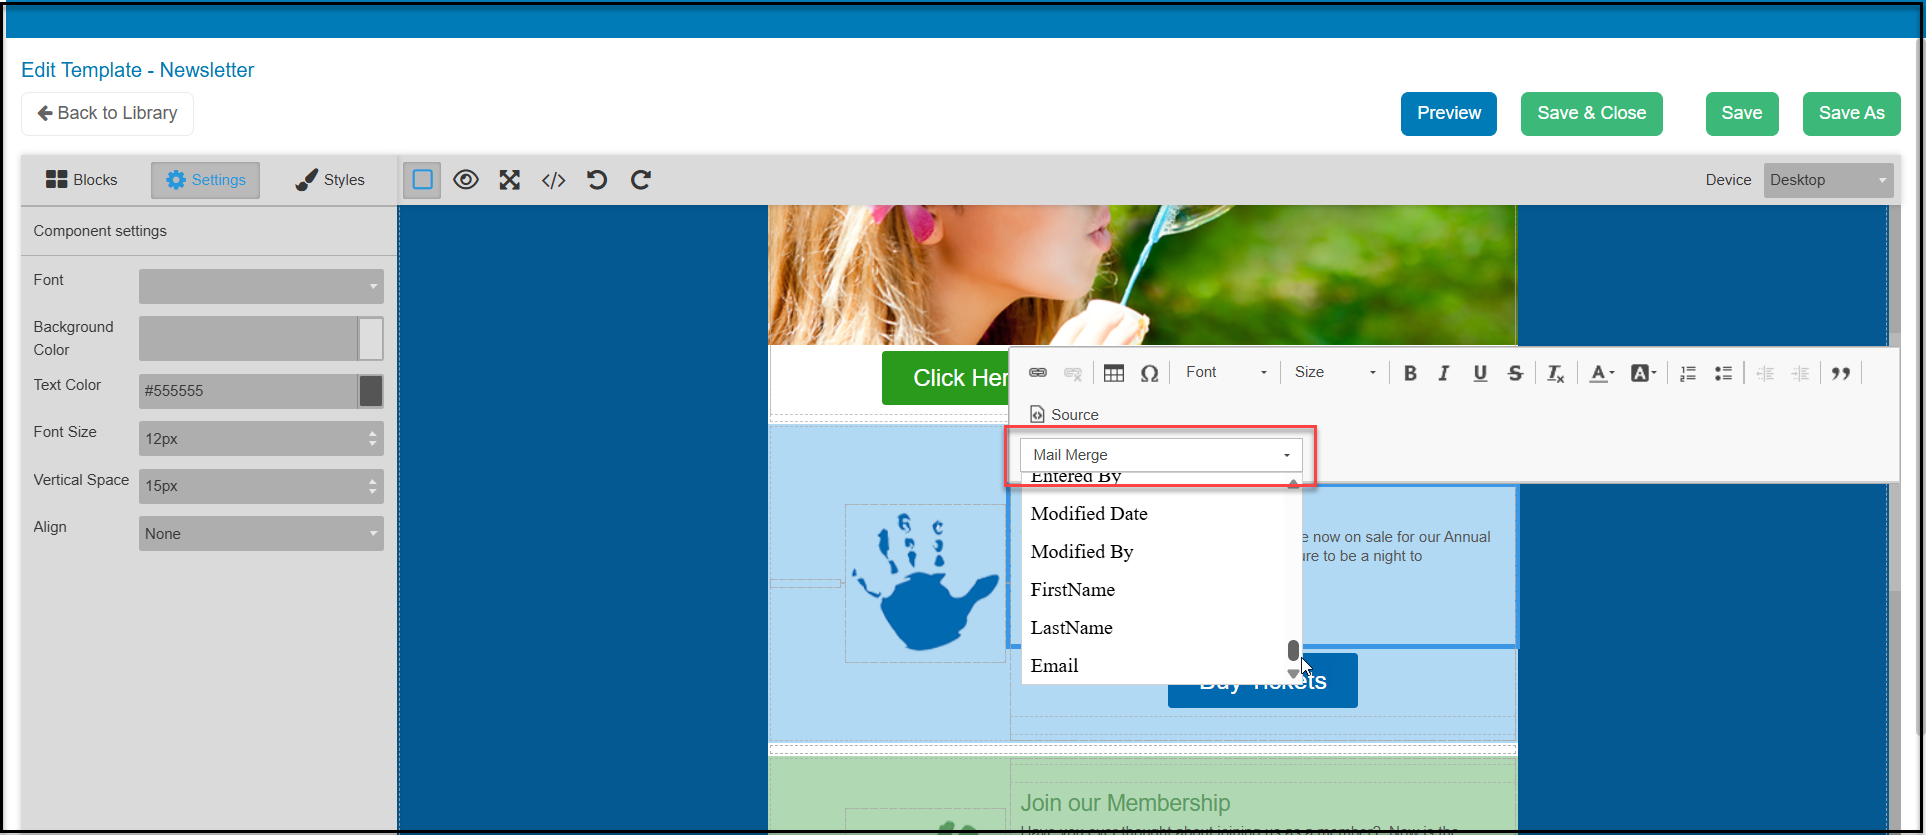
When you open your template from the Campaigns page, you have a new option available for text fields. When you double click in a text box, a new option for adding Mail Merge fields is available in the text editor menu.
- The mail merge fields that are available depend on how the list(s) were generated. If you created your list from the Constituents grid, for example, you will have fields found on the Constituents grid available to insert and personalize your message. If you imported your list, you will only have First Name, Last Name and Email.
- When you are complete with your changes, click Save & Close to go back to the campaign builder.
Email Preview Tab
Email Preview is only available to organizations that subscribe to Advanced Analytics. Without Advanced Analytics, this step is skipped.
If your organization has Advanced Analytics, this step is still optional.
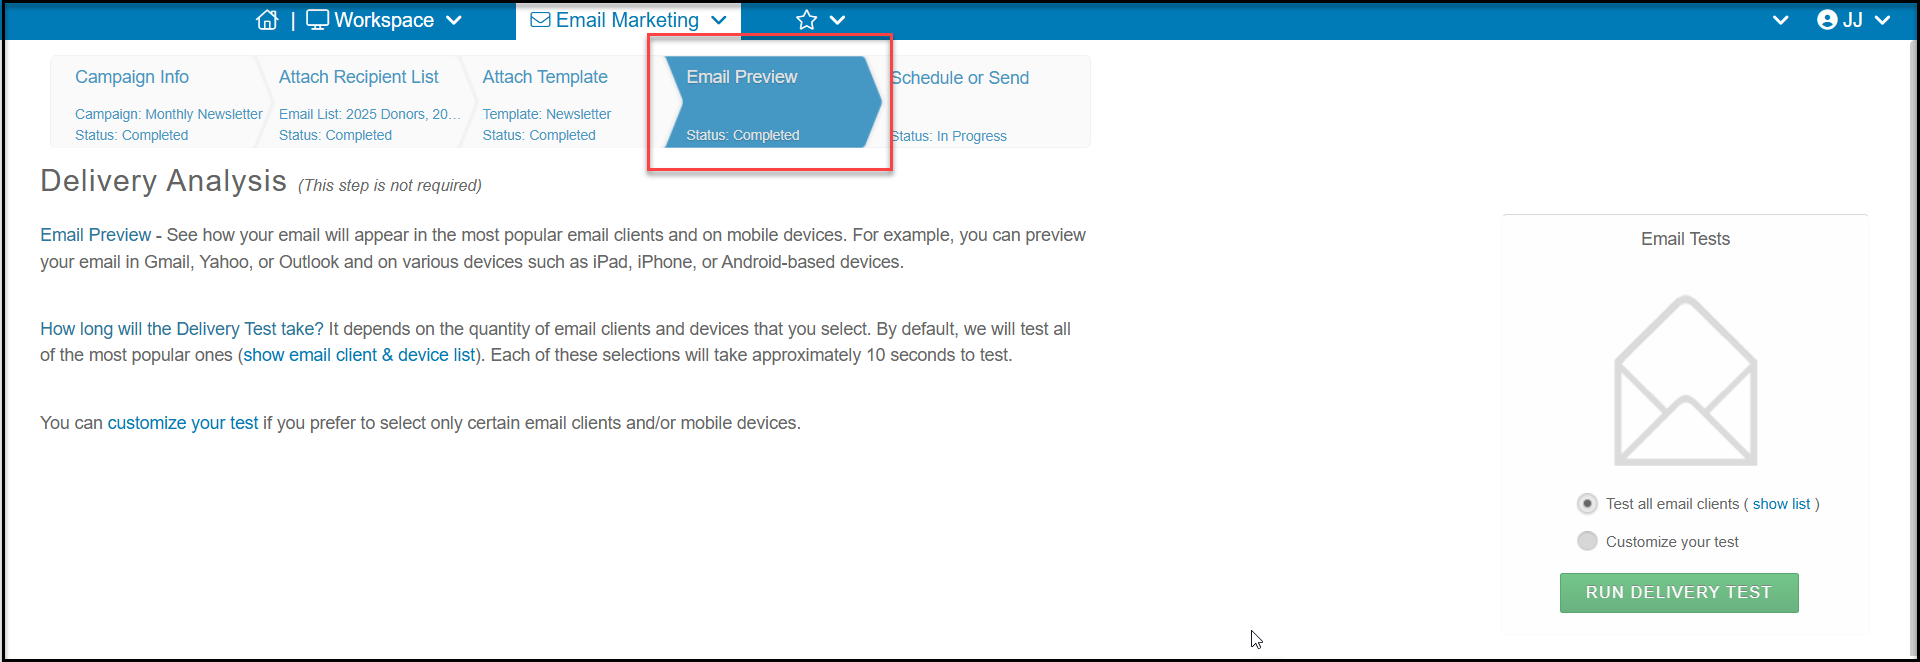
Email Preview will allow you to see how your email will appear on many email providers and well as estimate how it will perform with spam filters. Click on Run Delivery Test to run the test. Each time you make a substantial change to the email template, you may want to run the test again.
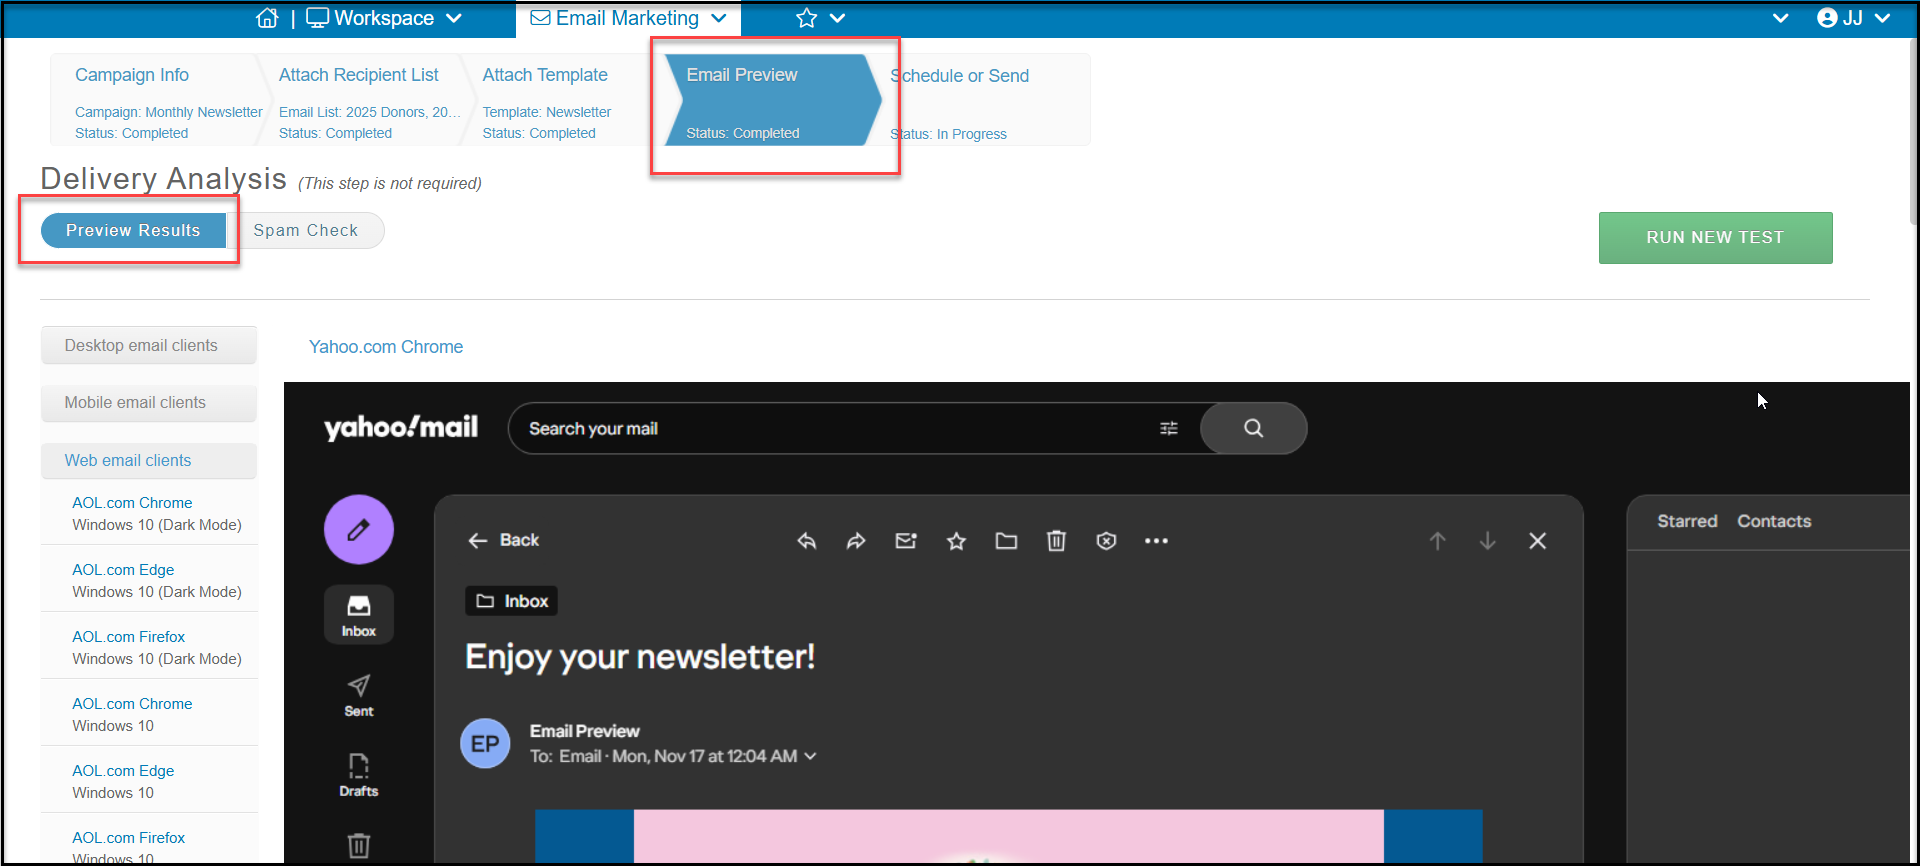
When the test is run, click on Preview Results and you can click on a variety of Desktop, Mobile and Web email clients and see how your email will look.
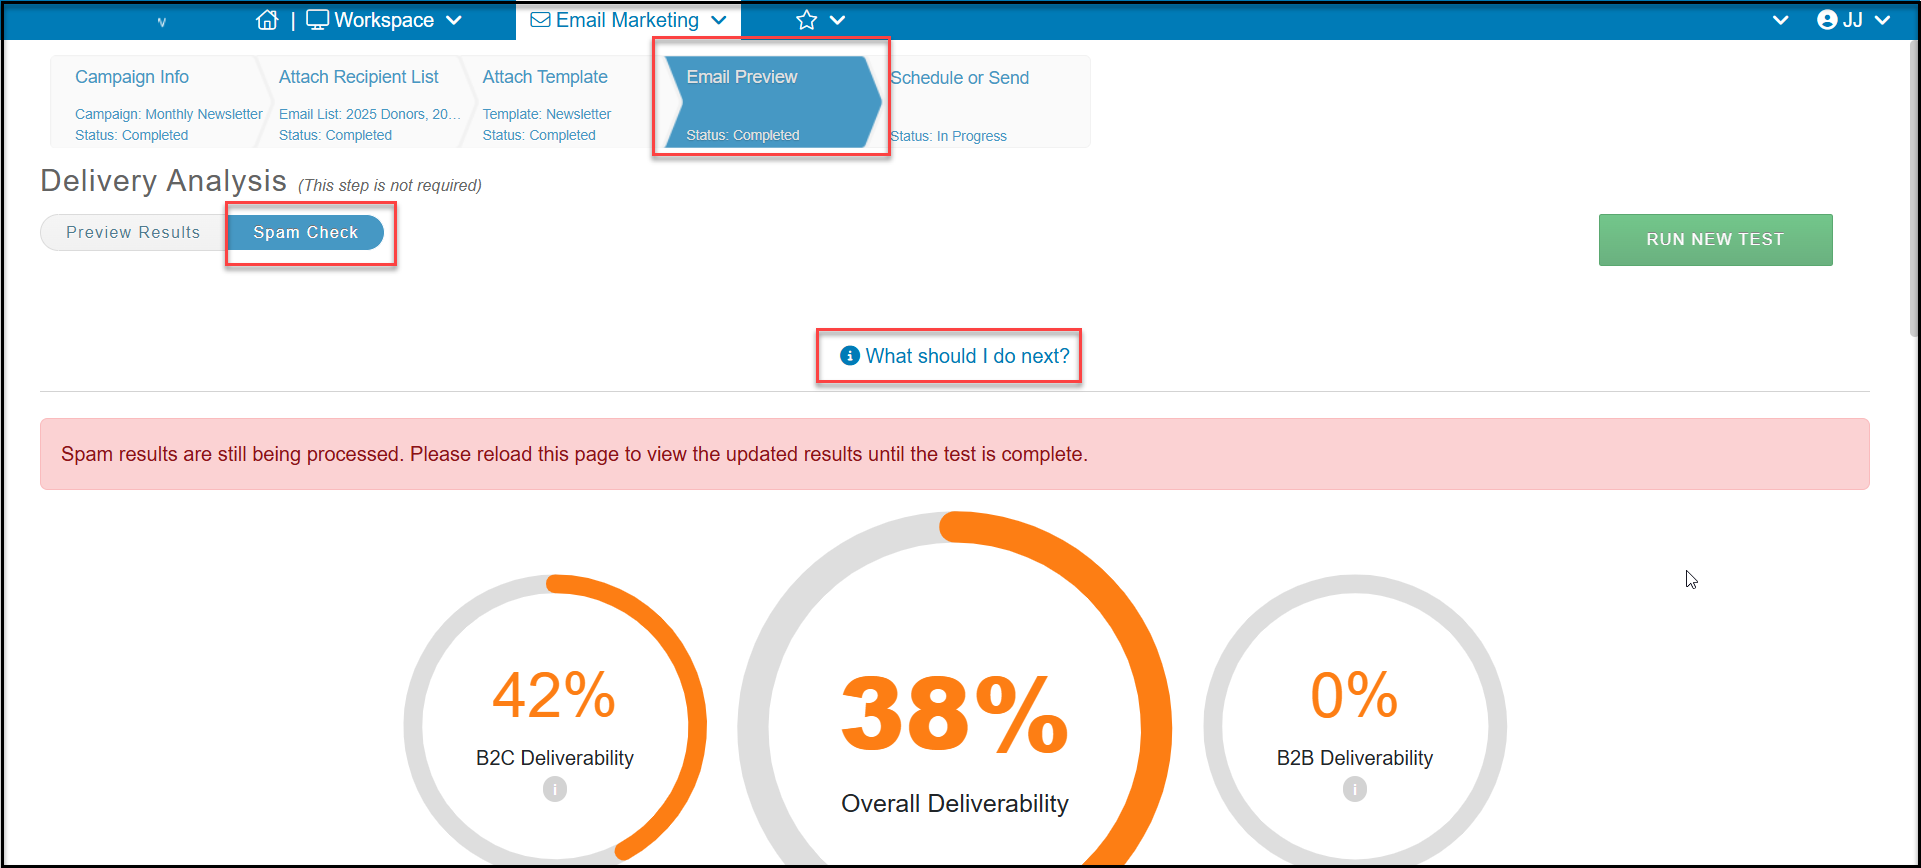
Click on Spam Check to see an estimate of deliverability rates. If your estimates are low, you can click the link “What should I do next?” to open the support article with recommendations for improving deliverability.
Schedule or Send Tab
The last step in sending a campaign is the Schedule or Send step. At the top of the page you have an unique URL and QR Code if you would like to share your email template via social media or other links.
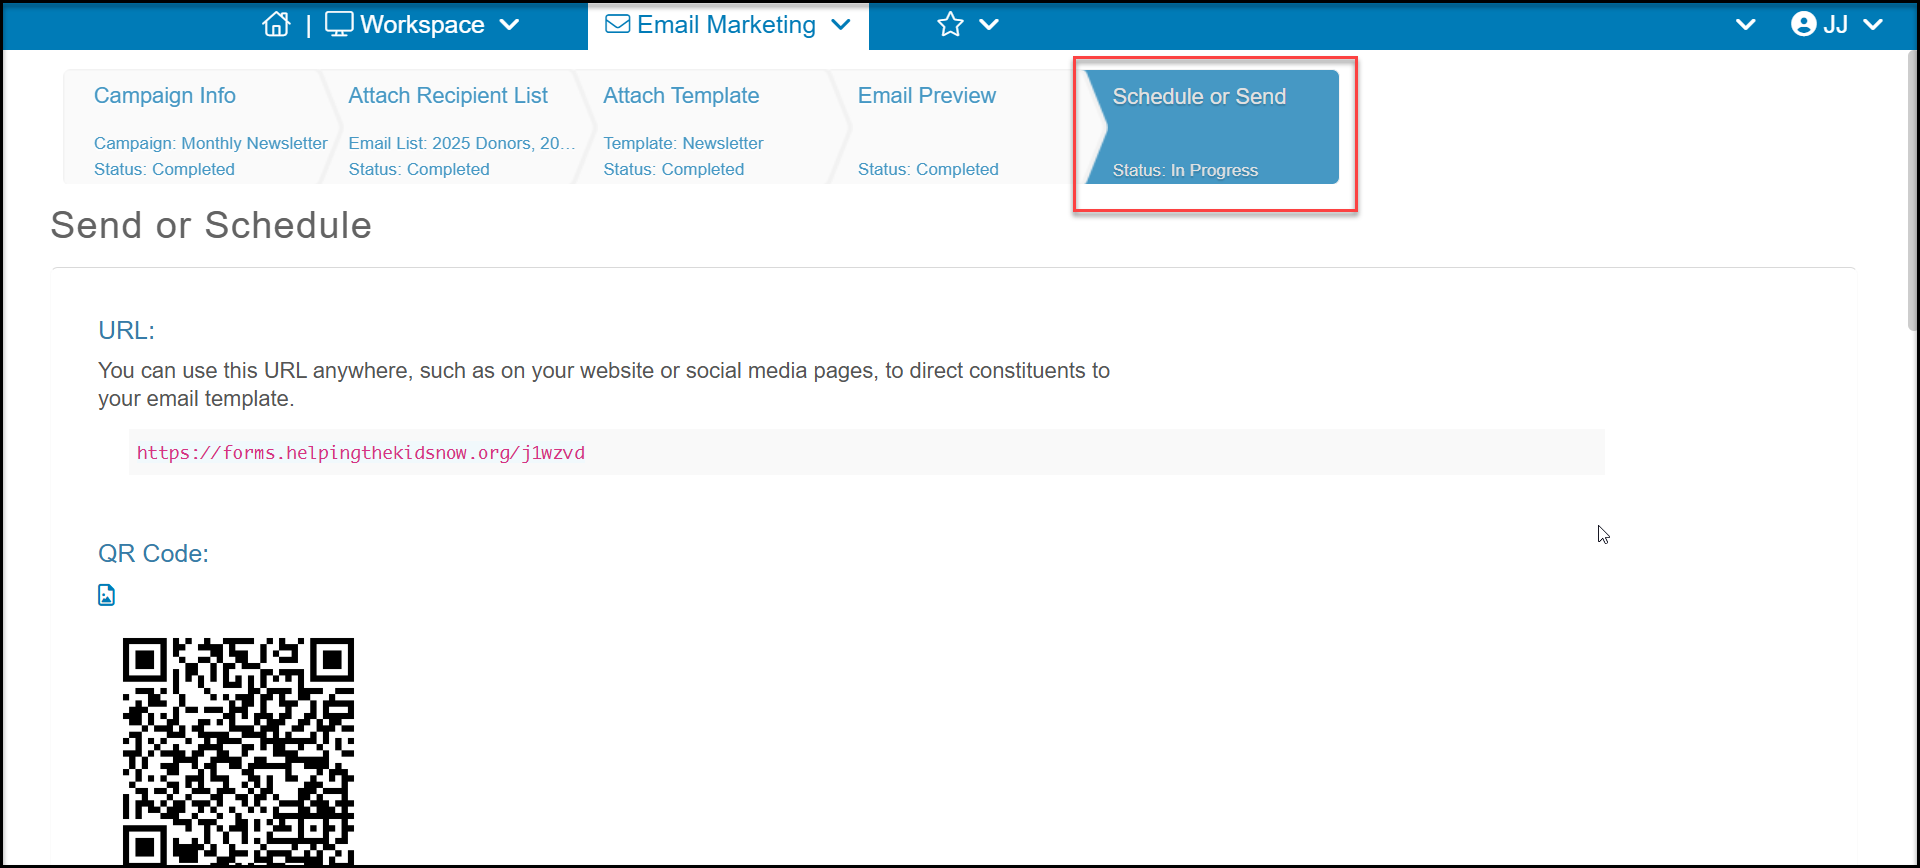
Scrolling for the page you will see the Campaign Summary and Distribution Methods you have selected.
You have an option to check the box next to Send Test Email to send a test message. You are then able to enter up to 10 email addresses per campaign to test your reminder. Note that adding test recipients will create new constituents in your database.
To send the message check the box to confirm that you are not sending spam. Then you have the option to Send Now or Schedule the message.
You also have the option to Validate Emails to run the email list through a special service to identify invalid email addresses. You can learn more about email validation in this article "Validate Emails."
After the message is sent, you will be able to see how it performed in the Email Marketing module's Overview page.